• Home
  • About
  • LIFE
  • HOME
  • FOOD

The . Thome . Home .

Shop our Entryway!

May 30, 2019 by Abby Thome

Shop our Entryway!

This is the space our feet first landed once our realtor opened the front door…

IMG_0068

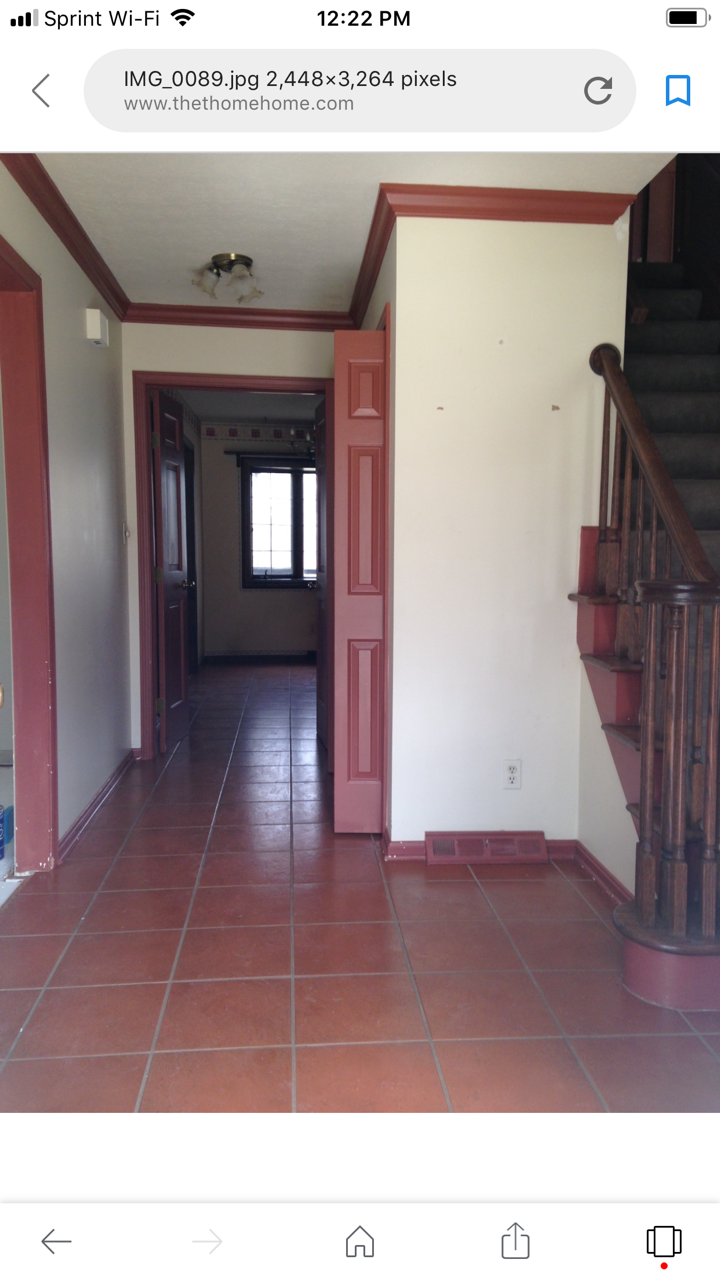
“This floor has to GO!” If I recall, was the first phrase that left our mouths.  Who would have thought that that very orange tile still exists in our home?! Beyond the cosmetic changes we knew we would like to tackle, we saw only the positives.  A large entry way.  In our first home, we had a tiny entryway that we adored.  It is such a plus an area, big or small, that you can step into when entering your front door that is not directly stepping into a living space.  Our entry way has a darling, well-loved railing, and a large closet for storage.  It checked all of our boxes, and the space that greets all of our friends and family as they enter our home.

Take a look at what we have transformed this space into!

ACS_0455

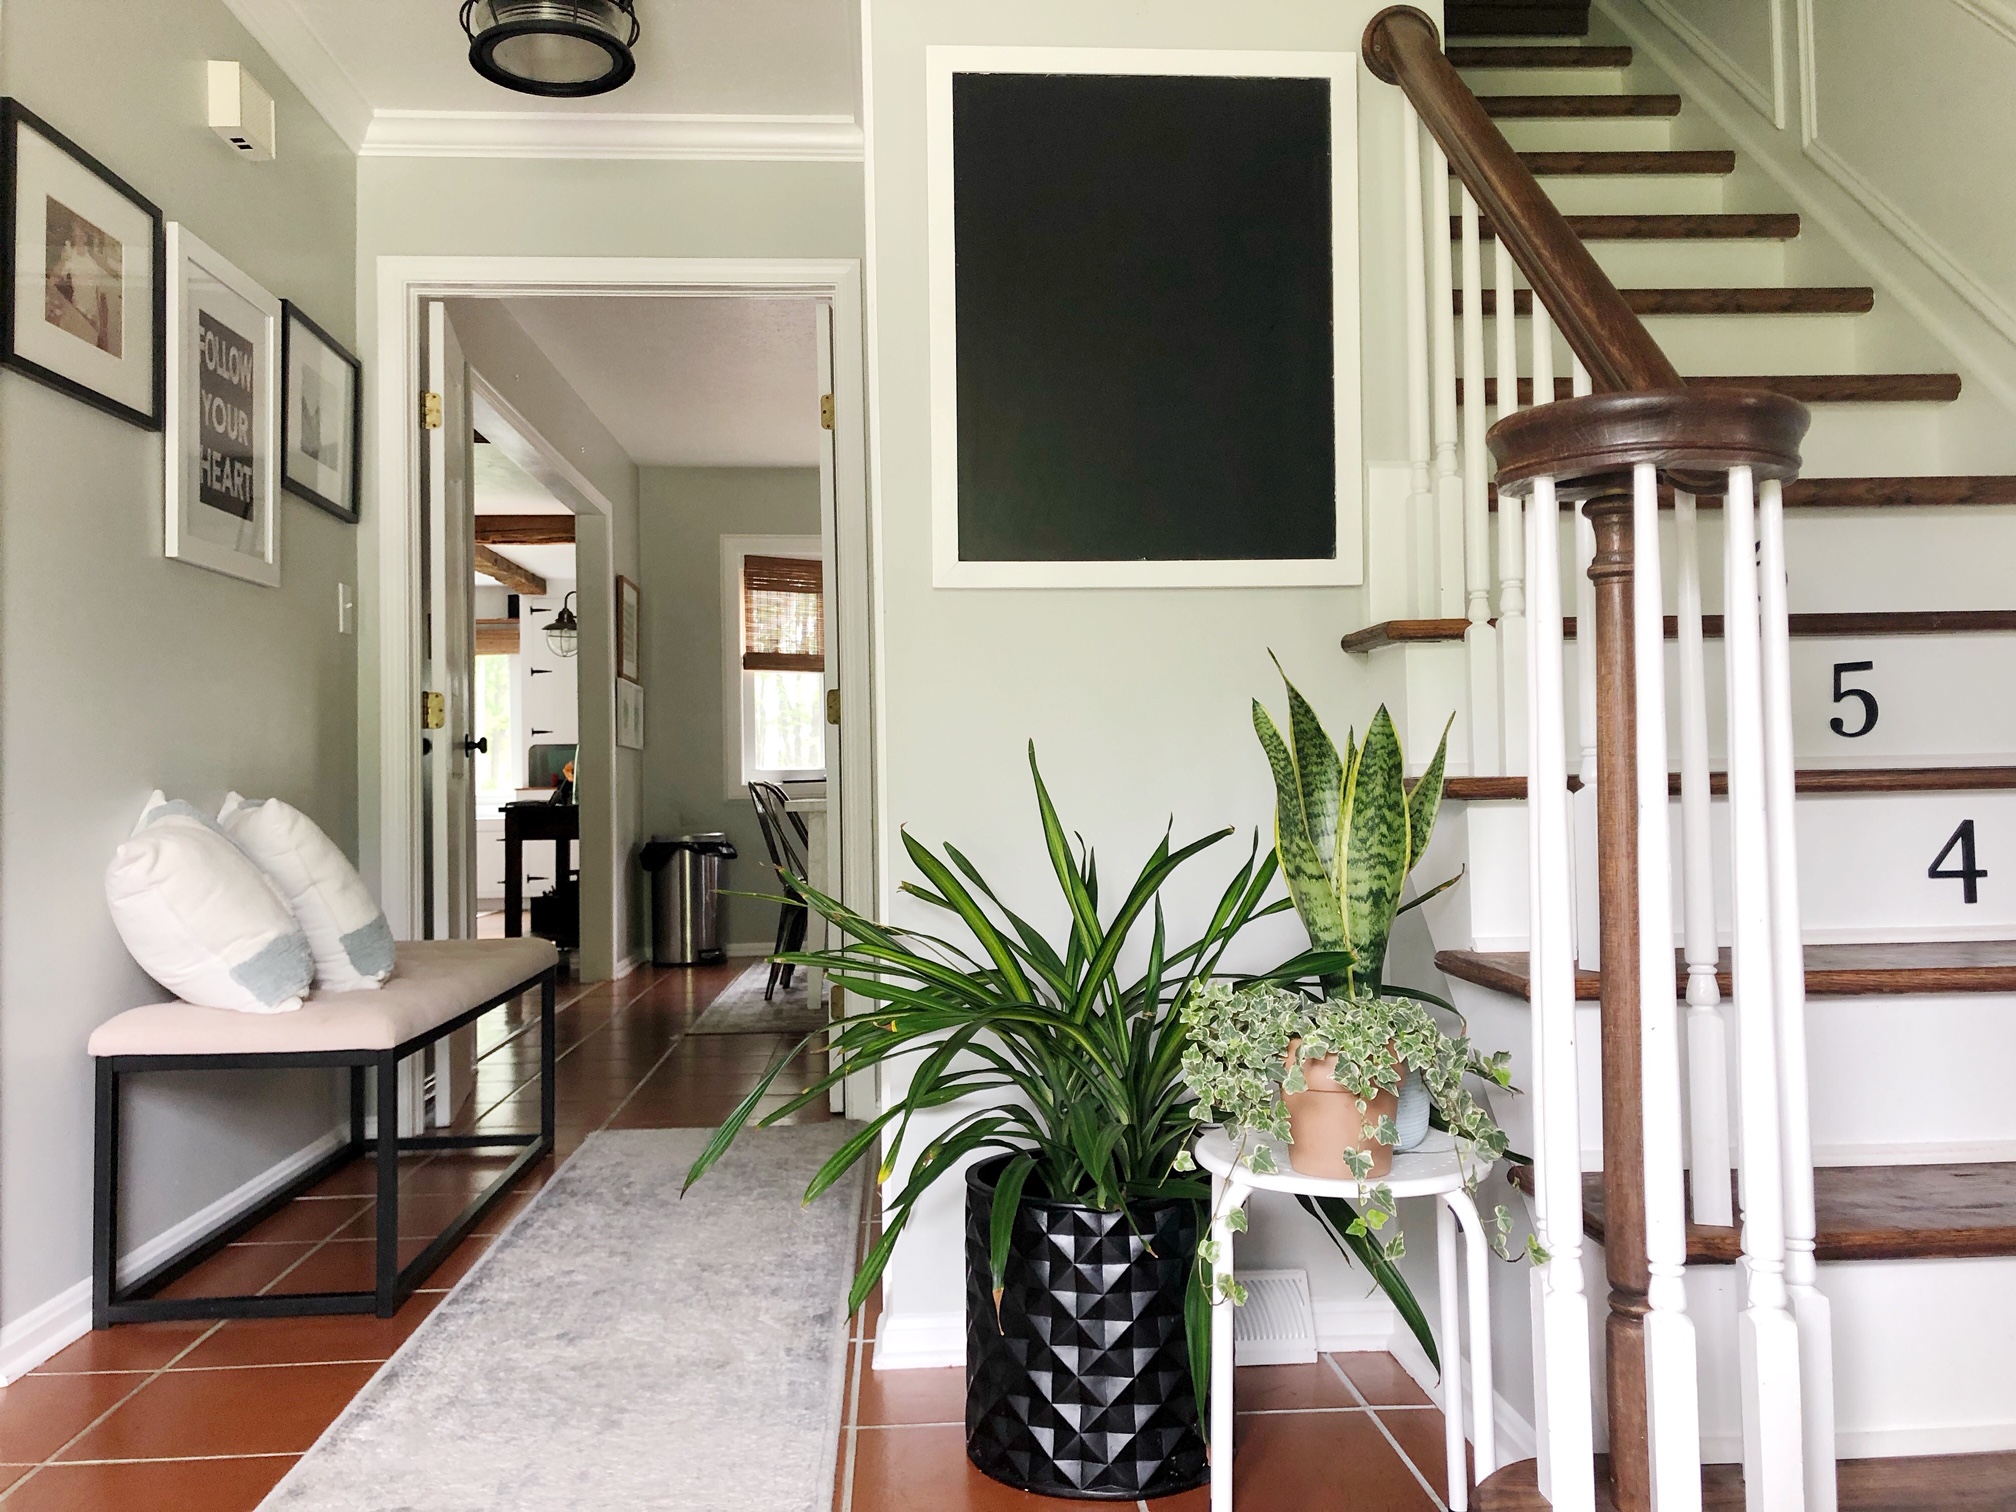
Wall Color: Aloof Gray by Sherwin Williams (color matched to Behr paint) It is a soft, moody gray that changes throughout the day.  Sometimes it looks clear gray, others it has a sage green undertone.  But, I love that about this paint color.  It adapts to whatever furniture and accents we throw at it!

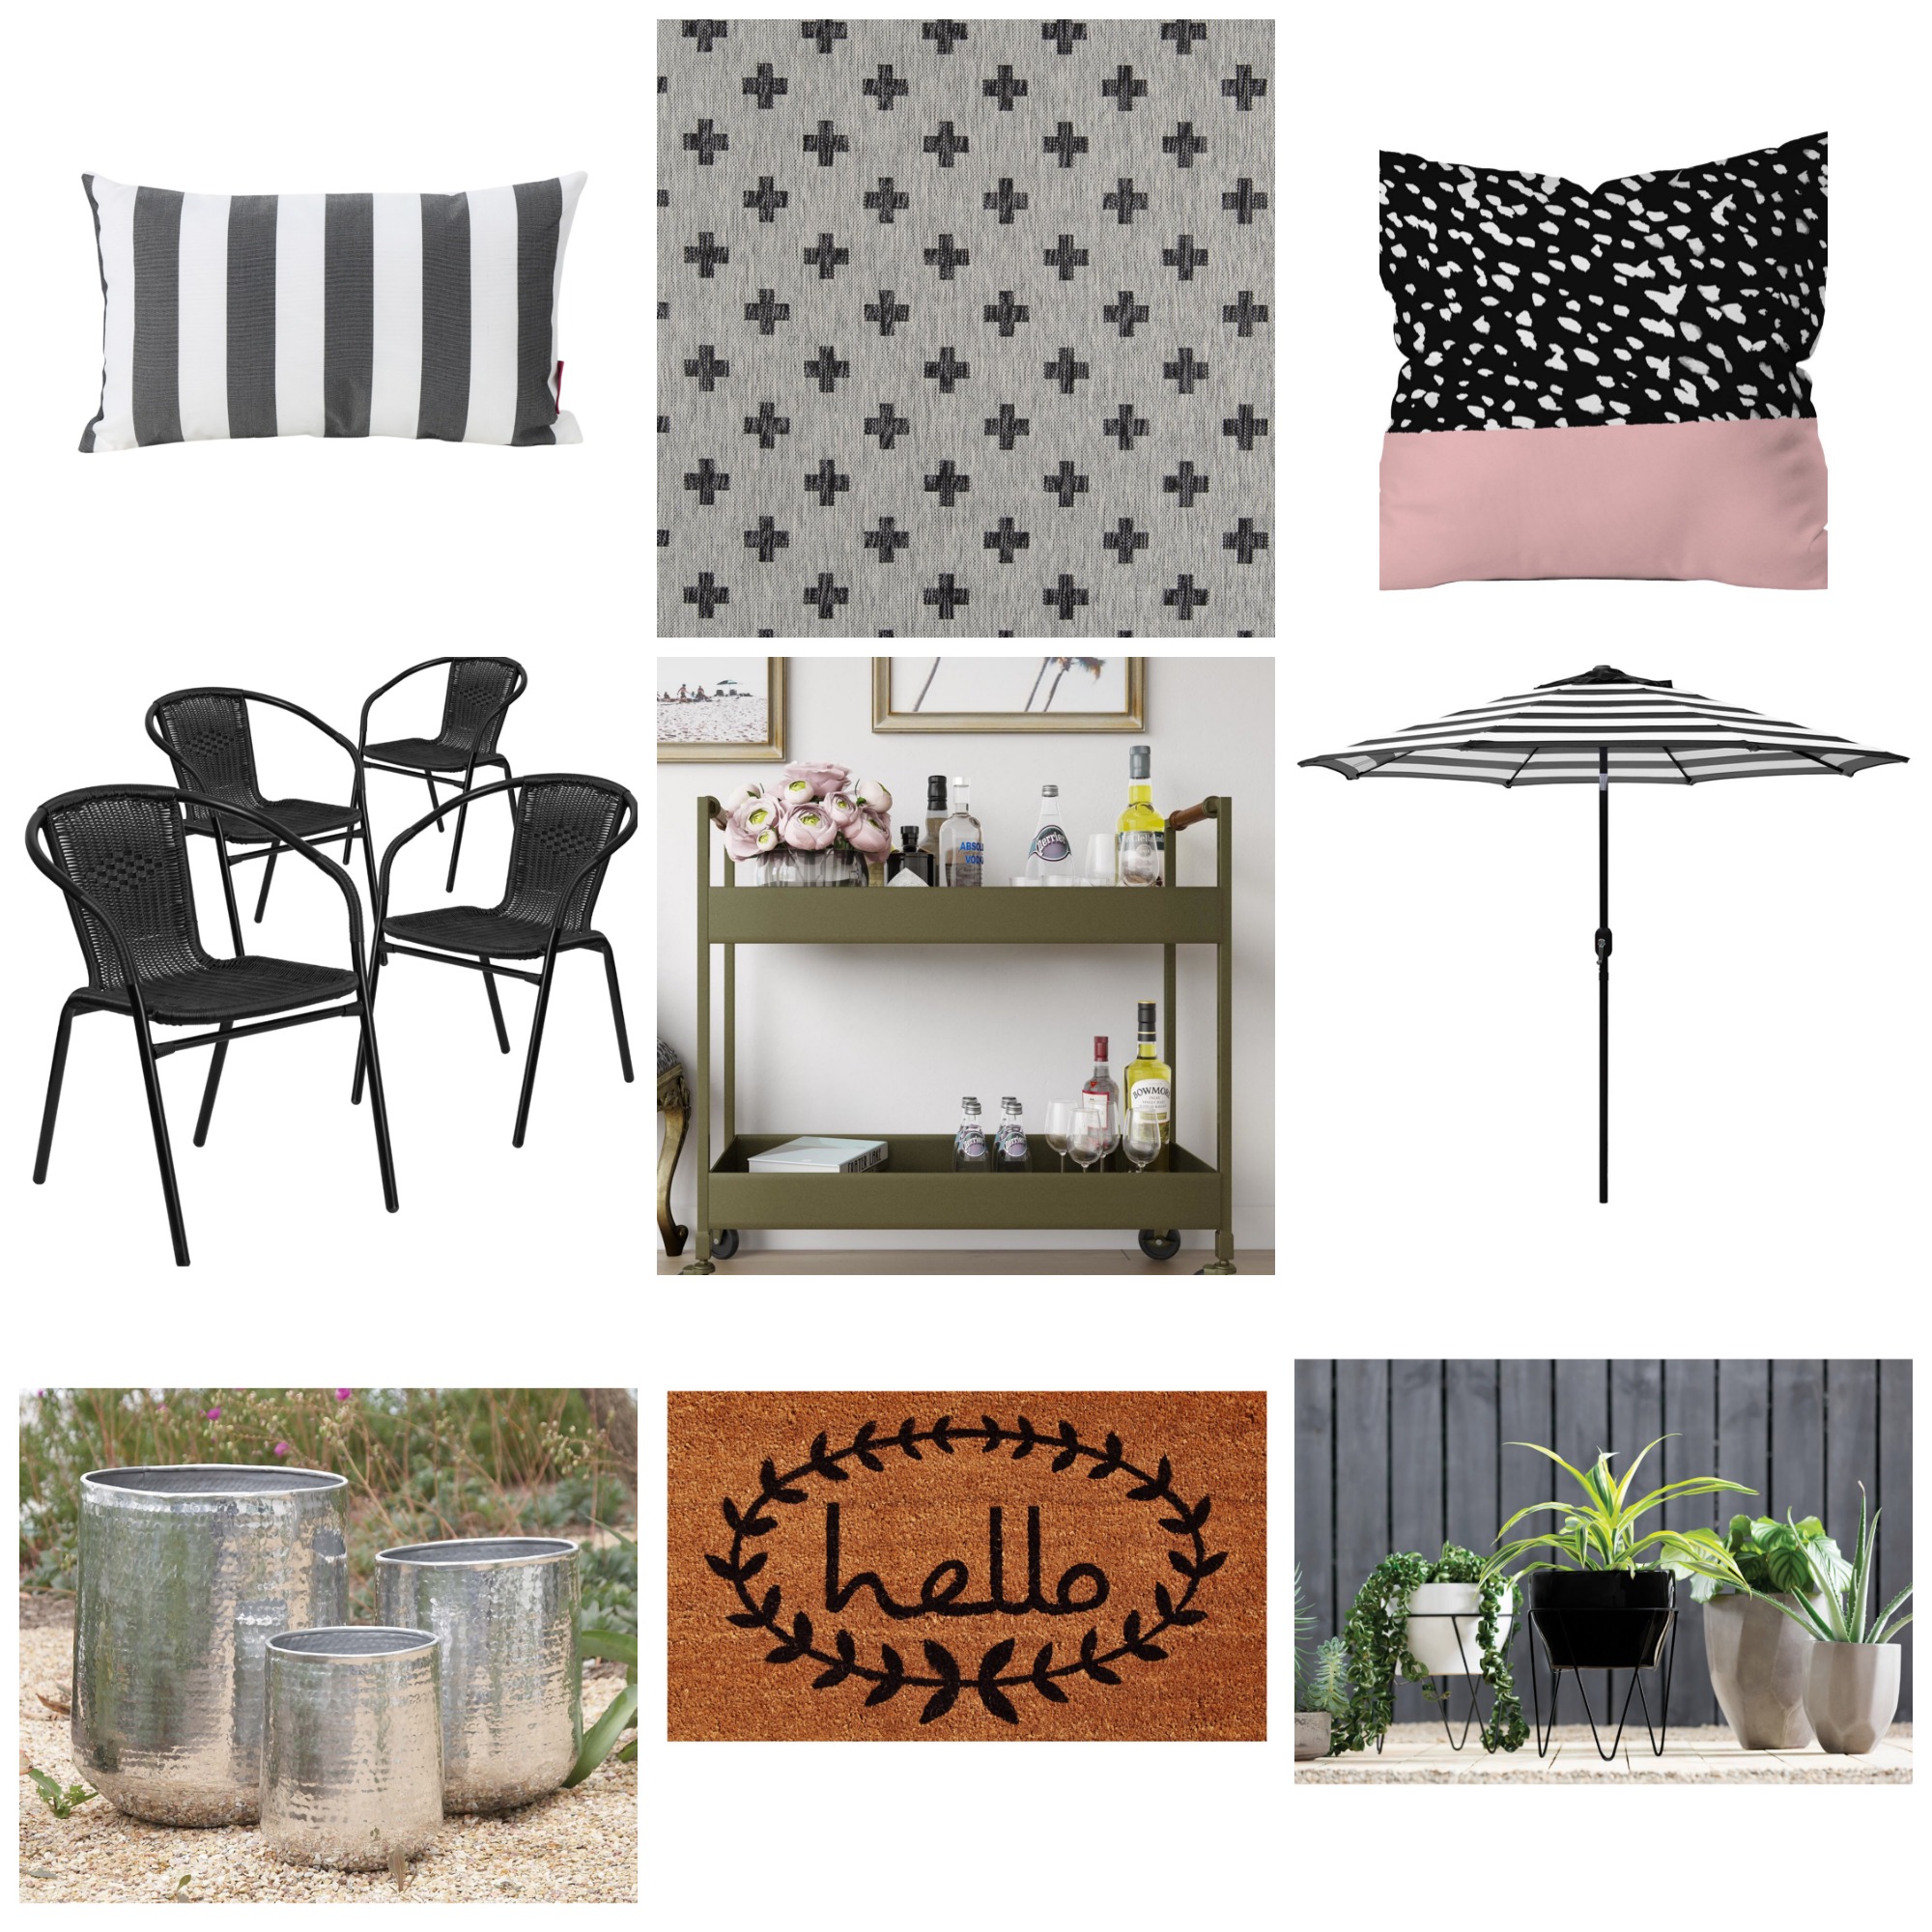
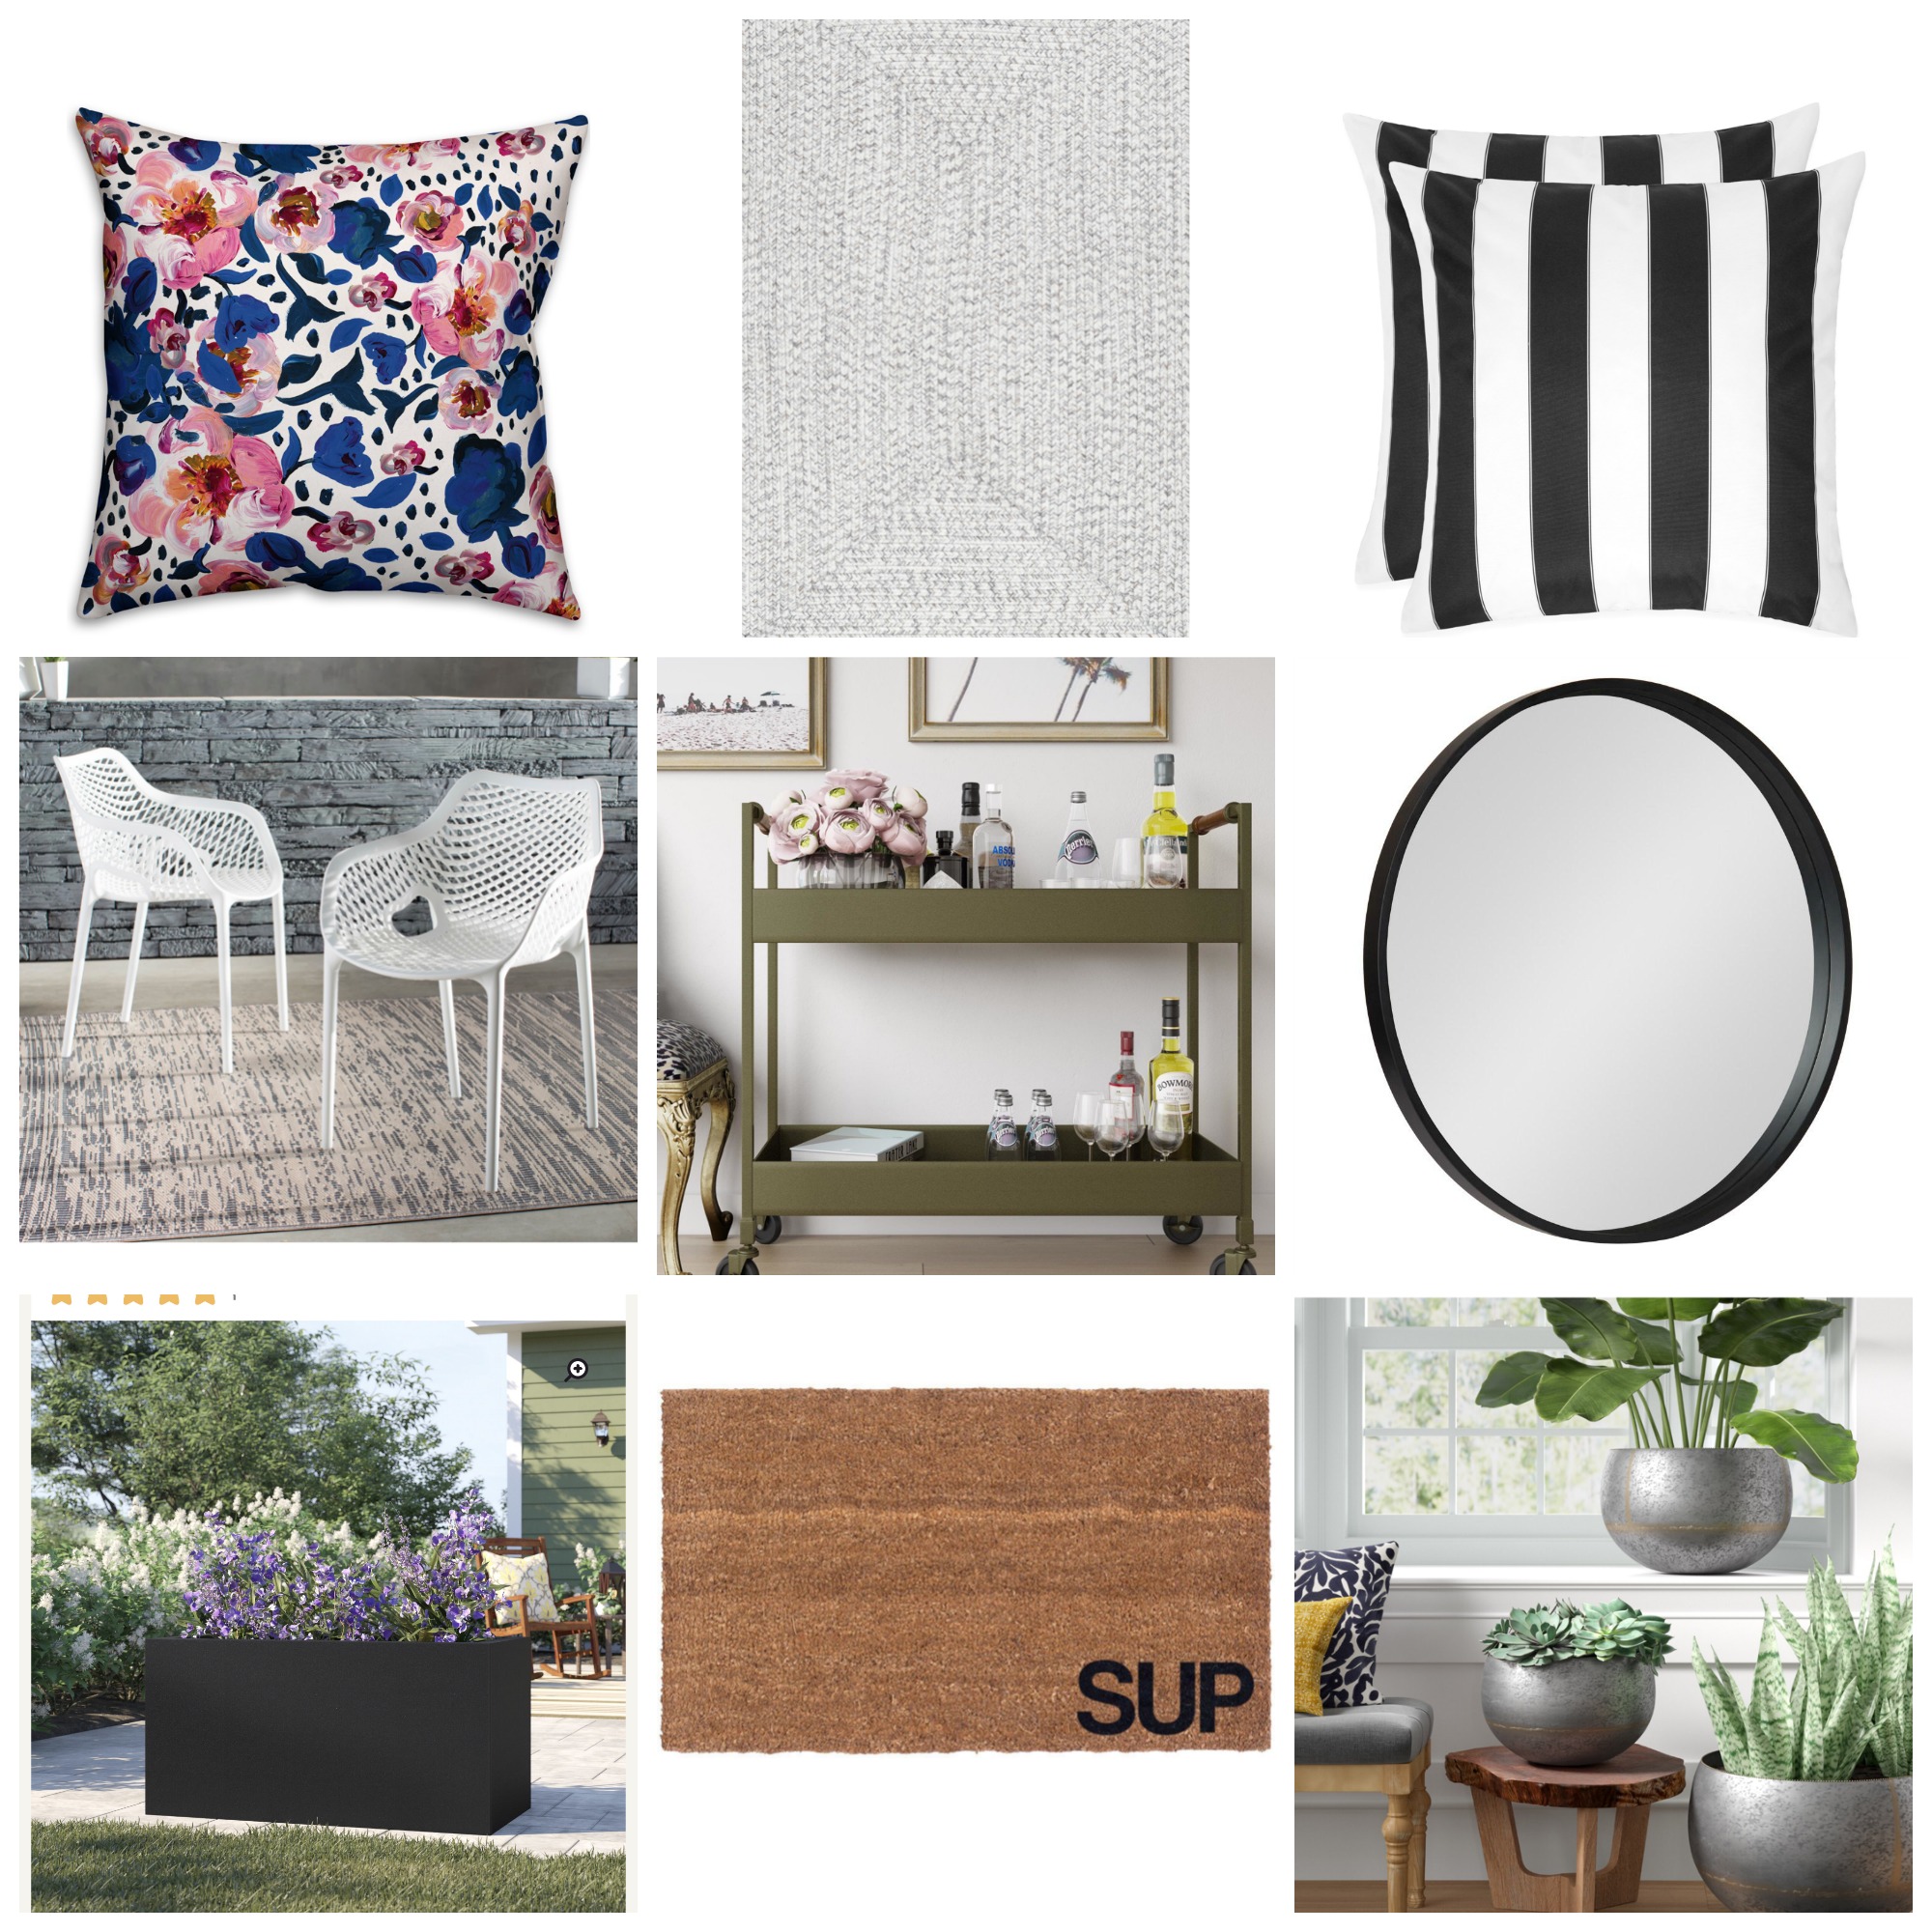
Want to shop this space? Here are a few of the key pieces …

Our bench is currently sold out, but if I am being honest I LOVE these two options much more!

Tufted Bench    :  Leather Tufted Bench

Gray Runner  :    Another Beautiful Option

Chalkboard

I struck gold with my black planter at Home Goods one day, and I searched high and low for a copy cat with zero luck! However! Best advice I can give when you are using planters to swap the place of what once was furniture, is make sure the pot, regardless of color has texture! It’ll make all difference! Here are a few awesome black planters I have my eyes on, for you!

Black Planters  :   White Planter

These metal stools from five below make the perfect plant stand!

White Metal Stool 

My pillows are sold out! Which does not surprise me, seeing I snagged them for $7 a pop on clearance – you can find them on Ebay!

Throw Pillows 

One of my all time favorite projects – numbering the stairs! It has become a topic of conversation for anyone new that comes over, and has stood the test of time! These are what we used!

Numbers on Stairs 

Don’t have an entryway? No need to fret! There are amazing ways to utilize the space you have, and carve out a little drop off space within your home! Take a look!

1a3036823cf4bde821429e789076857f

find this and more, here. 

1431299310-interior-entry-1

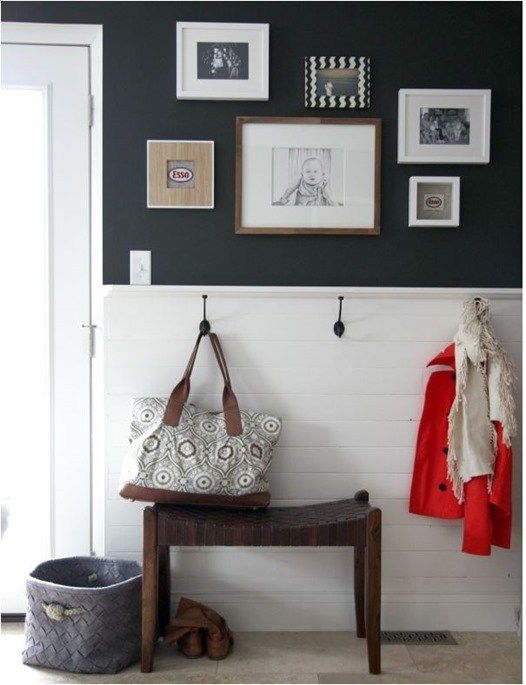
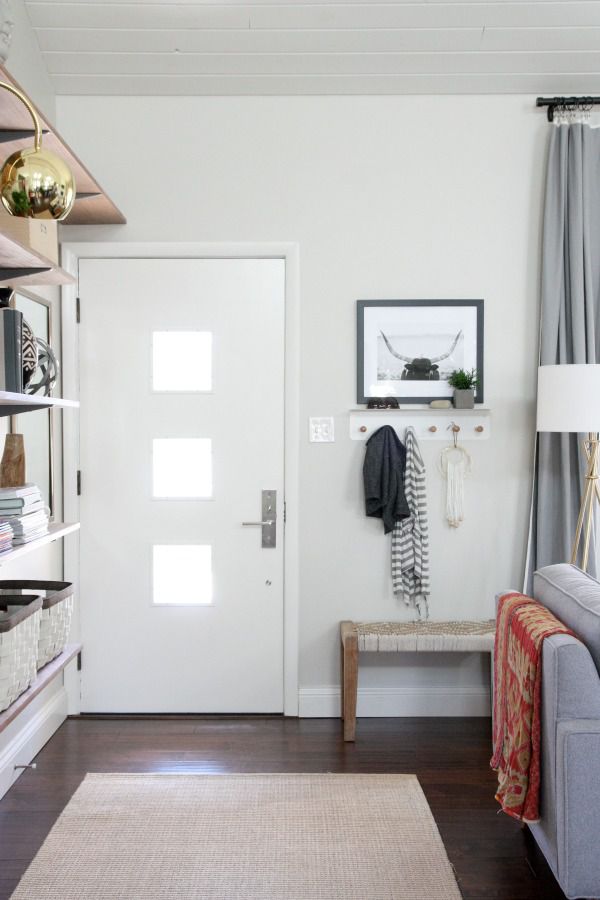
Adore her blog, HouseTweaking.com

Happy Home Making!

Filed Under: Home, Our Projects

Ramen Noodles, kicked up a knotch!

May 28, 2019 by Abby Thome

Ramen Noodles, kicked up a knotch!

This is a sponsored post in collaboration with Pete and Gerry’s. 

Their delicious organic eggs are sure to become a staple in your home!

ACS_0447 (1)

My boys (even the big one) go crazy over Ramen noodles! BUT – that packet!! (ugh) The nasty seasoning packet that is made of who knows what and a ba-zillion milligrams of sodium is the last thing I want to be feeding my crew.  So, whats a girl to do but to whip up her own ramen noodle dish and top them off with a few sunny side up eggs to create the most scrumptious dinner in less than 20 minutes!

ACS_0439 (1)

This recipe is broken down into four  very simple steps.

Prepare the sauce

Cook the noodles

Saute cabbage, shredded carrot, green onion + seasoning

Add a few sunny side up Pete and Gerry Eggs

LETS DO THIS!

ACS_0443 (1)

For the SAUCE : In a medium bowl, whisk together:

1/2 cup low-sodium chicken stock

1/2 cup low sodium soy sauce

1 Tbsp sesame oil

1 Tbsp apple cider vinegar

1 Tbsp garlic powder

1/4 tsp ground mustard

2 tsp sriracha

In a saute pan, over medium heat, cook:

3 cup shredded cabbage

1 1/2 cup shredded carrot

1/4 cup chopped green onion

Pinch of salt and pepper

1 tsp garlic powder

BOIL 6 blocks of ramen noodles, as packages directs, only swap the water for boiling in low-sodium chicken stock!

This is my all-time favorite trick to packing those squiggly noodles with SO much flavor!

Toss away the little seasoning packages, we will not be needing those.

Drain the ramen noodles, once cooked through.

Once noodles are done, add them to the pan of sauted vegetables, pour in your sauce – TOSS  to combine it all together! YUM

ACS_0446 (1)

Let us not forget the best part!! Adding Pete and Gerry’s Eggs, sunny side up style, to the top of the dish, as many as you please (one per person works in our house!)

ACS_0445 (1)

Top with sesame seeds and a drizzle of sriracha – and get ready for your taste buds to go to party town.

Feel free to saute any of your favorite vegetables into this dish.  Peppers, mushrooms, squash – the more the merrier!

I love that I’ve found a tasty way to use up the ramen noodles that my boys love so much, all the while serving them a dish that is packed with veggies!

IMG_0017 (1)

 In addition, I have to talk about one BIG problem we’ve got going on in our food industry.  Did you know that the FDA claims that eggs are UNHEALTHY?!! Yet, sugary cereals, and toaster pastries are not??

YOU GUYS! We all have to WAKE UP and crack the case of understand what we are consuming.  Whether or not the FDA does a good job educating about food groups, WE are the ones that put the food to our mouths.  EGGS ARE HEALTHY! Eggs are an incredible source of protein, vitamin D, omega-3 just to name a few! Whether you scramble a few for your kids for breakfast, boil them to have on hand for an on-the-go snack, or fry an egg to top a vegetable stir-fry.  Eggs are an extremely affordable way to bring healthier options to your table!

Filed Under: Our Bites

Veggie Burgers, two ways!

May 18, 2019 by Abby Thome

Veggie Burgers, two ways!

This blog post is in collaboration with Heinens.  As a Heinens Contributor, I thank you for supporting the brands that The Thome Home loves so much! 

Are you looking to add more vegetable-base meals to your weekly meal round up? Feeling overwhelmed with where to start?

Look no further than Heinens frozen aisle! YES! You heard that right, the frozen aisle.

Whether you are a meat eating fanatic, looking to decrease your animal protein intake, or, a parent to a phinicky eater and you need some new tricks up your sleeves to get veggies into their bodies, these Heinens Veggie Burgers will leave you amazed! We have worked really hard this past year in The Thome Home to implement vegetarian based meals into our lives.  I, am on a roll, and maintain a vegetarian lifestyle 5 out of the 7 days of the week.  This way, I do not pressure myself to give up meat in its entirety, and I can still indulge here and there.  The boys still eat meat with nearly every meal, however, we have made a lot of swaps for each meal that introduces them to veggies in a new form.  Cauliflower rice, zuchinni noodles, butternut squash boats, etc.  These changes over time have trained their taste buds to enjoy other options and eat 70% vegetable, 30% meat at the dinner table.

As for these delicious Heinens Veggie Burgers, there are multiple varieties available … Sweet Pepper,  Char-grilled Veggie, and Garden Veggie to name a few.  Four veggie burgers come in a package, individually wrapped  – which I absolutely love! No defrosting needed here, folks.  Simple take your frozen veggie burger and place it on your grill or skillet and cook a few minutes per side, and, voila! A healthy, delicious swap for your meatless nights!

This would not be a Thome Home recipe without taking these burgers to an entirely new level! With that, I introduce to you the Greek Veggie Burger + the BBQ Pineapple Burger.  If you did not know by now, I am 70% water, 10% caffeine, 10% wine, and 10% condiments.  I, Abby Thome, am a sauce addict.

Take a look at these burgers dripping with goodness ..

ACS_0426

First up, the BBQ Pineapple Burger.

I used the Char-Broiled Veggie Burgers for both recipes.

Once your patty is fully cooked, I brushed our favorite BBQ sauce on both sides of the patty while it was still on the grill.  On top of the saucy burger, I added a slice of pineapple ( so so good, you guys!) Put the burger on the bun, which of course you already added another dollop of BBQ sauce too, and add a bit of smashed avocado for more healthy fats.

ACS_0424

This burger was so rich and delicious, and the perfect addition to any summer time bash.   While you are at Heinens, make sure you grab their fresh hamburger buns.  They are pillows of pure goodness, and soak up every drop of sauce all while maintaining their ample fluff.  Incredible!

Next up …. a nod to my Grandfathers Greek heritage.  The Greek!ACS_0428

My homemade Tzatziki dressing is pure perfection, if I do say so myself.  These veggie burgers are so light and delicious, and the Tzatziki dressing brightens up the entire burger, adding a creamy zing to every bite!

Tzatziki Dressing:

1 17oz carton of plain Fage Greek Yogurt (full fat, do not skimp!)

Juice of 2 Lemons

1 cup Chopped Dill

1 Tablespoon diced Shallot

1 1/2 tsp Garlic Powder

pinch of Salt + Pepper

1/2 a cucumber, diced (NO seeds!) 

Stir together, store in an airtight container up to one day prior to serving! 

Add a healthy (over-sized) dollop to the bottom and top of burger bun, add veggie burger and top with iceburg lettuce.  Oh boy! I want one right now!

ACS_0425

If you have a vegetarian in your life, you have got to try these burgers.  It is a great way to be able to offer something for your guests to eat with dietary restrictions.  And, if I am being totally blunt – serve these babes to your meat eaters too.  Why not introduce alternatives to your friends and family? Step outside your normal grilling boundaries this summer, and experiment with a few veggie-based meals!

You will not be disappointed with the Heinens Veggie Burgers!

ACS_0427 Enjoy!

Tag me on your social when you make these recipes –  @abby_thome

Filed Under: Bites, Our Bites

Free Interview Printable for KIDS!

May 14, 2019 by Abby Thome

Free Interview Printable for KIDS!

Every parent wishes they would have recorded a bit more about their kiddos in different stages of their lives.  Any moms and dads out there with baby books that were never touched??

We are SO caught up in only posting things on social media that we forget to have tangible items that our kids can pull out and look at.  I mean, imagine the sheer panic if Instagram or Facebook were to delete entirely … and every single picture was wiped away.  It would be devastating!

This week, a goal of mine is to start printing out pictures we have stored on our computer.  So each of the kids can always have boxes to open to look back on fun family memories.

Speaking of memories! Remember when I would do yearly interviews with the boys? Look, here!

It was my favorite thing! BUT, like everything else, it was strictly digital, and nothing that they could have easy access too.

So, I created this darling FREE Printable Interview for you guys!  Simple click the blue pdf link below, upload it to your favorite place to print pictures.  Have it printed at your local store, (I recommend staples!) Fill it out, and bring it back to be laminated for safe keeping! How sweet will these be stacked up, year after year, to see how their answers will change!

Enjoy!

all about me!

all about me! PDF

Filed Under: Family, Our Life, Our Projects, Uncategorized

Happy Birthday, Boys! Entertaining made easy, with Heinens!

May 10, 2019 by Abby Thome

Happy Birthday, Boys! Entertaining made easy, with Heinens!

This is a sponsored post in collaboration with Heinens! Thank you for supporting the brands that The Thome Home loves so much!

I said it once, I’ll say it again.  The key to entertaining successfully is setting boundaries.  I, for one, love to cook.  Five years ago when prepping for a birthday party, I would go on a bender planning every last morsel of food – making each from scratch as if I had a staff helping me.  Endless amounts of parties later, I’ve learned that the key to having a great party is making yourself available to enjoy it too!

If you have a Heinens Grocery Store near you, I am sure you have tried a multitude of their “on to go” bites.  From their fresh salad bar, soups, wraps, pasta salads, sushi … my gosh, I could go on and on! The quality of ingredients are superb, and leave you feeling GOOD about the choices you make for your meals.   Whats even better, is that Heinens has an entertaining menu!! From appetizers, artisan cheese trays, main courses, sides, breakfast trays …. my loves, you will not believe it until you see it!! Take a look here –   Forget trying to grocery shop for your next gathering, panicking about each item, worrying about the time it takes to prep everything! Turn to Heinens to help you out!

Owen and Max have birthdays just one day apart, so combining the celebration always works best and we end up throwing a bash every year.  For the party this year, we chose to serve a multitude of wraps and I made my insane Summer Kale + Quinoa Salad that’s a knock off of Heinens salad they serve!  (Shhh.. mine may or may not be better!)

ACS_0408 (1)

The Ceasar Chicken wraps, and Turkey Bacon were a HUGE hit – it was so nice to switch things up and serve something light and healthy!

ACS_0409 (1)

The Godfather Wraps were gone in the blink of an eye, who knew that this classic deli combo was such a smash?! Tip: These wraps are BIG, so one wrap is cut in half, each guest could easily have 1/2 a wrap and sides.  It was so fun to see guests pile their plates high with a plate full of healthy food!

ACS_0410 (1)

This Summer Kale + Quinoa Salad is getting a post all of its own, and even a fun little video to go with it! So Stay tuned for the recipe launch.  It will, hands down, be your ultimate summer salad that will become a weekly staple in your home!

As for the cake, leave it up to Heinens to create the most delicious 1/2 vanilla, 1/2 chocolate cake with the fluffiest frosting.  Another party planning tip : LET THE PERFECTION GO.

Little ones will stick their fingers in icing, throw a fit over which slice they want before you even light the candles.  Speaking of candles, a great way to calm impatient little bodies for cake time – hand them candles to place in the cake themselves.  It makes them feel involved, and makes them feel so special too!

IMG_9561 (1)

The entire night was so relaxing – the kids ran wild.  Guests enjoyed every drop of food, and most importantly, Dan and I were able to sit back and watch the entire evening unfold.

If you have an upcoming gathering, big or small, I could not recommend turning to Heinens more to help you take a little off of your shoulders when it comes to planning a party!

Happy Birthday Owen and Max!

IMG_9555 (1)

Filed Under: Our Bites, Our Life

Carrot Cake Bites + Coconut Cake Bites

April 18, 2019 by Abby Thome

Carrot Cake Bites + Coconut Cake Bites

This post is in collaboration with Heinens.  Thank you for supporting the brands that we in The Thome Home love so much! 
IMG_9333

Still on the hunt for the perfect Easter dessert? Well, stop hopping around and plop that bunny tail right HERE right NOW!

Cake balls are all the rage, they have been for almost two years now.  You’ll find them at your local coffee shop, and they’ve become quite the popular treat for baby or bridal showers.  Have you ever tried to make them on your own? Not the puffy cake only dipped in melted chocolate cake pops, but the decadent, rich cake pops that are so over-the-top you will never be the same!

Listen, I’m a firm believer that sometimes you have to make a few shortcuts in the kitchen.  With this recipe, I chose to use canned frosting.  Making both cakes from scratch, and decorating each little bite was plenty to take on.  Making frosting would be great, but for this recipe you do not need much, so why not make it easier for you? Do not feel guilty for making semi-homemade items.  No bunny needs to know!

I whipped up two different recipes, because how is a girl to choose between the two?!

Let’s talk Carrot Cake Bites first!

These little babes are so delicious! Subtle spice, cream cheese frosting and rich cake – all mixed together to form, well, pure perfection!

ACS_0382

Carrot Cake Recipe

Pre heat the oven to 350*

Line a 9×13 baking dish with parchment paper

In a separate bowl, grate 2 1/2 cups of carrots

In a large bowl:

3 1/4 cup unbleached all-purpose flour

1 tsp baking powder

2 tsp baking soda

1 Tablespoon ground cinnamon

1 tsp kosher salt

WHISK THESE INGREDIENTS TOGETHER TO COMBINE

Now let’s do the wet ingredients!

1 1/2 cup vegetable oil PLUS 2 Tablespoons

6 eggs 

1 cup brown sugar 

1 cup sugar

1 tsp vanilla extract 

1 tsp maple syrup

WHISK TO COMBINE WET INGREDIENTS

Add the dry to the wet, with a handheld mixer, mix until fully incorporated.

Stir in the 2 1/2 cups of grated carrots

Pour batter into baking dish, bake @ 350* for 35-45 minutes – or until toothpick comes out clean/or with very little crumbs attached!

Let the cake cool completely!

OKAY! Now we are going to talk about the recipe for the Coconut Cake.  Because, once both of these cakes are cooled and ready to roll, the rest of the recipe/process is the same!

Coconut Cake

Pre heat oven to 350*

Line a 9×13 baking dish with parchment paper

In a large bowl …

3 cup unbleached all-purpose flour

2 tsp baking powder

1 baking soda

1 tsp salt  

WHISK THE DRY INGREDIENTS TOGETHER

Now it is time for the wet ingredients!

With a handheld mixer, one ingredient at a time – beat together …

2 sticks of room temperature, unsalted butter

2 cups sugar

4 eggs

1 cup buttermilk

2 tsp almond extract

2 tsp vanilla extract 

Once wet ingredients are well mixed, pour in dry ingredients – mix together until one flour is incorporated

You add coconut LATER in the recipe! So do not fret!

Pour batter into baking dish

Pour batter into baking dish, bake @ 350* for 35-45 minutes – or until toothpick comes out clean/or with very little crumbs attached!

Let cake cool completely!

IMG_9283

Once cakes are cooled – removed entire cake from the pan by simply grabbing onto the parchment paper and lifting it out of the dish!

Take a serrated knife, and cut all crust off from the cake (top/bottom/sides) This will keep any of the dark/crusty bits out of the cake bites!

NEXT UP IS THE FUN PART!

Crumble each cake in two separate bowls

ADD 1 can of cream cheese frosting to each bowl

FOR THE COCONUT CAKE: ADD 2 CUPS SCHREDDED COCONUT TO THE FROSTING/CAKE BEFORE MIXING

One at a time (Washing beaters in between!!) Mix together the cake and frosting, creating a thick and creamy cake mixture!

Using a cookie scoop, scoop balls, and roll gently in your hands.

Place formed cake balls onto a baking sheet lined with parchment paper –

Once you have two pans, filled with each flavor, place them into the freezer or fridge for 10-15 minutes to set!

I highly recommend only doing one sheet of cake bites at a time.  So start with either coconut or carrot.

You’ll melt 2 bags of white chocolate chips in a glass bowl in the microwave.  Do this in 30 second intervals, stirring in between each 30 second set.  BE CAREFUL.  White chocolate is very testy – you’ll want about 30% of the chocolate chips still in tact while the rest is melted.  THIS is the time to pull it out of the microwave and use the residual heat to melt the remaining chips!

NOW WE DUNK!

Take your cake balls, dunk into the melted white chocolate – use a fork to lift the ball out, and tap on the side of the bowl to let excess chocolate drizzle off.  Use a knife to scrape the cake ball onto the lined baking sheet.  While wet, top with sprinkle of choice!

REPEAT UNTIL ALL ARE DONE .

LESSON LEARNED:  Once the chocolate has hardened (it only takes a few minutes!) break off any straggly bits on the bottom, hold by the top, and only re-dip the bottoms of the chocolates to ensure the entire base is covered! This will keep the cake bites fresh when refrigerated for days, so you can make these in advance! So do not panic when your cake balls have sloppy bottoms after you the first scrape of the knife to get them off of the fork, dipping the bottoms a second time will make them look gorgeous!!

IMG_9332

These little beauties are SO incredible you will be so happy you took the time to make them! And if your overwhelmed by the process, rest easy.  You can make the cakes one day, the next day mix the crumbled cake with frosting + roll them out – put them in the fridge, covered with clear wrap, and then coat them in chocolate the following day.

IMG_9285

My little photographer could not help himself!

IMG_9290

He’s hired! These cake bites are not meant to look perfect.  My loves, not a soul will care what they look like once they take their first bite!

IMG_9333

A beautiful, bite size sweet that will leave everyone in complete awe!

IMG_9291Happy Easter Thome Homers!

Filed Under: Bites, Our Bites

Sky Zone for Brody!

April 16, 2019 by Abby Thome

Sky Zone for Brody!

This post is in collaboration with Sky Zone, Boston Heights.  Thank you for supporting the brands that The Thome Home absolutely loves! 
ACS_0392

Brody is officially a double-digit dude! I can hardly wrap my head around the fact that he is just 6 years away from driving, 8 years away from college, and 11 years until he can crack open a beer.  Let’s slow this number train down, and focus on the amazing birthday he had at Sky Zone, Boston Heights last month!

IMG_1776

Guys, I’ve said it before, and I’ll say it again – Sky Zone is the ultimate place to host your child’s birthday party! Seriously, Thome Homers – picture this.

Those munchkins roll into Sky Zone’s door, just antsy as can be to start jumping.  They check in, staff ensures their waiver are signed, and then proceed to collect the gifts.  Bins are set to the side for socks/shoes/jackets.  The kids are given their sticker to wear, and the infamous orange socks.  From there, we wait a few minutes as everyone impatiently waits for all of the guests to arrive.  As soon as your time slot is minutes away from beginning, staff goes over a few safety rules, and then they are ready to JUMP JUMP JUMP!

ACS_0394

These boys took off like a pack of hyenas, cackling away as they bolted to their destination of choice!

ACS_0396

This piece was a new addition to us all, and was the best surprise ever to all of the kids! This massive base serves are a jumping pad – you jump off, bounce off of the trampoline and over a hurdle across the way.  The contests that ensued over this piece were a riot to watch!

ACS_0397

ACS_0393At Sky Zone, I love that every age group is included! Dan and I did not have to stress over who was going to watch Max, and if any of Brody’s guests had little brothers or sisters that wanted to jump during the party they were welcome to do so! Which, I know from experience, is always a relief for parents to be able to include all of their kids!

ACS_0389

I literally had to yank this kid out of each area to try to capture pictures – he was grinning ear to ear the entire time!

Happy boy = happy mom!

IMG_1774

ACS_0391

After these rugrats played their little hearts out, it was time to chow! At Sky Zone, they organize everything for you! You pick your drinks, and prior to the party you discuss the amount/type of pizzas you would like to serve your guests!

TIP! It is always nice to make sure you’ll have enough pizza to serve to the parents who are attending as well!

ACS_0395

You can bring in your own cake! And, if you are a Costco member you know that their $18 sheet cake is a real winner!

The staff serves EVERYTHING!

Not only do they serve the kids, they handle clean up, and even present time! GUYS – the girls who helped with our party even put together a gift list for us so that even during all of the chaos of shredding open presents with 20 kids, they were able to write down the name of guests and the gifts they brought.  It was such a nice surprise!

If you are local, check out Sky Zone Boston Heights.  The nicest staff, who makes every birthday party a total dream for your kiddos!

image

Happy 10th Birthday, Brody!

Filed Under: Family, Our Life

5 Ingredient, Sweet + Simple Crostini with Heinens

April 11, 2019 by Abby Thome

5 Ingredient, Sweet + Simple Crostini with Heinens

This is a sponsored post in collaboration with Heinens.  Thank you for supporting the brands that The Thome Home loves! 

Spring is in the air! If you are a Clevelander, anything above 45* feels warm enough to break out the sandals.  Not proud, but I’ve been seen in sandals on days that I should have clearly been in more proper attire.

None the less, as the Spring weather rolls in, the more I keep thinking about all of the family gatherings that come with weather warmer.  Cookouts, holidays, and sunny days spent on our deck – it has my mind reeling with ideas on what I can serve my guests.  One of my favorite appetizers to have on hand, are crostinis.  Little delicious slices of baguette, topped with savory, sweet, or a mix of both.  The options are truly endless! Guests love that they are so easy to eat, and that they are not too heavy – making them the perfect party munchie.

Easter is just a few weeks away, and I wanted to create two crostini recipes that are beyond fool-proof to make!

Our local Heinens is the ultimate one stop shop to grab everything you need for your grocery trip.  If you have last-minute guests coming over, or planning an easter gathering, all you need is 5 ingredients to make an appetizer that will leave your guests begging for the recipe!

Let me introduce to you….

 5 ingredient, Sweet + Simple Crostini Recipe

Apple + Brie Crostini

apple brie

IMG_9183

Voila!

Here is how you make this beauties …

Toast your slices of baguette with a dash of extra virgin olive oil, until slightly golden

Spread a dollop of brie on each slice 

Add diced green apple 

Roughly chop the glazed pecans, sprinkle them on top

Drizzle honey across all of the crostini 

IMG_9184

This are so incredible, and are also just as delicious with a spicy glazed pecan as well!

IMG_9188

I just know that your guests will love these, and be even more amazed to hear how simple they are to make!

Next crostini …

Strawberry Bliss Crostini 

strawberry

IMG_9129

How to make …

Keep the baguette slices untoasted.  Believe it or not, it almost takes on a cake like texture with each bite!

In the microwave, melt dark chocolate chips in 30 second intervals until melted completely.  

Spread whipped cream cheese on crostini slice

Add a dollop of strawberry jam

Top with sliced strawberries

Drizzle melted chocolate over crostini – (I find it way easier to scoop melted chocolate into a ziploc bag.  Cut the tip of the corner, and pipe out the melted chocolate! It gives you clean beautiful lines)

Top with kosher or sea salt! 

IMG_9128

mid assembly … the whipped cream cheese is such a cinch to spread!

IMG_9131

Strawberry Bliss Crostini make the perfect brunch appetizer, or are even a fantastic dessert option!

Next time you have guests coming over, and you are racking your brain with what to make as an appetizer – look no further.  5 items tossed into your shopping basket and you will be the star of the show!

Thank you, Heinens! 

Filed Under: Bites, Our Bites

Let’s take this Bar Cart OUTDOORS!

April 10, 2019 by Abby Thome

Let’s take this Bar Cart OUTDOORS!

unnamed

Hey Hey Thome Homers!

Happy Wednesday!

We are half way through the week, and we’ve had a wild streak of warmer weather which has feeling all sorts of good vibrations. Who else has found that their entire mood has elevated in positivity with each degree it creeps? Me, Me, Me!

The sun, playing outside with my boys, simply loading up the kids for school without a million layers on, and needing to start my car in time to melt the ice — it.  feels. good.

I have a very crazy habit of window shopping online.  I like to play “How much is that patio furniture in the window?? The one with the teak base and white cushions?” It only takes ONE piece, guys, for me to come unhinged and plan an entire space around it.

Which leads to many problems.

1. Now I want to redecorated a space

2. I want it, can’t afford it

3. Trying to figure out what organ I can sell to buy everything I need

What I will tell you guys, from my unhinged habits of mood boarding late at night, and perusing the tabs on my laptop, is one thing.  All it takes is ONE THING to start your space.  STOP trying to pick out everything at once.  Find a key piece – whether it be a couch, table, rug – something that only has “so many options” and then fly away with all of the decor pieces – curtains, art work, table decor, pillows etc.

Bit by bit, you will find if you pick an item, an item that you get tingles over – the rest will fall into place.  And, if you are still having trouble – email me – I’ve got a fantastic new series coming in May to help all of you Thome Homers plan the space of your dreams!

BACK. TO. THAT. ONE. PIECE.

Wayfair is my one true love for home decor and furnishings, long before I became a Wayfair Homemaker Blogger.  I think the only cherry on top would be to star in a Wayfair commercial, maybe as an exhausted mom belly flopping onto an impeccable king size bed with the fluffiest bedding.  Or me hiding on our beautiful designed deck, pounding a glass of red before my kids find me. Would you watch? #abbythomeonwayfair  spread the word.

I digress …

I saw this Stella Bar Cart, and immediately knew it had to be mine.  I have the perfect spot for it on our deck outside, right underneath our t.v.  To hold appetizers, fresh flowers, and of course, cocktails.

Why make one mood board for this piece when you could make two?

1.

PicMonkey Collage (6)

2.

PicMonkey Collage (7)

You see how I went off the rails?? Hahaha.

Our current dining table is in good shape, but the chairs are beginning to fall apart.  Either a sign of a crappy set, OR, that they are used beyond their life span.  Which, I honestly think is the case.

New chairs, area rug, planters, gorgeous outdoor throw pillows and some funky planters ….

Ah.  this is the life.

Want to shop these pictures?

1.

Stripe Pillows.  Pink/Black Pillow.  Rug.  Bar Cart. Black Dining Chairs.  Stripe Umbrella.  Galvanized Planter.  Door matt.  Tier Planter.

2.

Floral Pillow.  Grey Rug.  Stripe Pillows. White Dining Chairs.  Bar Cart.  Black Mirror.  Black Planter.  Sup Matt. Galvanized Planters.

Anyone else putting together a deck or patio this Spring? Loop me in! #thomehomeoutdoors

Filed Under: Home, Our Projects

Belgium Waffles

April 9, 2019 by Abby Thome

Belgium Waffles

ACS_0370

I tried, you guys.  I tried to cheat the system the other morning and grabbed a box of protein pancake mix for the boys, and whipped them up hoping that by the time that they covered the flap jacks in syrup, they’d love them all the same.

Nope.  Not even two bites in, they spit them into the garbage.  They were angry, and it was hysterical.  “What are these!?” They shouted.

I told them, and they said “NO! NO! – your homemade waffles are wayyy better!!”

Listen, as parents, the clock feels like it is against us.  And if you are anything like us in the morning, we take full advantage of every last drop of sleep we can get until we have to plop our feet onto the ground and face the day.  So being that cheerful, loving mom whisking a homemade pancake or waffle recipe 30 minutes before school starts is simple not going to happen.

But, what if I told you I had the best belgium waffle recipe.  That not only you can make in bulk, but freeze, and pull out each and every morning, pop them into the toaster and have your kids thinking you are the best person ever?!

I introduced you guys to my Belgium Waffle recipe, a long time ago, and had to bring it back to the front of the archives because this recipe is so good that I actually have family that will brawl over a fresh batch.

When you check out the list of ingredients you need to make this massive batch to freeze for your family, and then take a peek at the back of the store-bought frozen waffles – you will be SO glad you stumbled across this recipe! REAL ingredients – without all of the junk!

ACS_0371

Belgium Waffles:

3 1/2 cups unbleached all-purpose flour

4 tsp baking powder

1/2 tsp baking soda

pinch of salt

1/4 cup cane sugar

6 eggs

3 cups buttermilk

2 sticks unsalted butter, melted + cooled

1 Tbsp vanilla 

Mix all of the dry ingredients together in a large bowl. Whisk.

Add eggs, buttermilk and vanilla.  Whisk until incorporated.

Add melted butter and mix until batter is smooth and creamy.

Heat waffle iron, I have one with four quadrants!

Mine is no longer for sale, but extremely similar to this one on Amazon! 

All waffle irons are different, so batter amount per waffle section may vary! Mine uses about 1/3 cup per square.

Once cooked through, transfer to cool on a wire rack! Store in a gallon freezer bag ( tip! use a square of parchment paper between each layer of four waffles, makes them easier to remove when frozen! 4 per layer)

The Thome Home’s favorite toppings …

Real deal Maple Syrup

Peanut butter + a drizzle of honey

Butter + cinnamon + sugar

ACS_0373These babes would be delicious for an Easter Brunch paired with a mimosa!

Filed Under: Bites, Our Bites

  • « Previous Page
  • 1
  • …
  • 13
  • 14
  • 15
  • 16
  • 17
  • …
  • 67
  • Next Page »

LETS BE SOCIAL

  • Email
  • Facebook
  • Instagram
  • Pinterest

Articles

Categories

Archives

Heinens

Visit The Thome Home 's profile on Pinterest.

Recent Posts

  • Pork Schnitzel
  • It’s time to book your vacation with Oasis Vacations!
  • Oasis Vacations at Ocean Isle Beach, North Carolina
  • JUS-ROL Crescents
  • Back to School Safely
  • Chicken Tender Charcuterie Board
  • Lillie’s Q Spicy Cheddar Sausage Pizza Bagel
  • Max’s Bedroom

Copyright © 2025 · Tasteful theme by Restored 316