• Home
  • About
  • LIFE
  • HOME
  • FOOD

The . Thome . Home .

Pretzel Crusted Chicken Tenders with Honey Mustard Dipping Sauce

March 1, 2021 by Abby Thome

Pretzel Crusted Chicken Tenders with Honey Mustard Dipping Sauce

Oh baby, baby!! Someone hold me back from shouting these chicken tenders across the universe because they are that damn good! Have I ever introduced to you Dot’s Pretzels? Forgive me if not, I’m sure you have seen them on my IG stories because they are a snack staple in our home. They are little sticks of pure magic, dusted in a seasoning that make your taste buds dance. So, what’s better than grinding up these pretzels in a fine crumb and coating chicken with it?? Don’t panic, if you cannot find Dot’s I have an alternative with regular pretzels and adding your own seasoning, I’ve got your back babe!

Can you even handle that golden crust? Give it to me!! Oh, and the honey mustard sauce is insanity, Dj + I both grabbed a straw and drank it straight out of the bowl…. Kidding, kidding – but it’s that good!

Pretzel Crusted Chicken Tenders

  • 2.5lb Gerber Chicken Tenders
  • 2 cup finely ground Dot’s Seasoned Pretzels
  • 2 eggs
  • 1/2 tsp kosher salt
  • 1/4 tsp black pepper

**If NOT using Dot’s Pretzels**

  • 2 cup finely ground pretzels
  • 1 tsp garlic powder
  • 1 tsp onion powder
  • 1 tsp paprika

Honey Mustard Dipping Sauce

  • 1/2 cup mayo
  • 2 Tbsp yellow mustard
  • 1 Tbsp dijon mustard
  • 1 Tbsp honey

Let’s cook!

  1. Preheat oven to 450* 
  2. Spray a cooking sheet with nonstick spray 
  3. Using a food processor, pulse the pretzels into a fine crumb, and pour into a bowl.
  4. In a separate bowl, whisk two eggs
  5. Sprinkle salt + pepper over the chicken tenders
  6. Dip seasoned chicken tenders into the eggs, shake off excess and then press chicken tender into the pretzel crumbs on both sides and place onto the prepared baking sheet
  7. Bake at 450* for 10 minutes, flip and bake for an additional 8-12 minutes until the chicken is cooked through

For the honey mustard dipping sauce…

Simply whisk all of the ingredients together.  Store in an airtight container in the fridge for up to a week, and enjoy! 

Air Fryer version…

Timing all depends on the brand of machine you have, however, rule of thumb is to cook them at 400*.  Place chicken tenders into thee basket and spray with nonstick spray, I love Heinens Avocado Oil Spray, and cook for 8 minutes, flip, spray again and cook for an additional 6 minutes.  Make sure to check if chicken is cooked all the way through, add one additional minute if needed.  

Filed Under: Bites, Our Bites

Boys Bedroom Makeovers

February 25, 2021 by Abby Thome

Boys Bedroom Makeovers

It’s been a while since we gave the boys bedrooms a little face lift! I walked you through the transitional stage of nursery to “big boy room” for Max a few years ago, check it out here. I find the 9+ age group can be tough for designing a space. Finding pieces that are fun for them, and yet pieces that can move with them over the years and even into their college years! I have found that you first have to access what you need (obviously) and if it seems like it will not be a long term piece, have a back up plan for it (younger sibling/donate etc). That way, like you’ll see shortly in Owen’s room design, if a piece is fitting for the next 4 or so years, have someone in mind to pass it onto (Might Max!)

I have had so much fun piecing together the boys new bedrooms with Sheely’s Furniture. One of my greatest tips to you when designing your kids rooms is to not hold yourself to the kids furniture only. You’ll definitely fall into the trap of picking pieces that will have a short shelf life for your kids. However – if there is a piece they are super pumped about (like Owen), let them be little, life is too short!

Sheely’s offers the widest variety of pieces and styles to choose from, so you know it’s a one stop shop for all of your needs!

Let’s start with Brody, Tween Room!

As much as I like to take full creative control, anything I picked out I ran the boys to see if they liked everything too! I love the idea of an upholstered bed for him, and these industrial shelves will flank each side will be perfect for all of his hockey trophies and memorabilia. Both boys have had second-hand dressers that are nearly 30 years old, so I wanted to replace them with a new solid-wood dresser that they can have for many years as well! This dresser had me at hello, simple + clean lines! Throw in a cool-retro reclining chair for gaming (surprise!) and a cozy woven rug, and this bedroom is surely one any teen would love to have! I will be putting these gorgeous green curtains in both of the boys bedrooms for a seamless view when transitioning to bedrooms – and B liked this Hockey Rink Print from Etsy!

Owen, the in-between room!

I loved designing Owen’s room, he is turning 10 in a few months, and I have to admit, I will suck up any “kid-like” things he desires. Which, let’s cut to the chase, is a bunk bed. I know, I know. He will only get probably 3-4 more years out of it – but Max can have it afterwards!

How cool is this room?? Owen has great taste and loves funky pieces, so I knew we could make a bunk bed room look cool! Let’s start with the bunkbed, it’s a twin on top full on bottom, so he plans to sit on top and play video games (haha). We went with the same cozy chair, incase the kids want to push them together and keep in one room. LOVE this mid-century modern dresser SO much I could squeal. Throw in a black rug to be topped with this stellar cowhide rug, and you’ve got the base for an amazing kids room!

Use my code : merryhome to receive $100 off of a $1,000 purchase Sheely’s Furniture

Filed Under: Home, Our Projects

Instant Pot Beef Stew

February 8, 2021 by Abby Thome

Instant Pot Beef Stew

I jumped on the Instant Pot bandwagon in the fall of 2020, just to see if it would live up to all of its hype.  Dozens of meals later, I am here to say that an Instant Pot is a fantastic tool to have in your kitchen! You can achieve a flavor profile that is usually only accomplished when you spend hours and hours cooking in the kitchen.  That’s the true beauty of utilizing an Instant Pot – it erases hours of cooking, and produces incredible dishes in a matter of minutes!

My Instant Pot Beef Stew is a prime example! Fork tender beef, loads of vegetables and a rich creamy sauce in just 30 minutes.  Spoon over a mountain of mashed potatoes, or you can try my Cauliflower Mash that pairs beautifully with this stew! 

Cooks note: This can also be made in a slow cooker, on HIGH for 4-6 hours, or LOW for 6-8 hours. 

Instant Pot Beef Stew

  • 2.5lb Beef Chuck Roast, cut into 1” cubes
  • 4 Tbsp Flour
  • 1 tsp Italian Seasoning
  • 1 tsp Kosher Salt
  • 1/2 tsp Black Pepper
  • 3 cup Carrot, diced
  • 3 cup Celery, diced
  • 1 Medium Yellow Onion, diced
  • 10 oz Mushrooms, halved (optional) 
  • 1 tsp Kosher Salt
  • 1/2 tsp Black Pepper
  • 1 tsp Oregano 
  • 1 tsp Garlic Powder 
  • 1 Bay Leaf
  • 6 Cloves of Garlic
  • 1/2 cup Red Wine
  • 1/4 cup Balsamic Vinegar
  • 4 Tbsp Tomato Paste
  • 2 1/2 cup Beef Broth

*If you prefer a thicker stew like me, at the end you will need 2 Tbsp flour + 2 Tbsp cool water*

Cooks note: If you have a few extra minutes, browning the meat prior to putting it into the Instant Pot is a great step to add another level of flavor.  

  1. Browning the meat: Toss the cubed beef chuck in flour, 1 tsp Italian seasoning, salt and pepper – Brown in a sauté’ pan with a drizzle of olive oil on medium-high heat just for a minute or two until beef is golden on both sides. SKIP: Add flour-coated beef straight into the instant pot – 
  2. Add the diced carrot, celery, onion and mushrooms to the instant pot
  3. Add the seasonings – salt, pepper, oregano, garlic powder, bay leaf and garlic cloves
  4. In a separate bowl, whisk together the wine, balsamic vinegar, tomato paste and beef broth
  5. POUR the sauce over all of the ingredients in the instant pot, stir and lock the lid on
  6. SET IT – Pressure cook on HIGH for 30 minutes, and then let the steam naturally release for at least 10 minutes. 
  7. Once the pressure is released, (always check by pushing over the nozzle to vent to ensure the steam is all released) Open the lid, and turn the Instant Pot onto “SAUTE” in preparation for the thickening agent
  8. Whisk together the flour and cool water in a small bowl, and add to the Instant Pot – Stir for 2-3 minutes on Sauté while the stew thickens
  9. That is it! Serve over Mashed Potatoes of my Cauliflower Mash!

Cauliflower Mash

  • 1 head of Cauliflower, cut into florets 
  • 2 Tbsp butter
  • 1/4 cup Parmesan Cheese
  • 1/4 tsp Kosher Salt 
  • 1/8 tsp Black Pepper
  • 1/4 cup Heavy Cream
  1. Bring a pot of water to a boil, and place the cauliflower florets in for 10 minutes, or until tender
  2. Drain cauliflower and add to a food processor
  3. Add the butter, parmesan cheese, salt, pepper and heavy cream to the food processor and blend for 3-4 minutes until the cauliflower is smooth and fluffy. 
  4. Add additional salt and pepper to taste if need be, serve right away! 

Filed Under: Bites, Our Bites

Creamy Sundried Tomato + Sausage Orecchiette

February 4, 2021 by Abby Thome

Creamy Sundried Tomato + Sausage Orecchiette

Dinner done in a flash!

This pasta dish is officially one of the boys new favorites! I was kind of shocked quite honestly, sun-dried tomatoes with little ones is kind of pushing the envelope. BUT – I am here to say it has been the most requested dinner since I have made it and I am not mad about it!

The only thing that takes the “longest” to cook is the sausage, which you can totally hack by buying pre-cooked chicken sausage and warming it through much quicker!

Creamy and cheesy, this sauce is done in the time it takes to cook the pasta – wicked fast! It is a flavor-packed pasta dish that is sure to please! If you are not a fan of sun-dried tomatoes, don’t let this dish be forgotten, simply omit – OR – you can swap it for a few Tablespoons of pesto! YUM!

Creamy Sun-dried Tomato Chicken Sausage Orecchiette

  • 1lb Mild Chicken Sausage Links
  • 2 Tbsp Unsalted Butter
  • 3 Garlic Cloves, minced
  • 1 Large Shallot, minced (3Tbsp)
  • 2 Tbsp Flour
  • 1 cup Chicken Stock
  • 1 cup Heavy Cream
  • 1 tsp Kosher Salt
  • 1/2 tsp Black Pepper
  • 1 tsp Dried Oregano
  • 1/2 cup Grated Parmesan
  • 1 cup Shredded Mozzarella Cheese
  • 1/2 cup Sun-dried Tomatoes, chopped
  • 1/2 cup pasta water reserved

First, let’s cook the chicken sausages …
1. Pre heat oven to 400*
2. Lay chicken sausages on baking sheet, drizzle with olive oil and bake for 30 minutes, or until sausage is cooked all the way through

Boil water for the Orecchiette, and cook according to package.  Be sure to reserve 1/2 cup of pasta water before draining to help thin the sauce out at the end

For the sauce …
1. In a shallow dutch oven, or deep sauté pan, over medium heat – sauté the garlic and shallot with butter until fragrant and slightly translucent (1 minute )
2. Add the flour, and stir for 30 seconds to cover the shallot and garlic
3. Pour in the chicken stock, heavy cream, salt, pepper and oregano
4. Turn the heat down to medium-low and stir for a few minutes as the sauce thickens
5. Add the cheeses, and stir together until sauce is creamy and smooth – if it is too thick, add 1/2 cup of the reserved pasta water to thin
6. Add the chopped sun-dried tomatoes and stir in
7. Add the drained orecchiette and stir to coat the pasta evenly in the sauce
8. Lastly, plate with the sliced chicken sausages and enjoy!

Filed Under: Bites, Our Bites

Chocolate Chunk Cookies

February 4, 2021 by Abby Thome

Chocolate Chunk Cookies

Simply the best, better than all the rest.

Be prepared to throw away every other Chocolate Chip Cookie recipe you have tried – because this one, my friends – is a panty dropper. Can I say that? Damn straight I can – If Dan made me these cookies himself he would have a 10/10 chance to gettin’ lucky tonight. Unfortunately, he did not. So no goodie-goodie for him, but allllll the chocolate chunk cookies for me.

You snooze, you lose.

Back to these COOKIES!! For over a decade I have tried various chocolate chip cookie recipes, and last year I landed on one that took the cookie cake. Gooey, chewy, super-soft and with a barely there crisp to the edge. They fluff up in the oven, and collapse into its chewy center once pulled out – YUM!!!

MUST-DO for perfect Chocolate Chip Cookies, every time!!

  • Use a cookie scoop! This ensures that your cookies are all an equal size, and will result in evenly cooked cookies! My favorite –
  • Whip’ up that butter, sugar, vanilla + eggs until light + fluffy
  • FLUFF that flour before you add it into the measuring cup, just stir it with a fork a bit so it is not heavy
  • DO NOT over mix the flour when added – just enough to incorporate
  • DO NOT over bake!! These cook for 9-11 minutes, and will be so soft you will swear they are raw. They are not! They finish cooking while cooling

Let’s Bake!

Chocolate Chunk Cookies

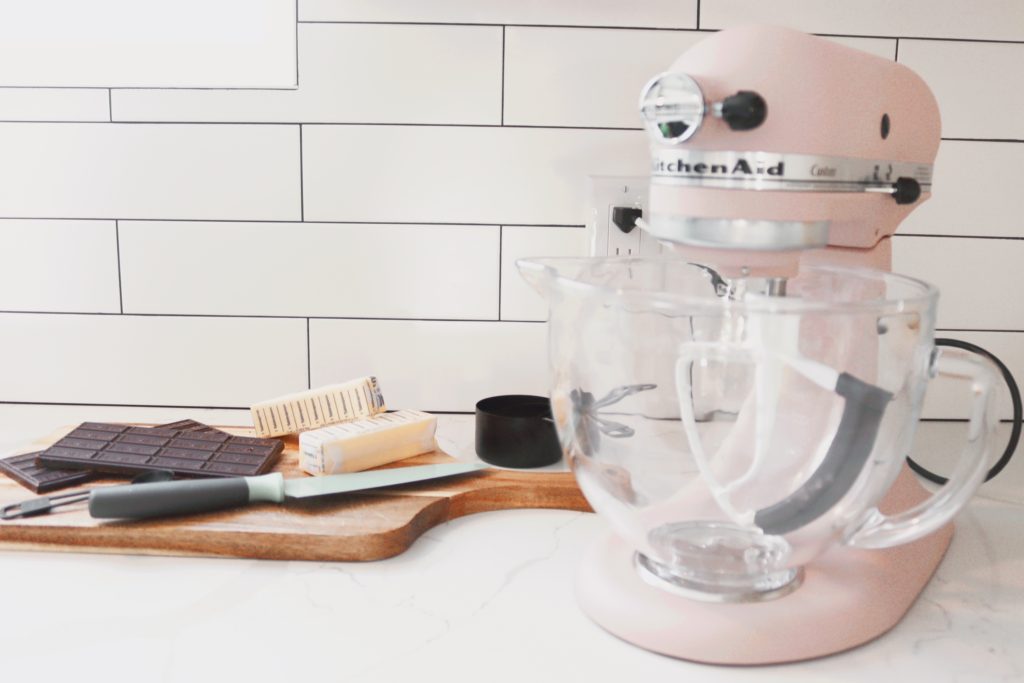
  • 2 sticks unsalted butter, @ room temp
  • 1 cup sugar
  • 1/2 cup packed light brown sugar 
  • 2 tsp vanilla
  • 2 eggs 
  • 3 cup flour 
  • 1 tsp baking soda
  • 1/2 tsp salt
  • 2 XL Hershey Dark Chocolate Bars, chopped (roughly 1 1/4 heaping cup) 
  • A few extra dark chocolate chips to decorate

➖With a mixer, beat together the butter, sugars, vanilla and eggs until light and fluffy. 

➖Add the flour, baking soda, and salt

KEY: Fluff the flour in your bag with a fork before scooping with measuring cup ✔️

➖Mix everything together for just a few seconds until the flour mixture is JUST barely combined, and dump in the chopped chocolate chunks

➖Finally, mix a bit more until chunks are scattered throughout 

Stop there! Do not over mix 

➖Preheat oven to 350*

➖Scoop 1.5 Tbsp worth of dough onto a parchment lined baking sheet 

(I use an @OXO medium cookie scoop)

➖Top each cookie dough ball with an extra chocolate chip or two + a sprinkle of sea salt

➖BAKE for 9-11 

➖PULL OUT no later than 11 minutes – they will be SUPER soft, and will set a bit more 

Here is the cookie scoop I use, in the medium size – this is such a nice tool to ensure your cookies will bake evenly because they are all the same size!

Filed Under: Bites, Our Bites

The Kitchen! Lighting + Runner with Wayfair

January 26, 2021 by Abby Thome

The Kitchen! Lighting + Runner with Wayfair

this post contains affiliate links. a small commission is earned when items are purchased through these links, at no cost to you. thank you for helping support our blog and brands we love so much!

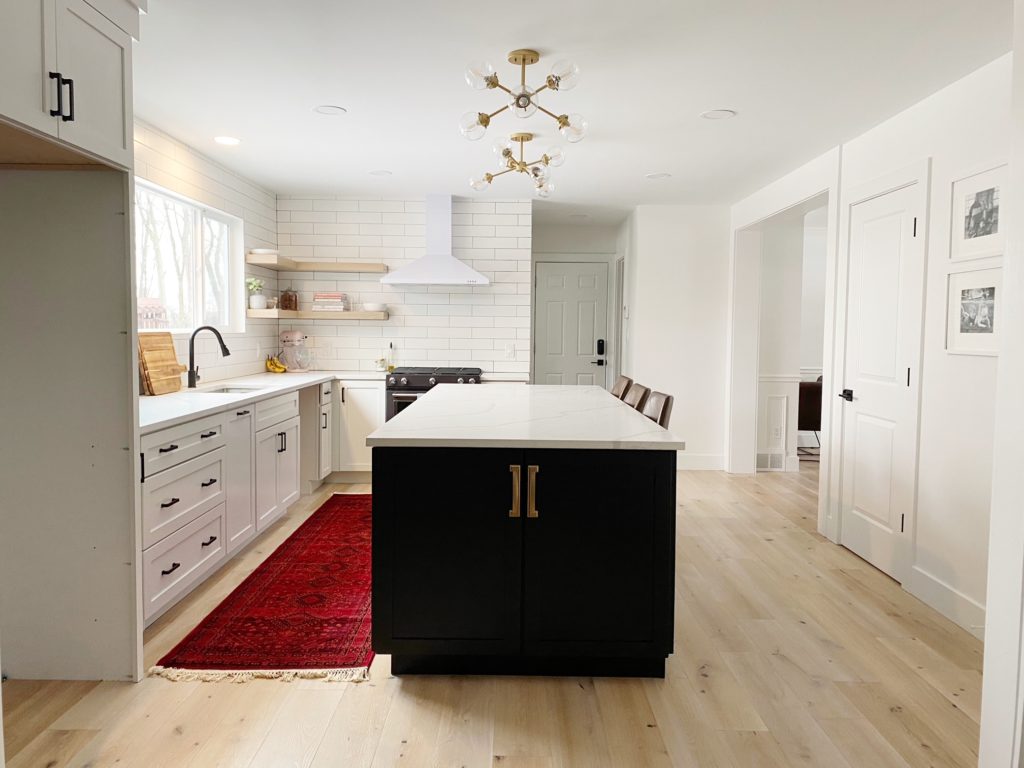
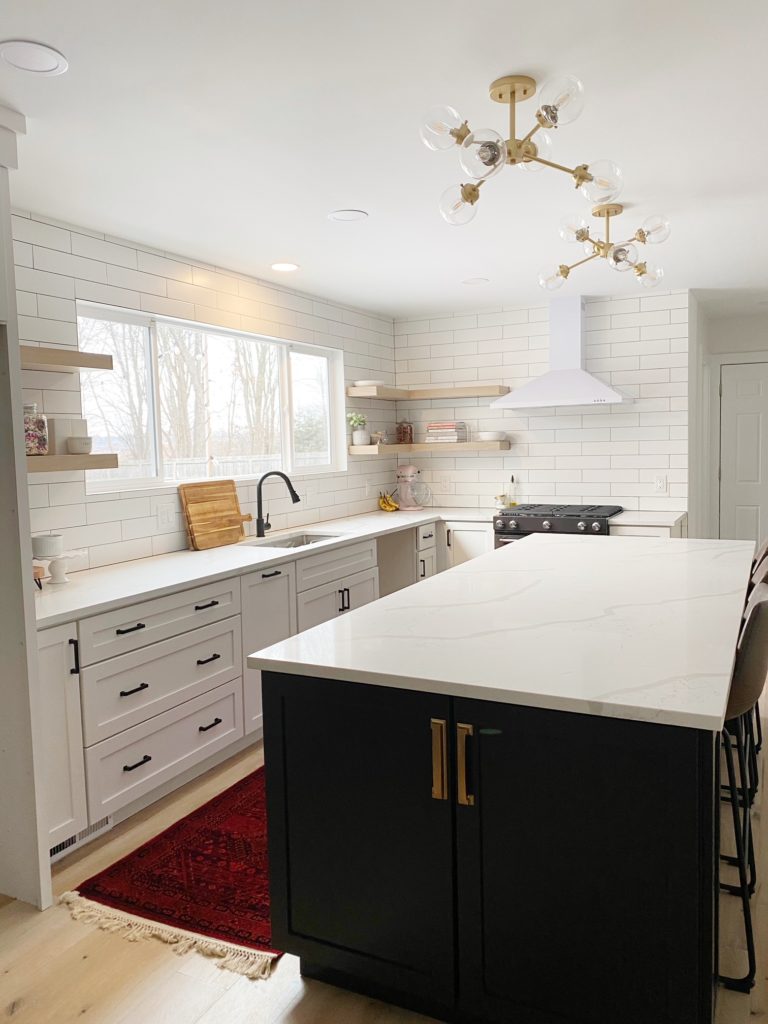
Holy smokes folks, the kitchen is COMPLETE! Well, we still have to decorate a bit, wait for the fridge and dishwasher to come but who the heck cares!! The space is usable, I have a new oven to cook in and I am over the moon to have a bit of normalcy back into our lives!

3 months ago, this was our kitchen…

And now…

Can you even wrap your head around the fact that that is the exact same space, no additional square feet added?? It is still wild to me! Alix Home Solutions did such an incredible job on this renovation! If you are local and looking to renovate a space big or small, I highly suggest calling them. Their entire team is dedicated, timely, and go above and beyond what is asked!

The lighting above the island is what sparked my inspiration for this entire space. I love a “traditional” feel with some funk added in – and these pendant lights are so fun and beautiful in person too! Wayfair has a never-ending assortment of lighting to sort through, by style, size, and color – you can truly find exactly what you are looking for!

These lights are the perfect option for a kitchen island if you are looking for lighting that does not hang low and will not obstruct your view. This was key for us! We put in a big beautiful window and the last thing we wanted was anything standing in its way!

And don’t even get me started on my love affair with my new runner(s). I ordered two because they are SO incredibly beautiful!! They are currently only $75 on sale from $200 – such a steal, and will not last long!

This space feels so bright and airy now, which is exactly what we were hoping for! I’ve had lots of questions pouring in about how we are managing without upper cabinets, and I’ll have an entire blog post dedicated to how we keep our kitchen organized and simple!

  • Shop the runner
  • Shop the lighting

Filed Under: Home, Our Projects

Simple Sheet Pan Baked Cod with Chimichurri

January 25, 2021 by Abby Thome

Simple Sheet Pan Baked Cod with Chimichurri

A recipe that will change the way you eat fish in your home! Do you guys eat fish? My boys LOVE seafood so much, so we incorporate it into a few dishes a week.

The simplicity of sheet-baking cod creates the most mild, flaky fish that is a fantastic base for a healthy dish.  I like to kick it up a notch by pouring a spoonful of my chimichurri sauce to baked cod, and WA-BAM! You’ve been punched with flavors that will make you dance in your pants. Get ready for it!

The chimichurri stores beautifully in an airtight container in thee fridge for up to a week, and is delicious over fish, steak, chicken or pasta dishes.  This dinner is complete in 15 minutes, pairs perfectly with a pasta, salad or roasted vegetables. 

Let’s cook!

For the Cod –

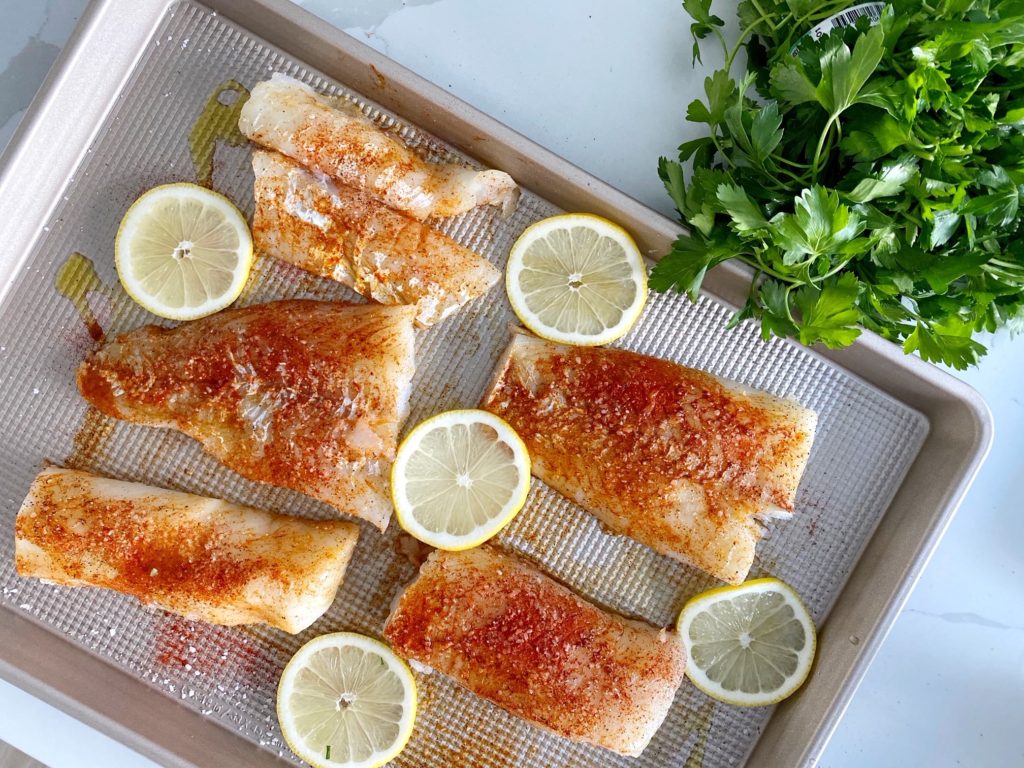
  • 2lb Wild Alaskan Cod Fillets
  • 1tsp Paprika
  • 1 tsp Garlic Powder
  • 1 tsp Kosher Salt
  • 1/2 tsp Black Pepper
  • Drizzle of Extra Virgin Olive Oil 
  • Lemon, sliced

Chimichurri – 

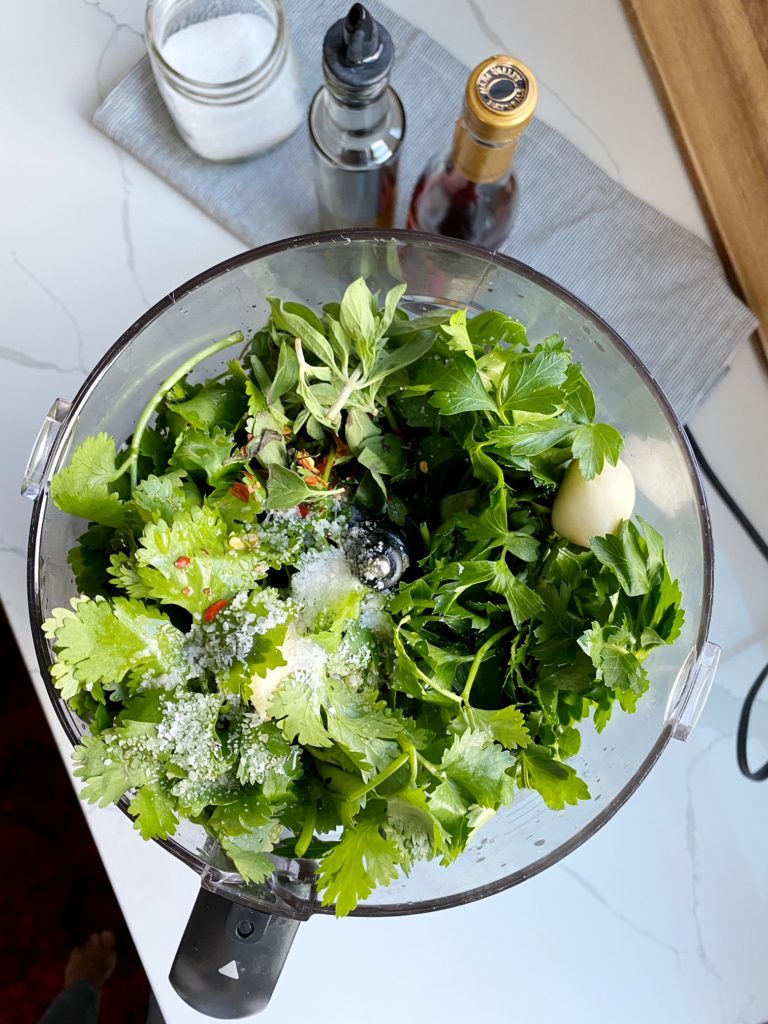
  • 1 bunch of Parsley, cut off bottom stems
  • 1 bunch of Cilantro, cut off bottom stems
  • 1/2 Red Onion, diced
  • 3 Garlic Cloves
  • 3 Tbsp Red Wine Vinegar 
  • 3/4 cup Extra Virgin Olive Oil 
  • 1 tsp Chili Pepper Flakes
  • 1 Tbsp Oregano, fresh – or 1/2 Tbsp Dried Oregano
  • 1 tsp Kosher salt

Preheat oven to 400*

  1. On a baking sheet, place the cod fillets and drizzle with olive oil.  
  2. Sprinkle the paprika, garlic powder, salt and pepper all over both sides of the fish. 
  3. Place sliced lemons on baking sheet.  

4.   Bake at 400* for 15 minutes, until fish is cooked through

For the Chimichurri – 

  1. In a food processor, add all of the ingredients listed above
  2. Blend for 1 minute or so, herbs will be finely minced, no large pieces of herbs

That’s it! 
You’ve just created a healthy dinner for your family in 15 minutes! You can pair with my One Pan Lemon Parmesan Orzo – delish!

Filed Under: Bites, Our Bites

One Pan Lemon Parmesan Orzo

January 25, 2021 by Abby Thome

One Pan Lemon Parmesan Orzo

Ever stumped on what else to put on your dinner plate alongside your protein? Well, look no further than this one-pan wonder that is my Lemon Parmesan Orzo! Creamy orzo dressed with plenty of lemon juice + zest, this pasta side is so satisfying! I’d pair with roasted chicken, seafood of any sorts, or steak! Oh! And a vegetarian option of a roasted cauliflower tossed with pest would be insanity, damn that sounds good – making that next!

You can even simply stir in my famous Garlic Expressions Shredded Chicken that you have on hand for quick meals, so easy!

One pan is all you need, ready?!

  • 3 Tbsp Shallot 
  • 3 Garlic Cloves
  • 1.5 Tbsp Extra Virgin Olive Oil 
  • Juice of 2 lemons
  • Zest of 1 lemon
  • 1 cup Orzo
  • 2 1/2 cup Vegetable Broth
  • 1/4 cup Heavy Cream 
  • 1 tsp Kosher Salt
  • 1/2 tsp Black Pepper
  • Heaping 1/4 cup Grated Parmesan 
  • 3 Tbsp Chopped Parsley 
  1. In a deep sauté pan, or shallow dutch oven, over medium heat sauté the shallot and garlic cloves with a drizzle of olive oil until fragrant and slightly softened (1-2 minutes)
  2. Add lemon juice and zest, stir
  3. Add Orzo, and a drizzle of olive oil, stir for a few seconds to coat the orzo in the lemon juice and zest
  4. Pour in the vegetable broth, heavy cream, salt and pepper and let simmer over medium heat for 10 minutes until the orzo is aldente
  5. Once orzo is cooked and the majority of liquids are absorbed, add the grated parmesan and chopped parsley
  6. Stir everything together and serve immediately 

Spice it up with a few shakes of chili pepper flakes too! YUM!

Filed Under: Bites, Our Bites

Be the damn grain of rice…

January 12, 2021 by Abby Thome

Be the damn grain of rice…

It takes one grain of rice to tip the scale. So when you cannot shake the shitty mood you feel stuck in, throw in a grain of something to change it. Don’t overthink it, don’t beat yourself up for being in a funk, just grab that grain of rice by the balls and implement it into your day. Before you know it, your mood will shift – promise.

Tell me what grain to grab…

Don’t over think it babes….

  • Play your favorite song
  • Watch a funny tiktok
  • SMILE- seriously – put on a big ass grin and feel it radiate
  • Pour yourself a cup of tea, coffee or water
  • MOVE- yoga, quick walk, hell, get on the floor and practice an old Nsync dance from grade school
  • Text a friend
  • Take a shower or bath
  • Make yourself something healthy to eat
  • Make plans to watch a good show or movie
  • Journal
  • Turn off the news + listen to a podcast instead
  • Equilibria CBD – I kid you not, the balance this brings to your mood is incredible. For anxiety, depression or just overall moodiness this CBD restores our systems and levels us out. Takes the edge of and amplifies your endorphins and combats cortisol!

My code ABBYTHOME will give you 15% off of your order. Subscribe and get another 20%!

2020 proved to be a heavy year, and let’s face it – 2021 didn’t start off on the right foot either. So, it’s time to starting taking matters in our own hands and make sure that we are implementing that tiny grain of rice into our day to day so that we stay positive and focus on the good to be had.

What are you waiting for? Grab that rice babe

Filed Under: Our Life

Kitchen Essentials

January 8, 2021 by Abby Thome

Kitchen Essentials

Life in my kitchen is always crazy! With cooking being part of my full time job, there is constantly something being made at all hours of the day. With that being said, it is even more important to me to make sure that the things I have in my kitchen do not add to the chaos and that I only have what I need to work with, nothing more.

This took time to catch onto, for sure. 10 years ago I owned every gadget and kitchen item in excess, until we moved into our current home 7 years ago and realized very quickly between moves how little I actually used on a day to day basis. Yes, even as I photograph food and recipe develop, there was only a true need for about 50% of what I owned, if that.

With that being said, I thought it would be extremely helpful for me to show you all the kitchen essentials that I will be bringing into our new kitchen. It is a clean slate to refill, and to continue to do it in a minimalistic approach.

First and foremost, you know your girl loves a good cutting board. I use it for obvious reasons, but also use it constantly to serve our meals on! Home Goods is a fantastic place to find quality wood cutting boards for next to nothing!

Gadgets + Utensils

When it comes to my utensil drawer, less is more! Which sometimes drives visitors crazy when there are more than one cooking in the kitchen. But, I have found after years of recipe development that you only need a one of each item, and then once it wears down – replace it. No need for 8 wooden spoons, or 16 knives that you’ll never use!

Side note: this medium oxo cookie scoop is the tits. I use it for cookies, of course, but for meatballs and when I make muffins. I use it ALL the time.

Olive wood spoon Olive wood Spatula Cookie Scoop Vegetable Peeler Microplane Whisk Silicone Spatulas Tongs Turner

Cookware + Bakeware

I always keep two of everything you see here in my cupboard. Two Large 12×18 baking sheets, 2 9×13 baking sheets, 2 cake pans, two muffin tins (mini + regular) etc… The mini muffin tins are great for egg bites, mini pancakes and so much more.

Cake Pan Bread Pan Rectangle 9X13 Baking Sheet Mini Muffin Tin Muffin Tin Cooling Racks

Baking

Believe it or not, I have only ever used a handheld mixer in my kitchen. That may change with the new renovation because I am longing for a countertop piece, but I use this hand mixer for everything while baking. I love a good set of stainless steel bowls, they stand the test of time and you can use them for everything in your kitchen (salads/leftovers/for baking)

Measuring spoons Kitchen Mixer Liquid Measuring Cup Stainless Mixing Bowls Measuring Cups

Tried and True …

I do not like to buy pots and pans as a set, there are always ones I never use and go to waste! I like to just order pieces separately, the ones I will only use the most! With that said, GreenPan has been a household staple for over 8 years. Did you know many pots and pans if overheated can release toxic fumes? EEK! Not GreenPan! They cook evenly, and the nonstick is incredible! I always have one lasagna dish on hand that I take straight from oven to table – the price on this World Market one you just cannot beat!

And you’ve heard me talk about this Lodge dutch oven for YEARS on this blog. Until 2020, they were always in stock – that is until a few big time bloggers shouted them out and they have been flying off of the shelves and selling out. You cannot beat the price, I buy one every few years – forget the Le-Cru-whatever (haha) keep the money in your pocket and buy this one for less than $70, it is hands down my favorite kitchen piece.

Lasagna Dish GreenPan Pots + Pans Lodge Dutch Oven

I love a good grill pan for our midwest colder months. Also, a deep saute pan is fantastic for pastas!

Grill Pan Saute Pan

If you have the space, I LOVE these…

While these are not necessary, they are definitely handy small appliances to have on hand. The ninja food processor/blender I use constantly for sauces, pestos and smoothies. Cusinart Air Popper for popcorn makes the best popcorn! Although, it may get returned after falling in love with Safe + Fairs new Sea Salt popcorn! I am addicted!! I highly recommend a slow cooker, or an instant pot these days – everybody is doing it. Lastly, a waffle maker, if you are into making big batches to freeze – check out my Belgium waffle recipe. If you want to go balls to the wall, I would add a panini press. Nothing beats a toasty sandwich with soup.

Ninja Blender + Food Processor Popcorn Maker Crockpot Waffle Maker

Not pictured…

The obvious missing items I need to shop for still –

  • I own a wine opener, and can opener of course
  • A new knife – I only keep a serrated knife for bread and a knife for cutting. My Walmart knife lasted me 7 years (believe it.) Less than $25 – I am on the hunt for another. The key is just to get them sharpened, no need for 12 knives in the kitchen
  • Collander – duh. Gotta drain that pasta, wash the produce
  • Ladel for soup, nothing fancy

Of course kitchen essentials will look different for every home. Depending on what you cook most frequently. These are the tools that help me cook everyday, multiple meals a day for my crew!

I may have missed an item or two, but I’ll be sure to add and keep you posted as we restock the kitchen over the next few months!

Filed Under: Home, Our Life

  • « Previous Page
  • 1
  • 2
  • 3
  • 4
  • 5
  • …
  • 67
  • Next Page »

LETS BE SOCIAL

  • Email
  • Facebook
  • Instagram
  • Pinterest

Articles

Categories

Archives

Heinens

Visit The Thome Home 's profile on Pinterest.

Recent Posts

  • Pork Schnitzel
  • It’s time to book your vacation with Oasis Vacations!
  • Oasis Vacations at Ocean Isle Beach, North Carolina
  • JUS-ROL Crescents
  • Back to School Safely
  • Chicken Tender Charcuterie Board
  • Lillie’s Q Spicy Cheddar Sausage Pizza Bagel
  • Max’s Bedroom

Copyright © 2025 · Tasteful theme by Restored 316