This is a sponsored post in collaboration with Chalkworthy. Thank you for supporting the brands that support our blog!
Shiplap walls are all the rage since Chip and Jo hit the scene revealing the incredible dimension and style shiplap brings to a room instantly!
If you’re an avid blog follower – or even glued to the boob tube watching any DIY network or HGTV shows, you’ve seen the rising trend of shiplap walls. These wood planked walls are all the rage for all of the right reasons. Shiplap walls add detail, dimension and undeniable style to a room that you just cannot beat. No need for color added, white or wood makes such a bold statement all while remaining understated enough to compliment any decor.
I adore the lines, the depth of the wood, and the statement they make to any room. When pregnant with Max we knew right away that we wanted an accent wall that was shiplap. Without a doubt the crisp contrast of shiplap lines and the soft textures of the rugs and baby blankets had me oozing with excitement to get started.
And look at the results – A-MAZ-ING.

Shiplap Wall Tutorial, so easy to do in just an afternoon!
If you want to replicate this look in your home, you’re in luck! Our tutorial breaks it down into the simplest way, because let’s be honest – with 3 kiddos, if it’s not easy, it’s not getting done 1/2 the time.
Tools you will need:
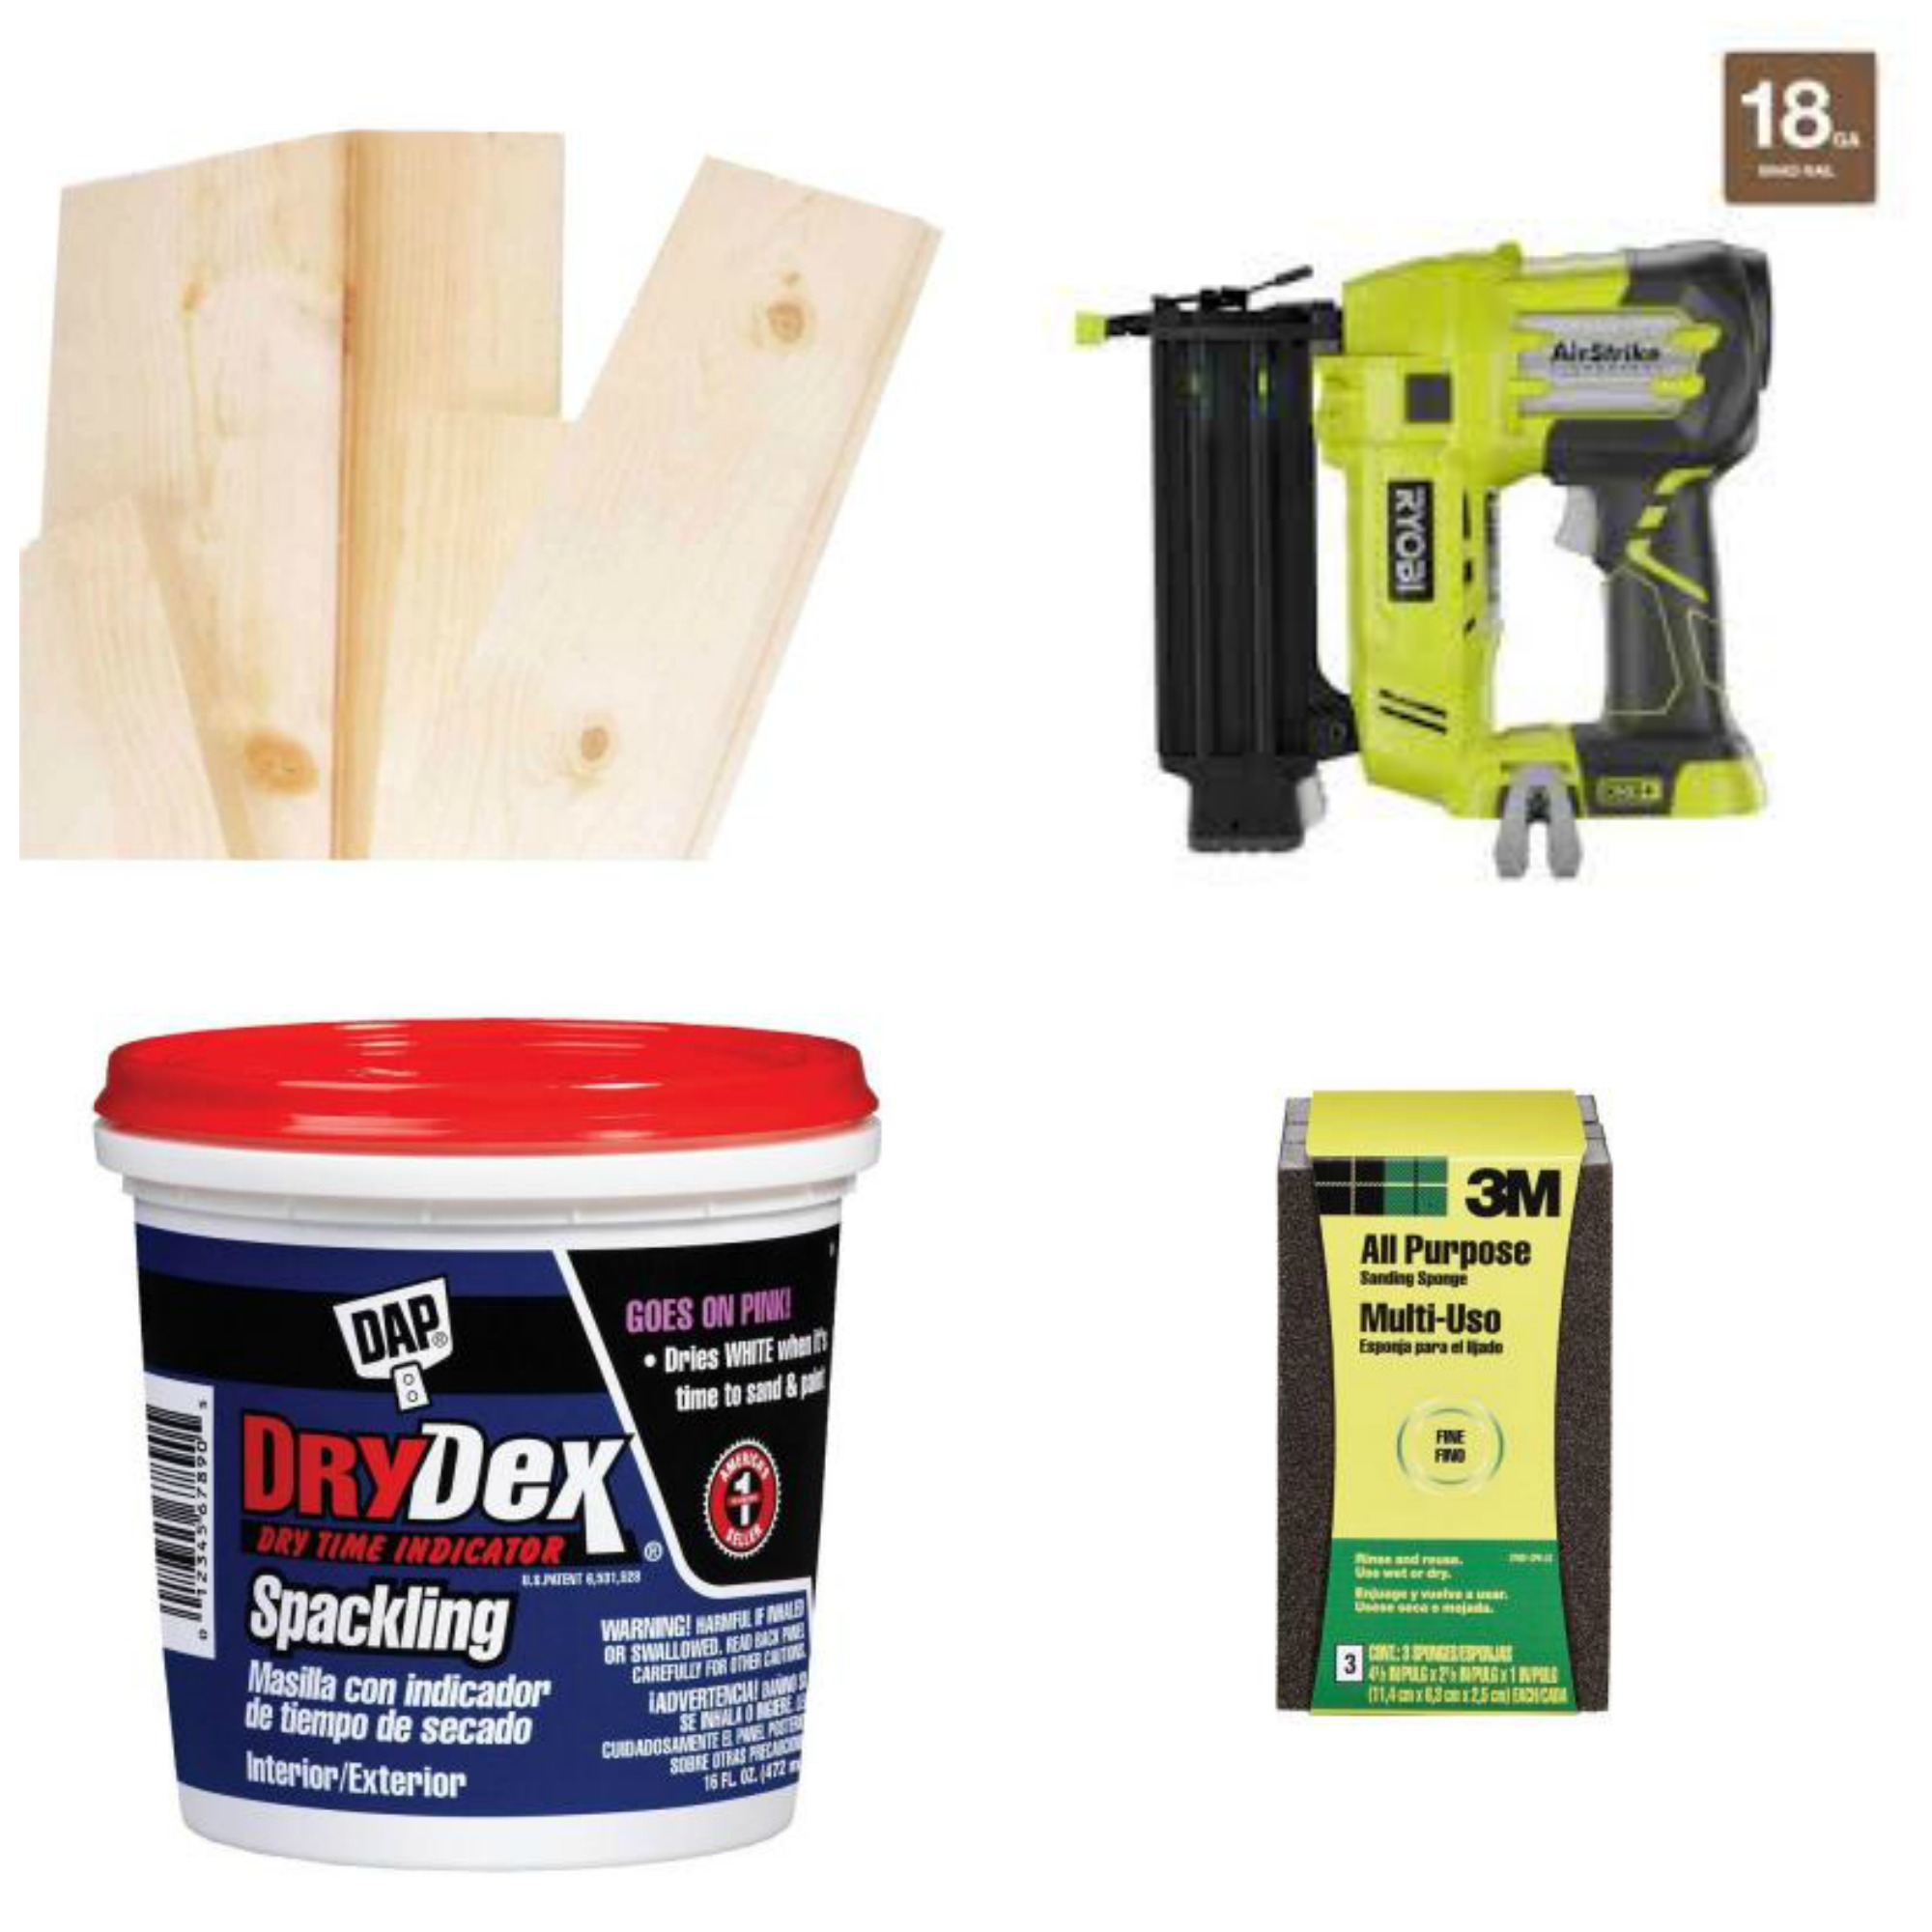
Tongue and Groove Pine Boards :: Nail Gun :: Spackling :: Sanding Sponge (or paper)
Rubber Mallet :: LEVEL :: Electric Hand Saw :: Chalkworthy Paint
Let’s break it down into a few simple steps, and then I’ll show you the pictures to better understand
- measure the wall(s) you will be placing the planks of wood on. you’ll want to measure the length and the height of the wall. Height of the wall will help you determine how many boards you will need to cover the entire wall.
- The length of the wall will help you determine how long of boards you want to purchase. Ours were 12 feet, and we knew wanted the boards staggered and would be cutting them into different lengths. If you have lets say an 8 foot wall, you can keep the boards 8 feet the entire way across – you do not have to cut them (you may have to skim the ends dependant upon your room) Thankfully, cutting the 12 foot boards made it much simpler to carry up and down the stairs while cutting them! 🙂
- We purchased the 12 foot boards, to be cut accordingly
- The boards are tongue and groove, which makes “clicking” each layer of boards together such a breeze! No need for nickles like most tutorials call for when using a raw edge. These have the groove and establish that gorgeous line in between without the extra hassle!
- you will need to find the studs in your wall, all the way across and all the way down to make it easy as you go. we used a pencil and marked an X – and followed down the wall so as we put up boards we remembered where to nail
Many walls are not even. LESSON LEARNED. It’s rare to find a perfectly even wall.
We decided that we would stagger the pieces in length. Making ONE cut on each board, alternating ONE cut at 7 feet and the next board at 8 feet. Leaving an end piece of 5 + 4.
We then started with the longer board ( 7 or 8 it doesn’t matter) making sure it is level before nailing it in, and starting at the TOP of the wall. You want the lip of the tongue and groove (where the next piece will click in) to be facing DOWN. The flat edge to be the one facing towards the ceilng.
Nail the end piece right next to it. START AT THE TOP OF THE WALL – which will more than likely not be perfectly straight, so make sure your first board is perfectly level. That’s so important! It takes 2 people to hold the boards and ensure it’s just right.
Oh! And of course we stepped outside the box. We put our boards on backwards – so we have that extra groove line in the middle. I wanted to see more details + more lines. So, if you want just one line spaced between each board, make sure you have the middle running groove on the BACK, not facing the front!
Next board you start with opposite lengths, short piece first and then the long. When clicking in the tongue and groove, use the help of a rubber mallet to pound the bottom edge upward if they need some encouragement!
It went like this …. all the way down the wall. Keep in mind, you will have to cut some edges dependant upon how straight your wall is to make them fit correctly. So you may have a bit to skim off of some ends.
__________ 7 feet _________ ______ 5 feet ______
_____ 4 feet _____ ____________ 8 feet ________
______ 5 feet _______ __________ 7 feet _______
____________ 8 feet _________ _____ 4 feet ____
Of course our action shots are night time shots (oy vey) life with kids, you tackle the projects whenever you can!
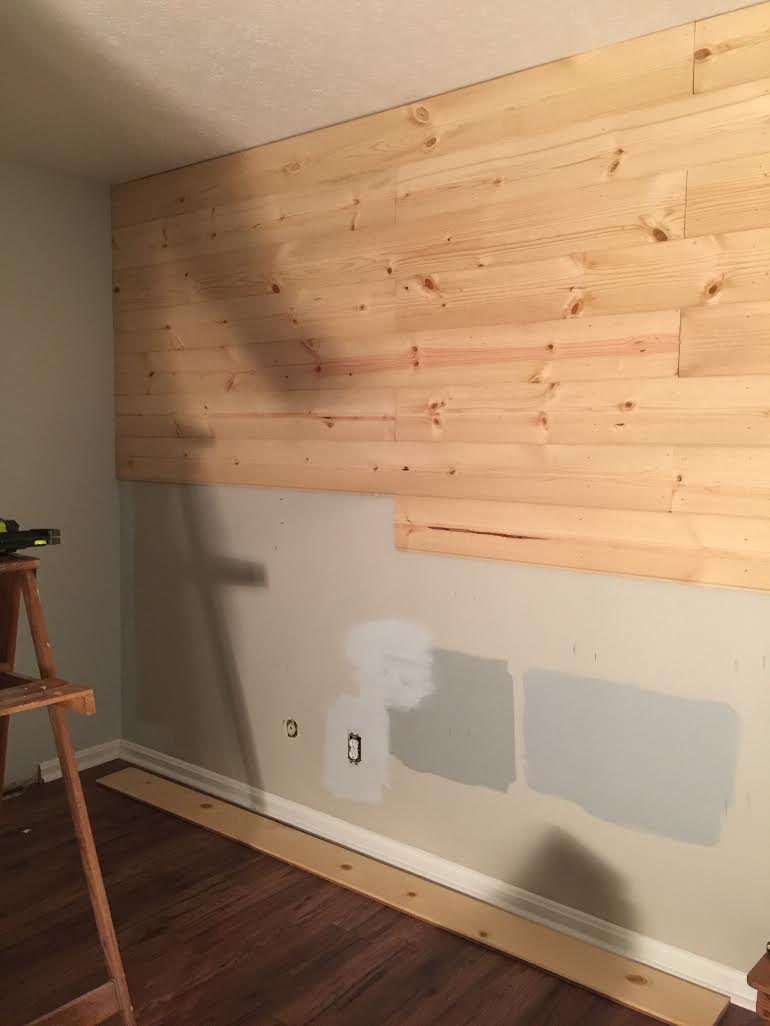
You’ll use an abundant amount of nails to hold these gorgeous wooden planks up – so nail away. No need to worry about the tiny holes, you’ll fill them in later!
Once you’ve moved all the way down the wall, you may have a smidge of space “uncovered”. You can add a white piece of trim to the bottom of the board to hide any imperfections.
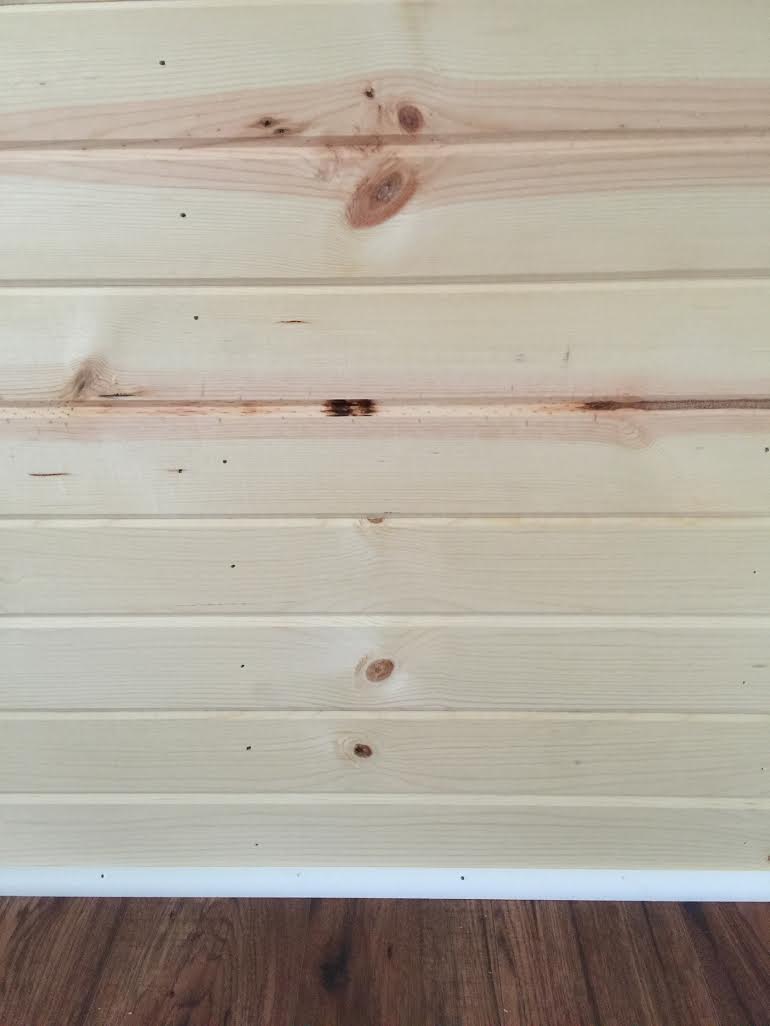
Once you’ve completed your wall – it will look like this. If you have outlets on the wall you are covering, make sure to measure accordingly and cut out that section on that specific plank of wood. That’s the best part about putting together a ship lap wall, one board at a time so you can customize each piece as needed. And the tongue and groove, oh you guys just wait – it is SO much easier than spacing regular planks of wood!
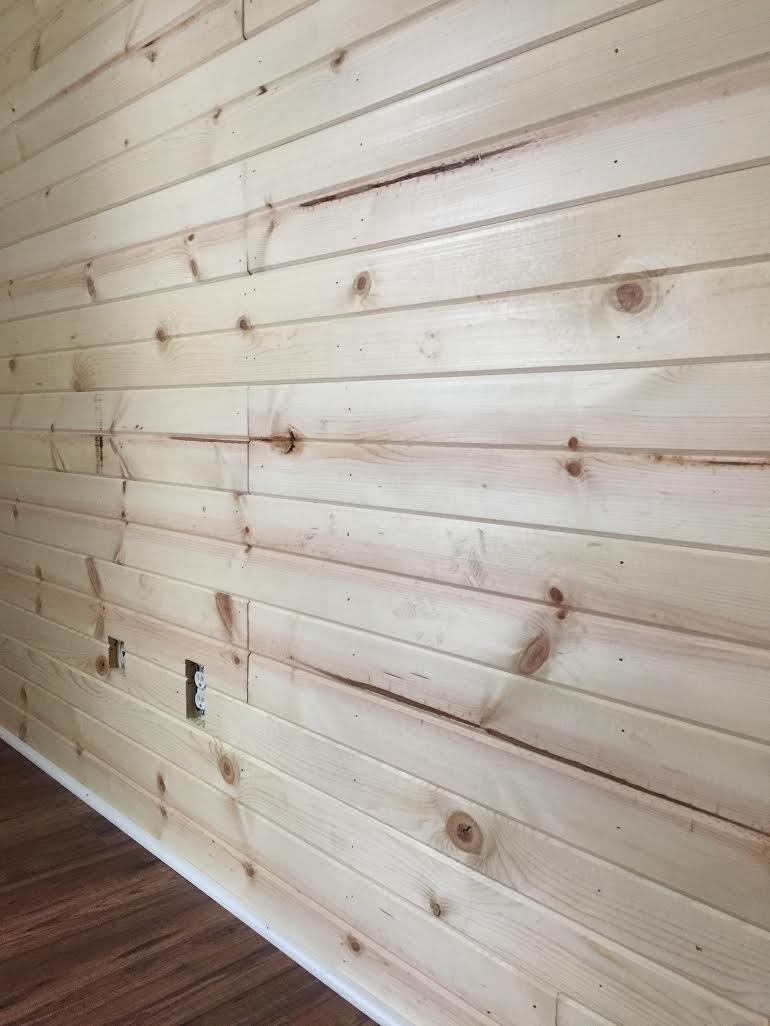
A gorgeous raw wood wall, just begging for some chalkworthy love! But be patient, you must spackle those itty bitty holes shut and sand them down. Sand the spackle after it is 100% dry – and then take a DRY paper towel to make sure the wall is dust free and ready to paint!
And then the CHALKWORTHY paint of your choice –
We went with our favorite classic white linen.
We used 3 cans to cover the entire surface of the wall 2 times. You must use a brush for this paint application – a roller would not cover all of the nooks and crannys. Keep an eye out for drips in between the lines, always going back to ensure you have good coverage and no drips!
I just cannot express enough how much we adore this feature wall. The ease of putting it all together, along with the amazing touch of Chalkworthy paint.
So it’s really that easy. Purchase all the tools/products you need. Measure twice, cut once. Start at the top. Nail away. Spackle. Sand. Paint. And you’ve got yourself a gorgeous ship lap wall!

Shiplap Wall Tutorial for Nursery
I know Max ( and mom and dad ) will be big fans of this room for years to come!
Love it! You make everything look and sound so easy 🙂 We need to channel our inner Thomes to DIY more often! LOL XOXO