• Home
  • About
  • LIFE
  • HOME
  • FOOD

The . Thome . Home .

Chicken Pot Pie with a Sharp Cheddar Crust

October 19, 2015 by Abby Thome

Chicken Pot Pie with a Sharp Cheddar Crust

unnamed-22

This is sponsored post with Wayfair.  Thank you for supporting The Thome Home and helping us bring out the best in our blog! 

When I received an email from my lovely ladies at Wayfair, I knew the second I read the first few lines I had to try to get into this sponsored post.  “Battle of the pies” if you will, or a fun virtual bake off where a select group of Wayfair homemakers will blog about their favorite pies.   Funny thing is, as much as I love a delicious slice of pie, I have never made pie dough from scratch- so I knew this was going to be the perfect challenge for me!

unnamed-18

 Chicken pot pie was the first pie that popped to mind to bake when responding to the email.  I am sure I could have listed 100 other sweet pies for my Wayfair folks to assign me, but with this pregnancy, all I want is  savory all day everyday – thankfully, they allowed me to do my own twist!

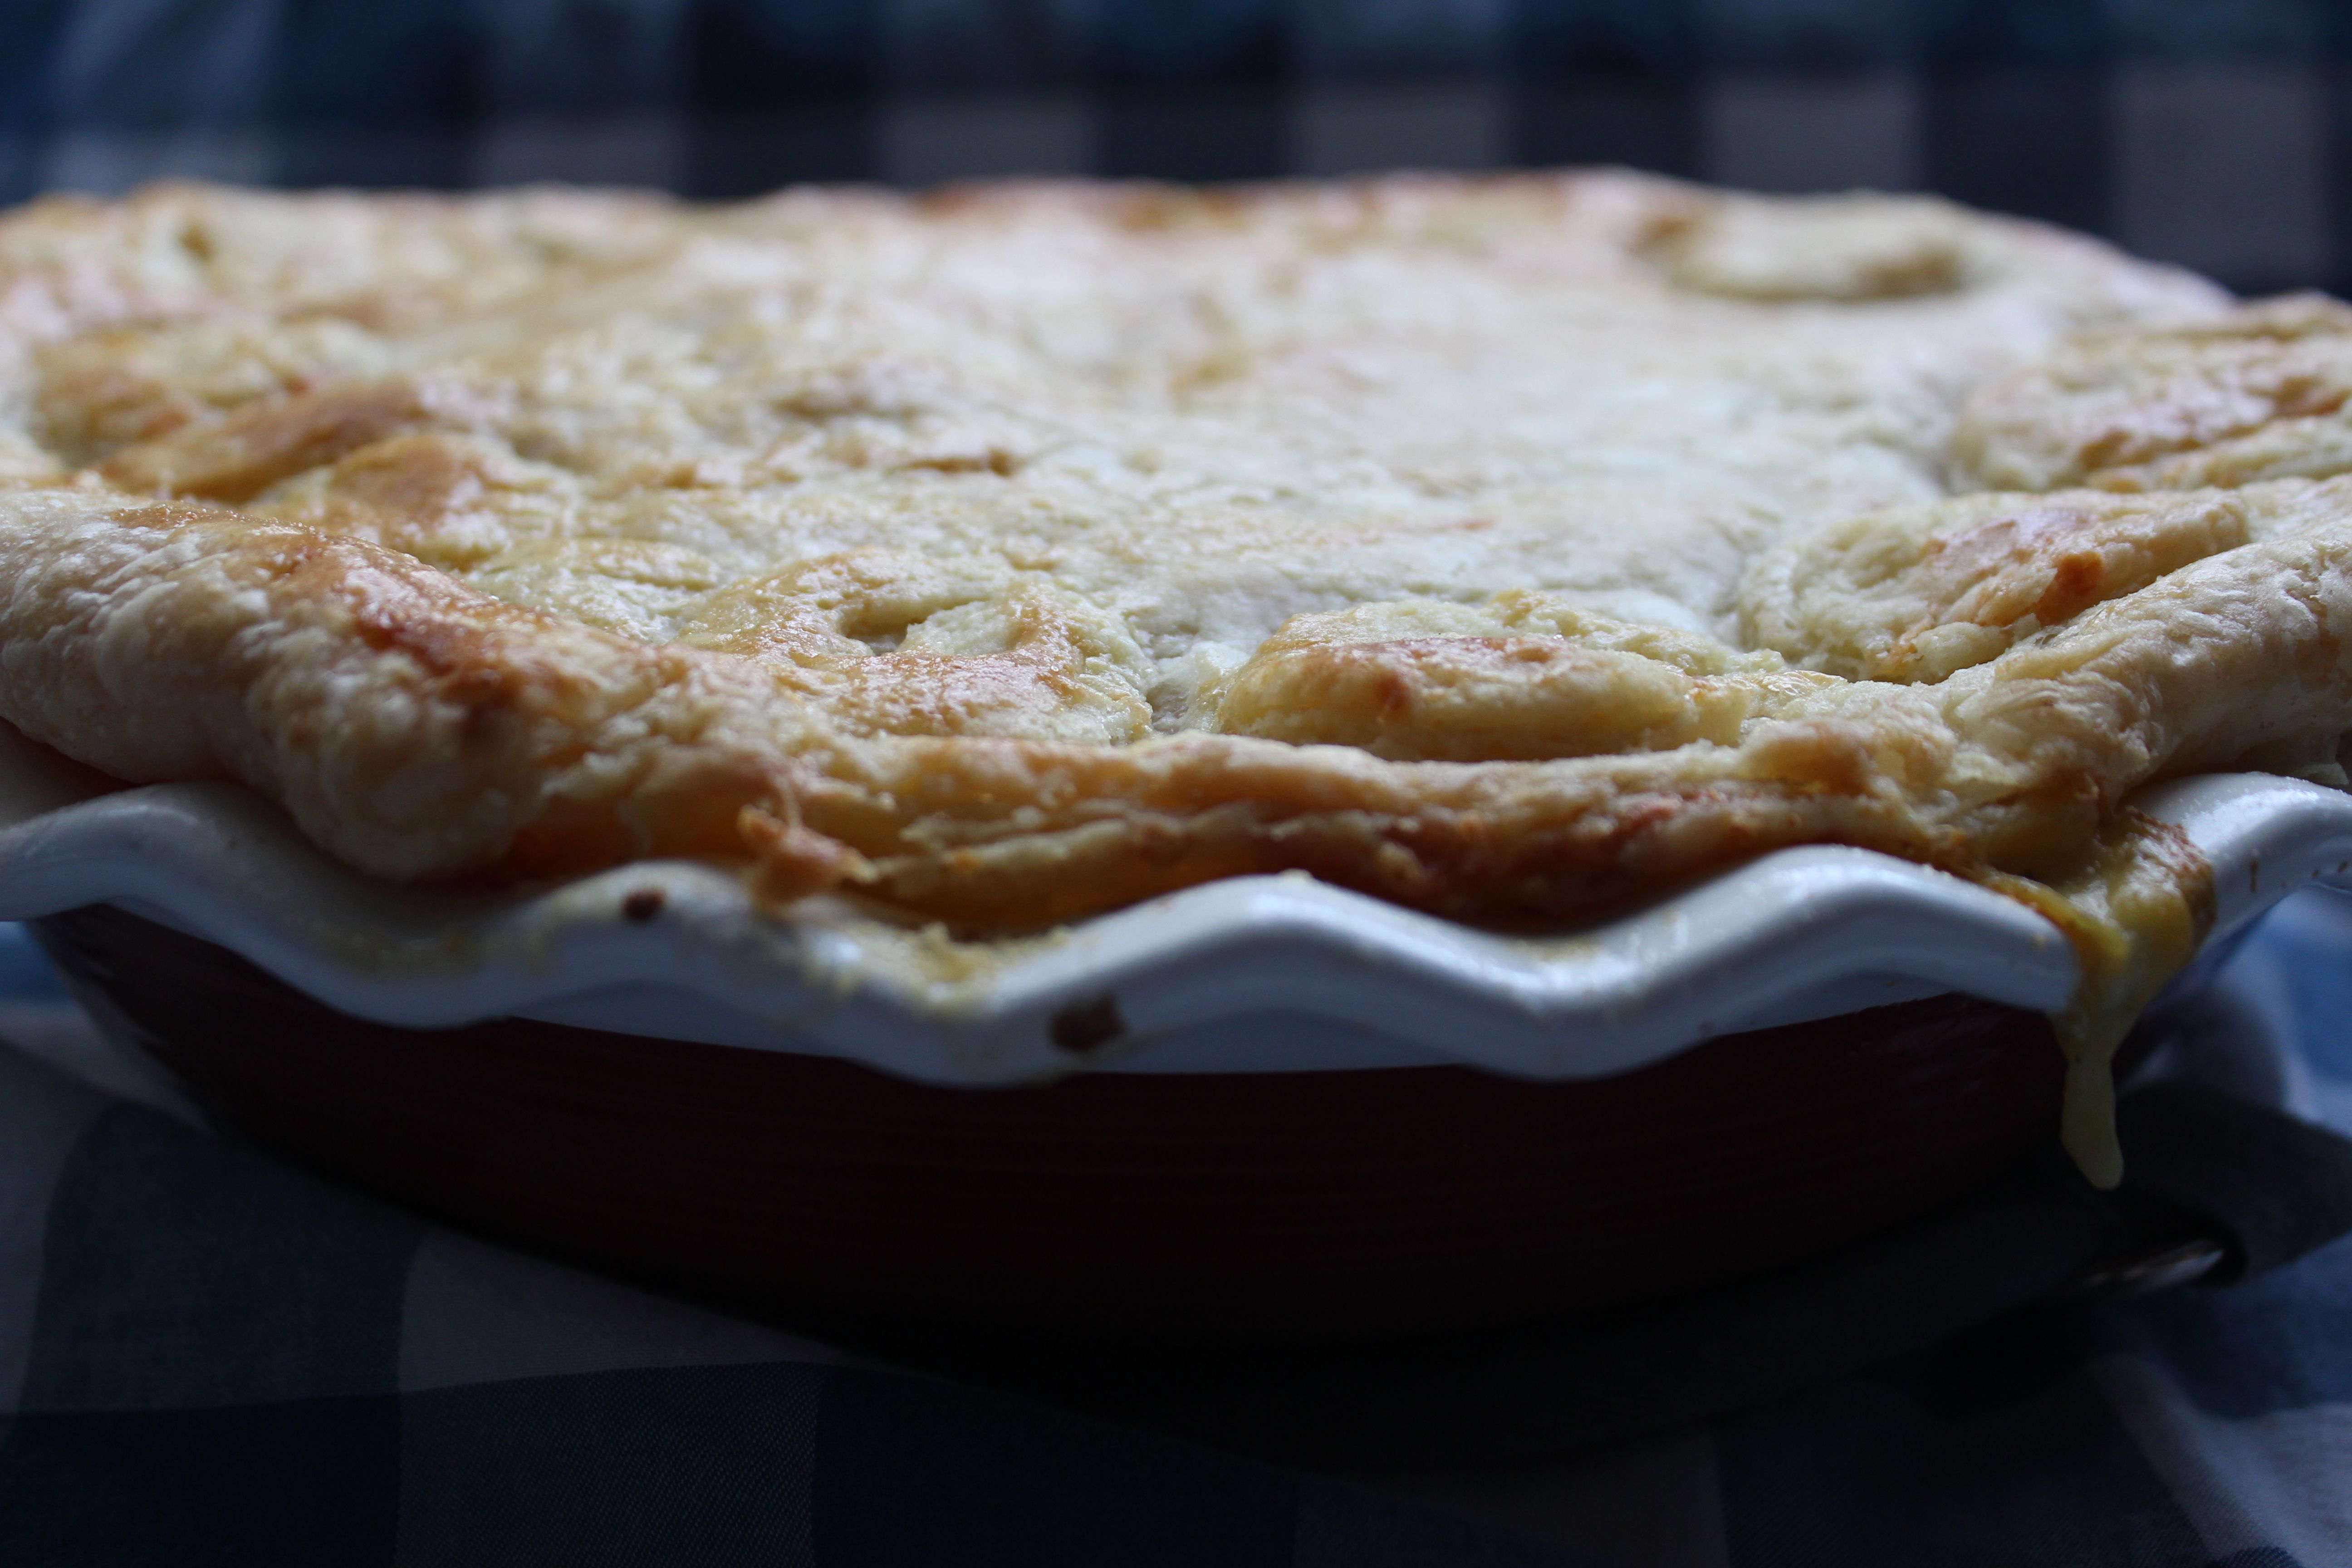
A chicken pot pie, with a sharp cheddar crust was the pie to be baked.  And, oh boy did I do that pie justice!

unnamed-21

Why oh why do people who make pie make it sound like perfecting a pie crust is the trickiest technique in the books?? Folks I did mine with a bowl, two folks, my god given fingers and the correct ingredients and BAM — flaky, golden pie crust from heaven.

unnamed-20

Let’s start with how I went about making this dish.  It is a process, I started the entire deal at 1:00 and we ate at 5:00.  Of course I had breaks in between, but chicken pot pie is a dish that needs a lot of loving and I promise you this one in particular is worth every second of a lazy sunday afternoon!

This recipe is to make TWO pies.  Both with a double crust.  So, cut it in half if you are wanting to make just one.  Honestly, if you’re going to take the time to whip it up, there is nothing better than having one to toss into the freezer, which is why you always see me doubling my recipes!

First –  the pie crust.

unnamed-19

Sharp Cheddar Pie Crust
Author: Abby Thome
Ingredients
  • 5 cups unbleaced all purpose flour
  • 2 tsp salt
  • 2 tablespoons sugar
  • 4 sticks of unsalted butter – cubed and chilled in the freezer
  • 2 cups ice cold water (plus more if needed)
  • 1 8oz block of sharp cheddar cheese grated
Instructions
  1. This is a DOUBLE recipe, for a DOUBLE crust. So, feel free to cut this recipe in half to end up with 1 perfect pair of pie crusts for a top and bottom dish.
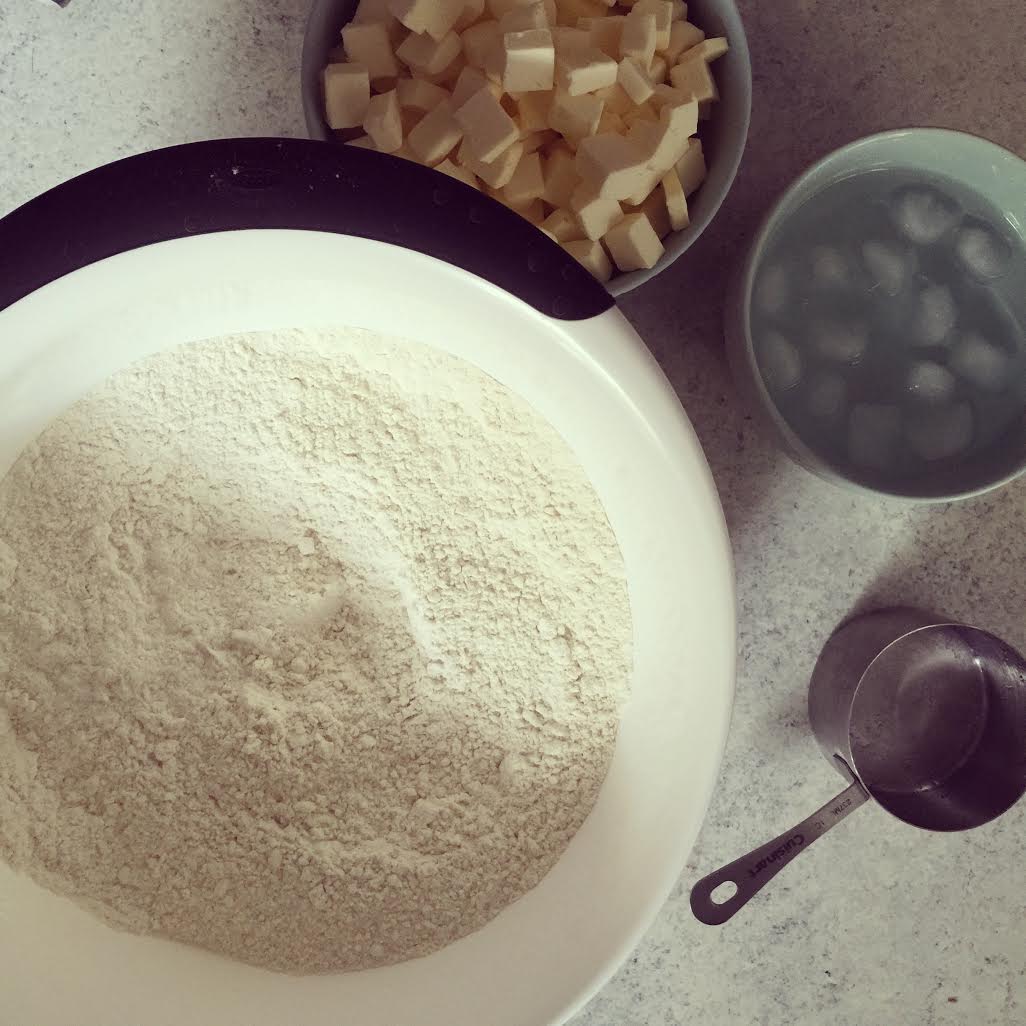
  2. First, whisk together the flour, salt and sugar.
  3. Secondly, add your cubed butter that has been chilling in the freezer for 30 minutes.
  4. With a pastry cutter, or two forks, mix the butter into the flour until the butter resembles the size of peas and the flour is just barely, if at all incorporated.
  5. Pour in 1 cup of the iced cold water, and stir together with a spatula.
  6. Add an additional cup of ice water, the pie crust should come together a bit more.
  7. I used an additional 1/2 cup of ice water for my dough
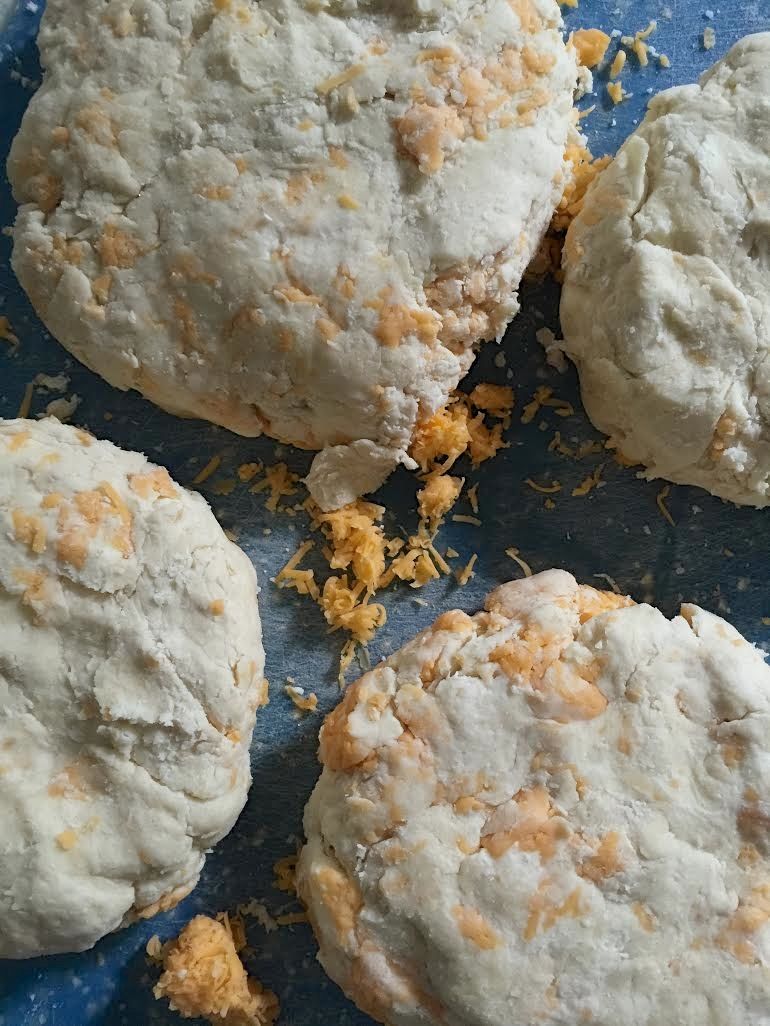
  8. Once the water was in, stir in the grated sharp cheddar cheese
  9. Knead the dough with your hands until a nice big ball forms, do not over mix, it still will be a bit crumbly in areas.
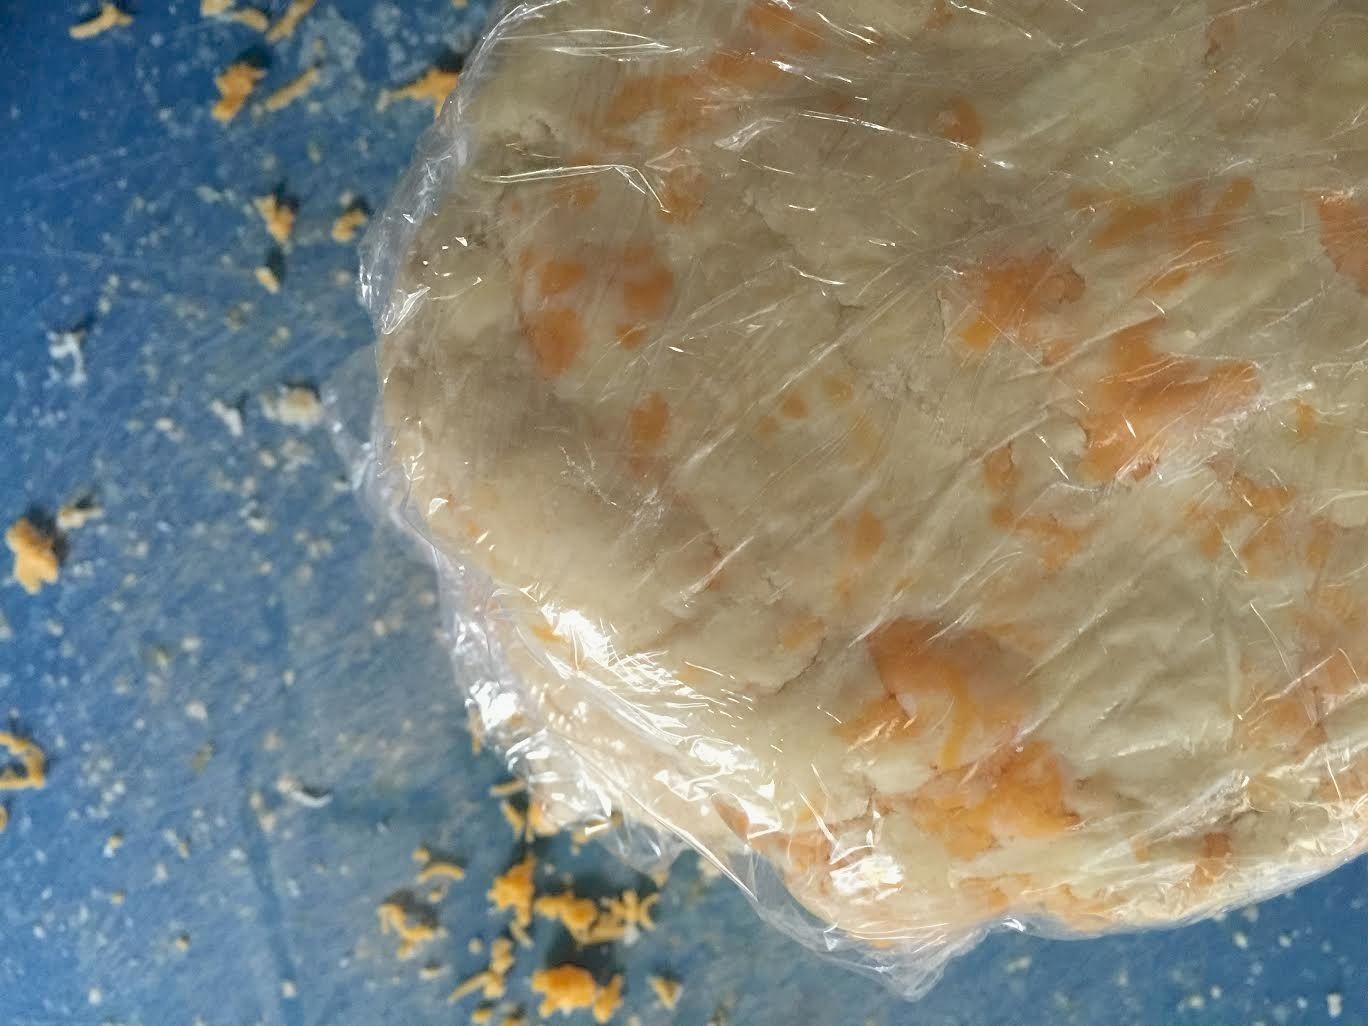
  10. Form 4 even balls, flatten into disks, and wrap with clear wrap.
  11. Set in the fridge to chill for 1 – 2 hours until you are ready to roll
3.3.3077

Whew, okay do not let the pie crust intimidate you.  I’m begging you — I told Dan at dinner that it is almost a joke how fearful I was of making crust.  I am now a firm believer in pie crust making, even more, adding unexpected flavors to my crust has left me addicted to this process.

An all butter crust is the way to go.  Forget about the lard or shortening (eh, the thought of those ingredients just makes me gag).  Use the real deal, ice cold water, freezing cold butter, you’re all good.  Oh, and the sharp cheddar added in at the end just made this crust out of this world.  It added the tangiest depth to this flaky dough, helping it crisp up and have a gorgeous golden hue.

IMG_4188

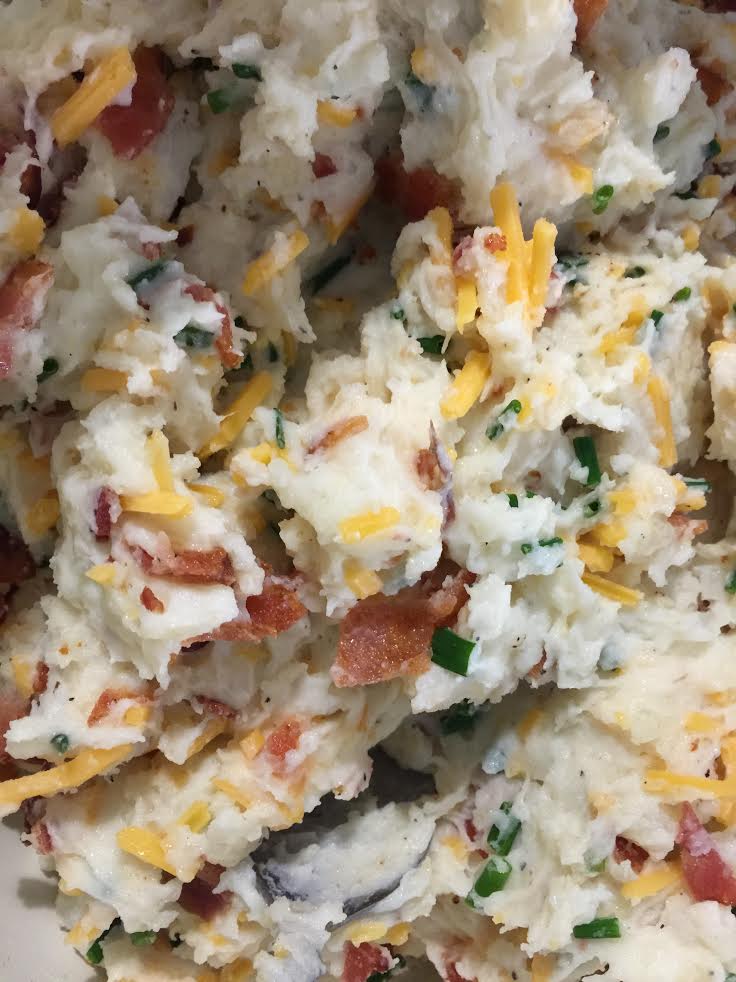
Now, onto the filling! I was spooning this into my pregnant face while stirring it.  I seriously could not help but pat myself on my back! It is amazing how cooking a dish can bring you right back to your childhood – I am so grateful to have a mom that always had a huge passion for cooking, because it spread right through me too.  Hence, my 10+ paragraphs talking about chicken pot pie …. you can stop me if you’d like, but look at this baby …..

IMG_4199

Ingredients:

Roast 1 head of garlic in the oven – cut the top off, sprinkle with EVOO salt and pepper.  Wrap it up with foil, place it cut side down, and bake for 40 minutes.  Set aside.

4 roasted chicken breasts.  Seasoned with extra virgin olive oil, salt, pepper and a pinch of herbs de provence.   Baked at 375* for 25 minutes

6 large carrots, chopped.  6 stalks of celery, chopped.  2 onions, chopped.  3 potatoes, peeled and chopped.

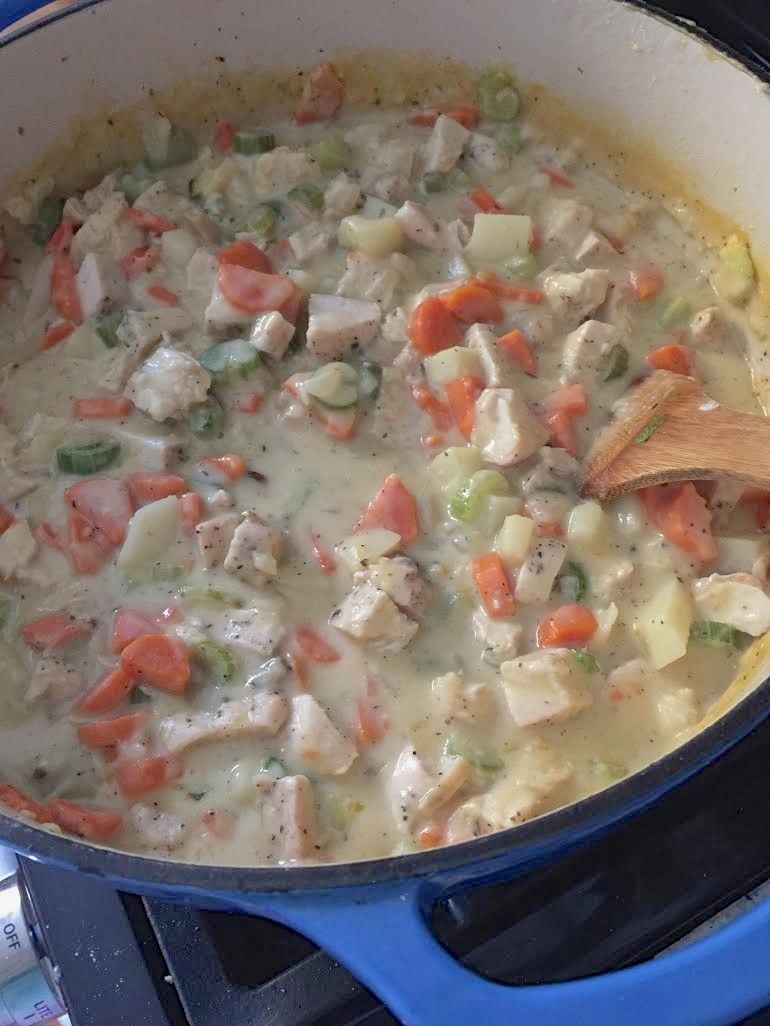
In a dutch oven, on medium-high heat, saute the veggies with a few tablespoons of extra virgin olive oil, salt and pepper, and a dash of herbs de provence.  For about 10-15 minutes until the veggies begin to tenderize.  Next, add 1/3 cup flour,  simply sprinkle it across the veggies and toss in 3 pats of butter.   This provides the base for what will thicken your chicken stock + milk.  Stir in 1 cup half and half + 4 cups chicken stock.   Toss in 1 boullion cube for an old school punch of flavor you just cant mimic.  Squeeze out all of the roasted garlic bulbs into the filling as well.  By now, your mouth will be watering.

IMG_4195

Let the mixture come up to a boil, and reduce the heat to medium – low until the sauce has thickened like a gravy.   Turn off the heat – and get ready to start your pie crust and get this beauty assembled.

IMG_4192

Now for the assembly! 

Roll out TWO of your pie crusts — Placing one in the bottom of your pie pan, poking holes with a fork in the bottom.  Bake it at 375* for 8-10 minutes until barely golden.

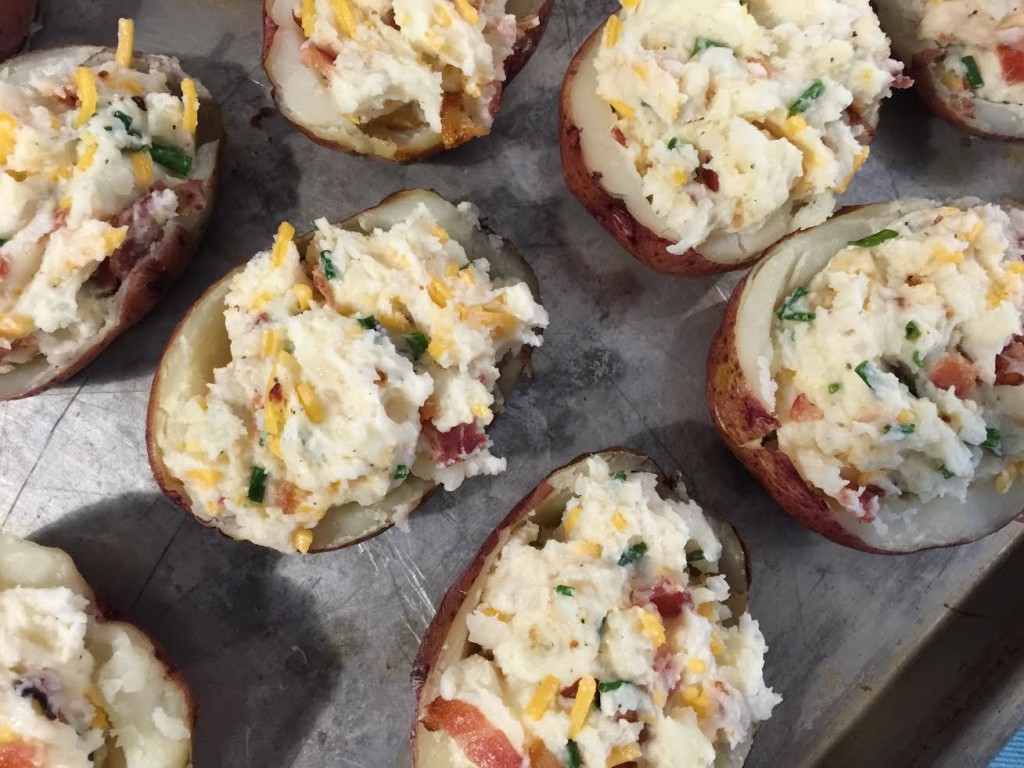
Once the bottom crust has baked, take a handy dandy scoop and add as much filling as you’d like – I added about 4-5 cups to my pie pan (I like my pies plump).  Take the other rolled out pie dough and place it on top, crimping the edges.

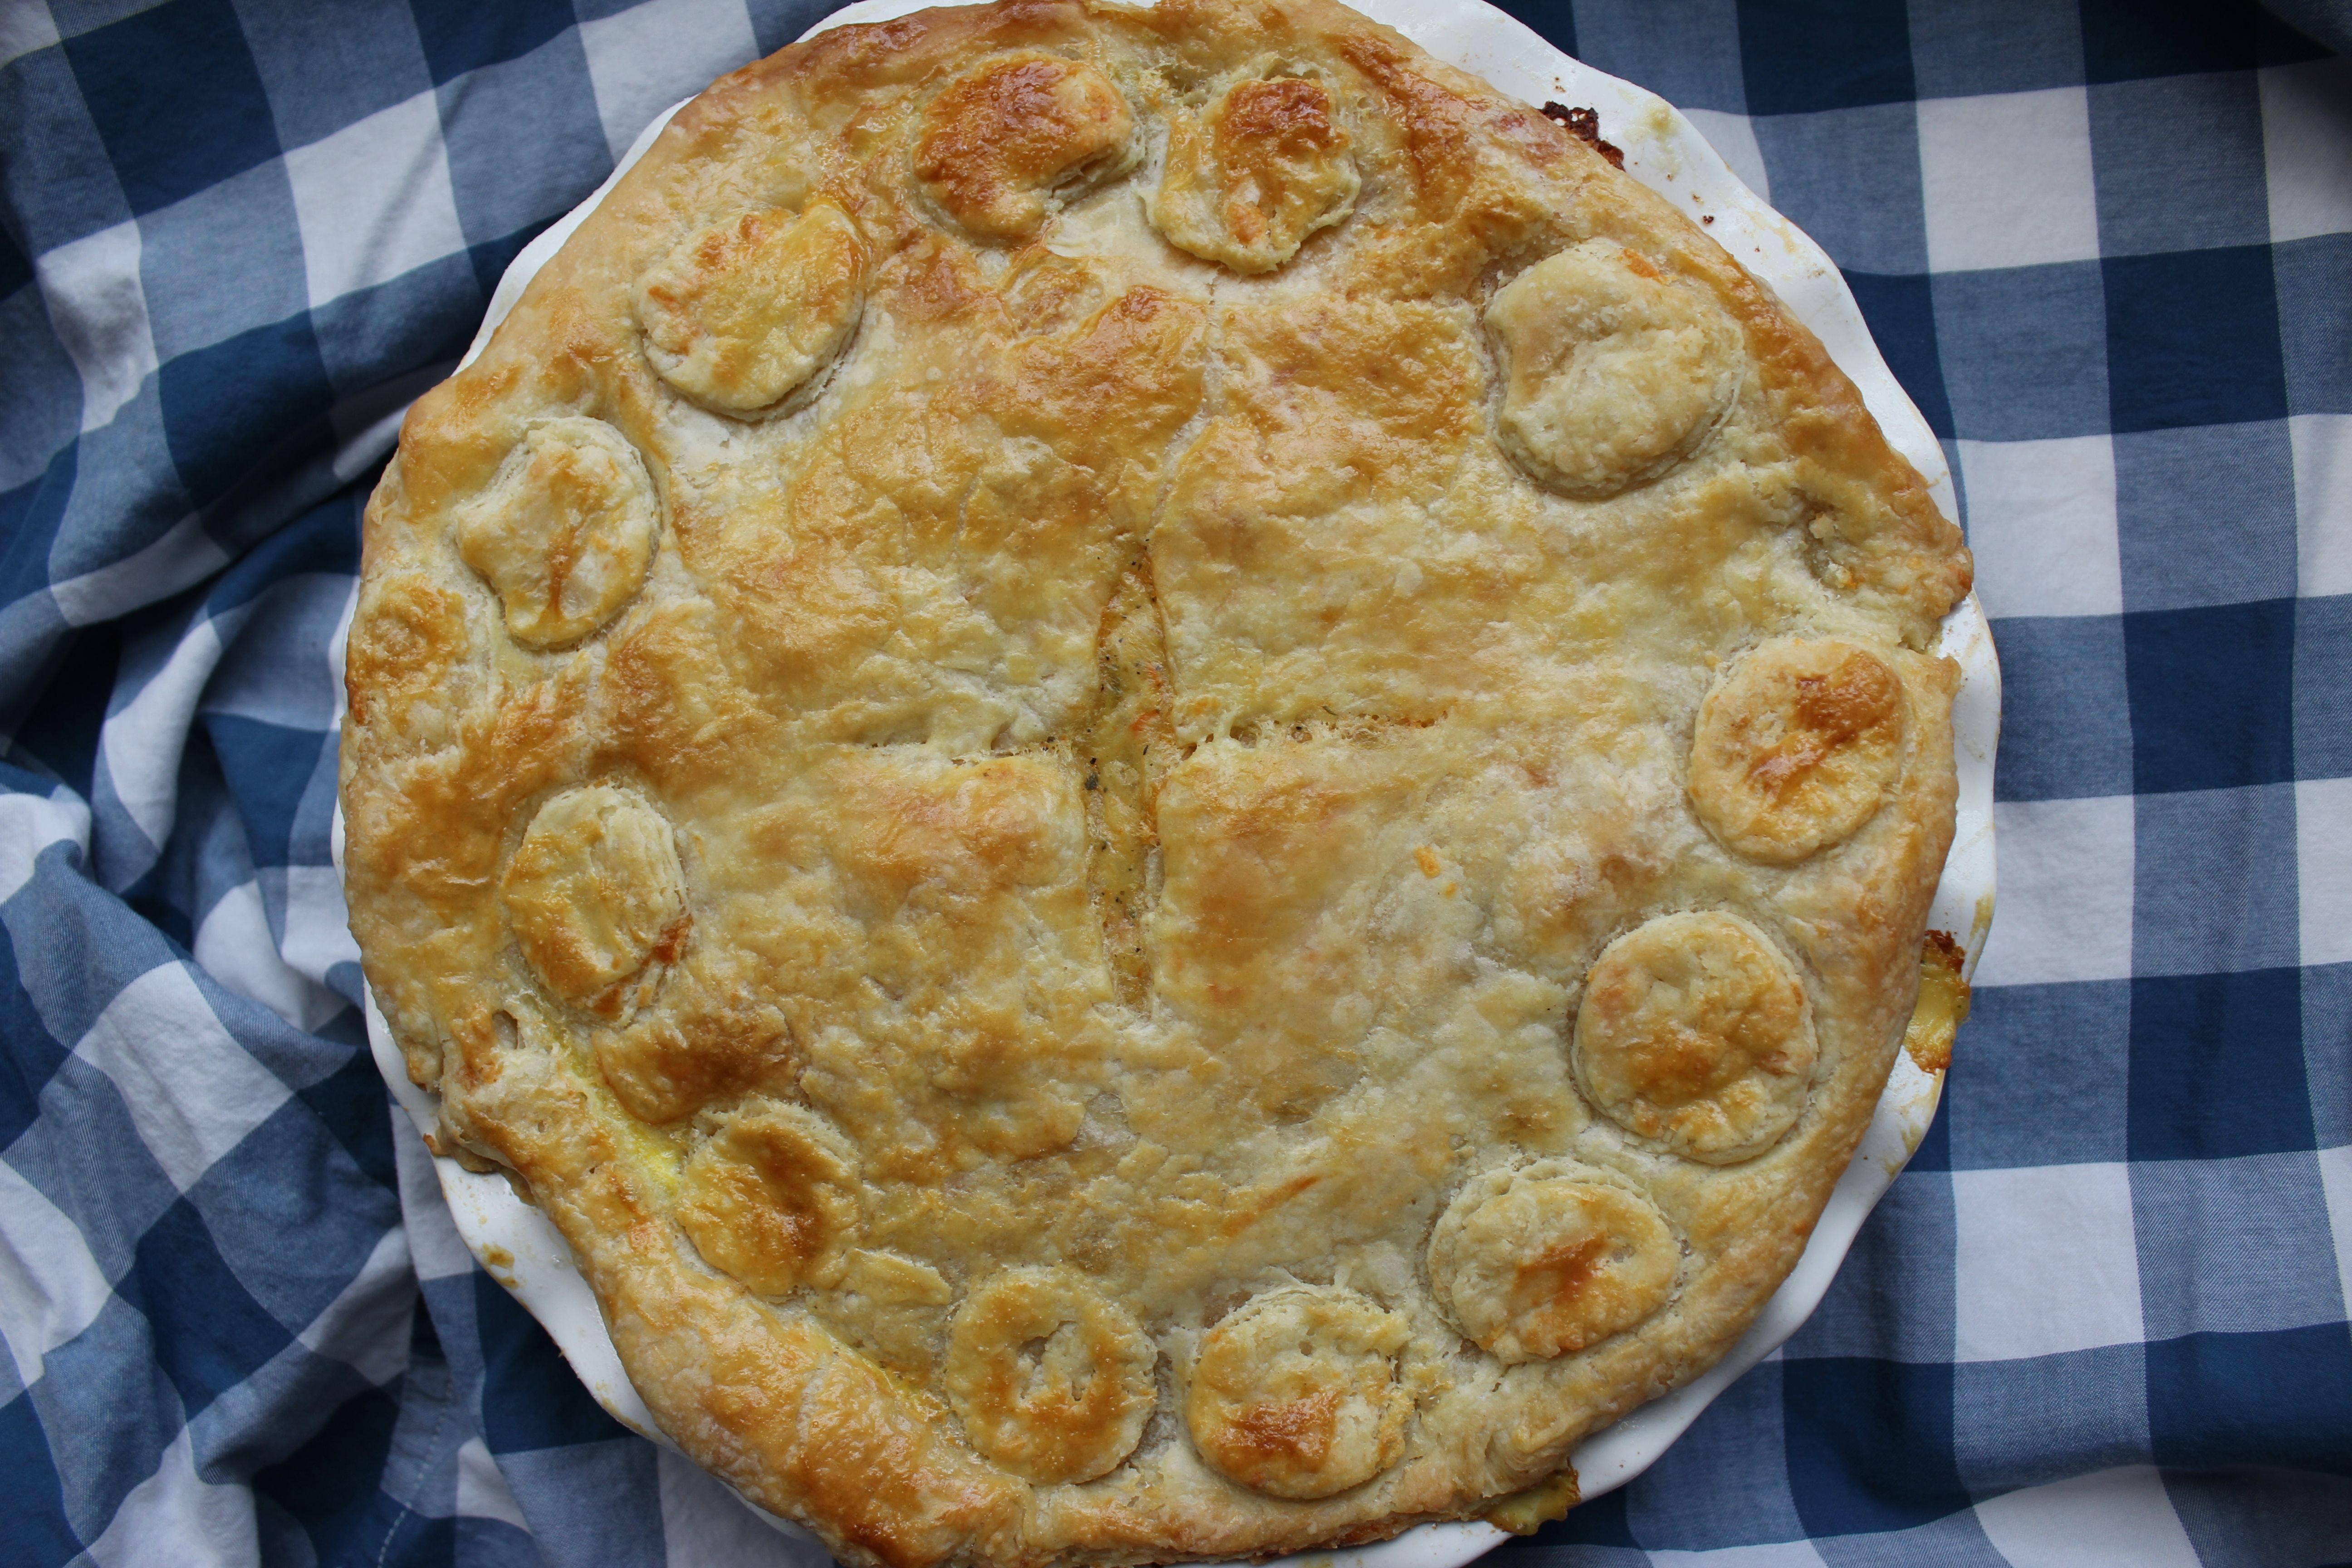
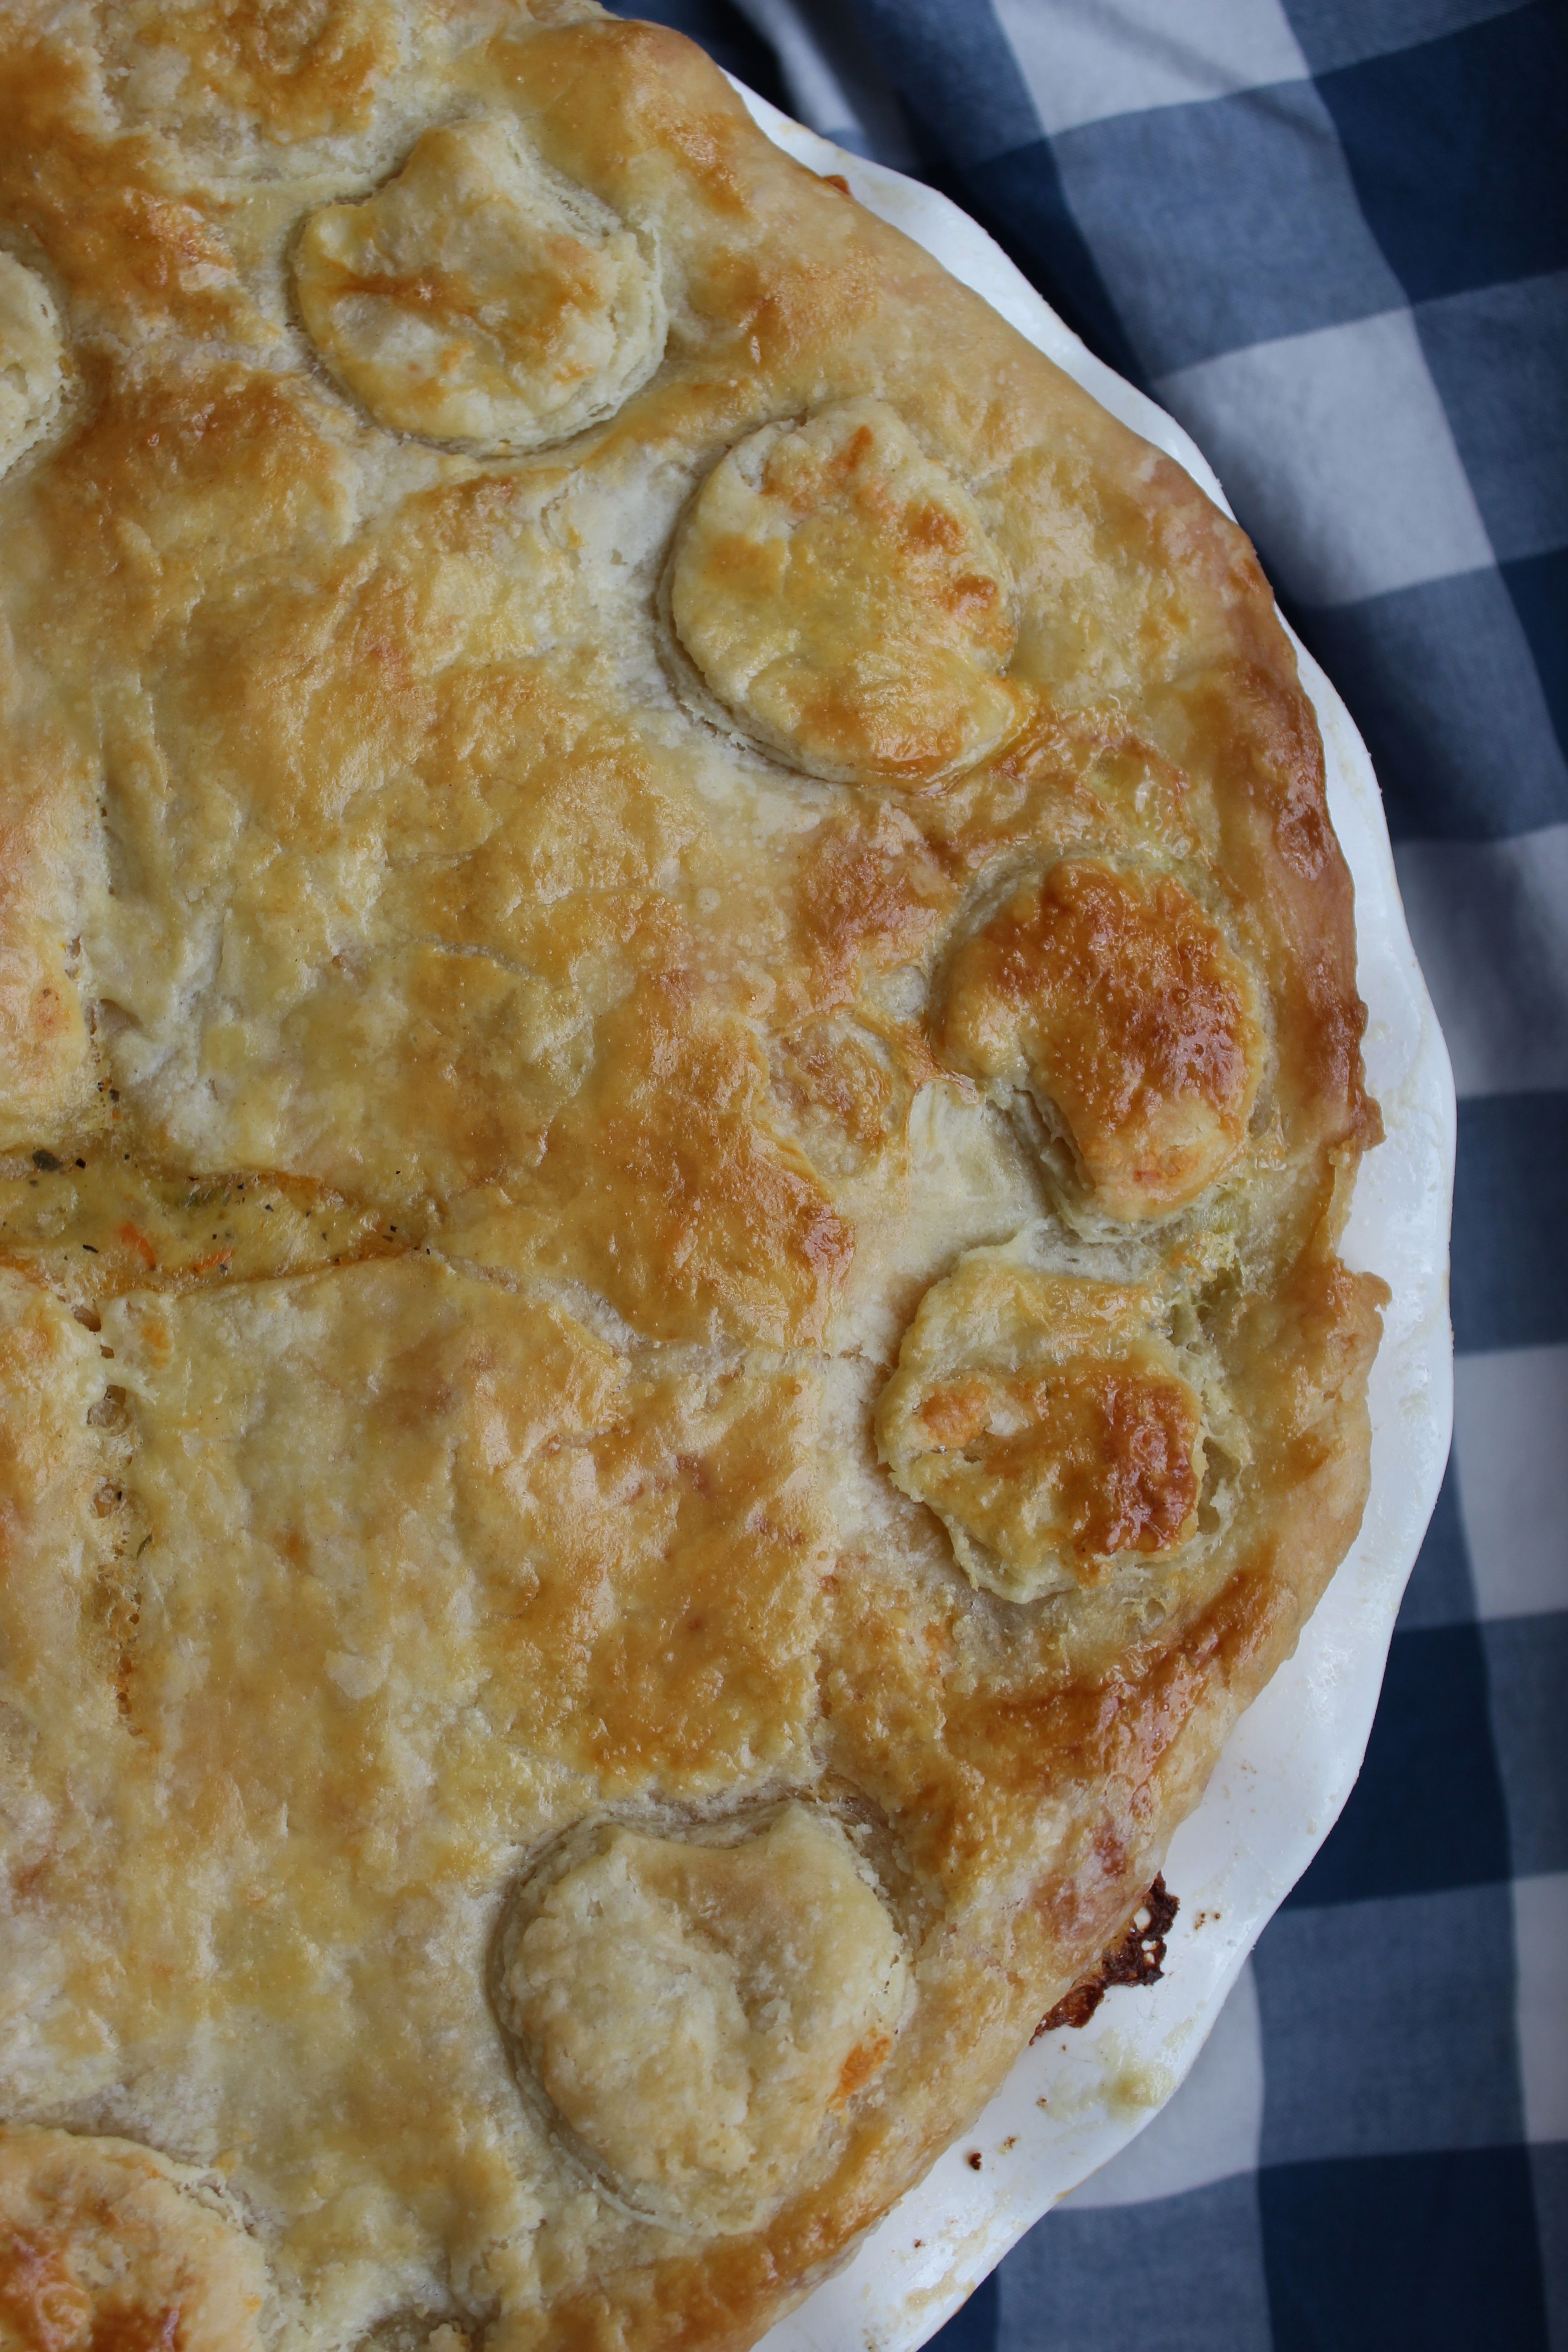
Last but not least, whisk an egg and brush the entire top with it to ensure a golden crust.  Cut a slit or two in the top for ventilation and bake at 375* for 30 minutes, or until the crust is golden.

If you’d like to make the second pie, do the exact same steps and bake away.  I saved my pie dough + cooled filling for the next day, in the fridge, to be assembled, baked and cooled – to be put in the freezer for a chilly winter day when I am craving this dish again.

Let cool for 15-20 minutes before slicing and serving, that is, if you can wait that long 🙂

IMG_4198

 I am so happy I took the pie crust plunge and just did it.  I panicked hours before, wondering if I should run and grab a food processor (how a lot of cooks show it on t.v.) …  honestly, just following the directions and using exactly what is called for is all you need to be on your way to a delicious pie crust.

This sharp cheddar pie crust would be amazing for an apple pie, a quiche, or even twisted into ropes and baked for dipping into soups this fall. Either way you have it, make this chicken pot pie and it is sure to turn into a family favorite!

Filed Under: Our Bites

Pumpkin Bars with Cream Cheese Frosting

October 14, 2015 by Abby Thome

Pumpkin Bars with Cream Cheese Frosting

I woke up this morning and went through my mental files of all that I could post for you today and these pumpkin bars were pushed straight to the top of the list.  I’d like to blame it all on the pregnancy, but craving sweets is not on my radar.  The boys, I liked everything, sweets and all – give it to mama, I’d eat it.  This time around I’m a bit more particular, and for some odd reason I want veggies – Oh the #6 Veggie sub at Jimmy Johns calls my name daily and I try my best to ignore it, only falling for its calling once a week.

The nausea has been so daunting this pregnancy – that’s all new to me too.  Maybe because it has been nearly 5 years I have been pregnant, my body is just doing this differently? But at 10 weeks, I’m still chugging along the “all day” morning sickness.  Throw me some pasta, pickles, cheese and crackers, or carrots and hummus I am one happy lady.

IMG_4151

 I made these pumpkin bars a few weeks back, hoping they would be the perfect friend for a late night treat.  I never got around to sitting down and eating a slice ( don’t worry, I tasted them ) and they are out of this world good.  Instead I fed it to family, who loved it as well.  Man, I miss my sweet tooth …  but I guess I’ll balance it all out in pasta and veg.

unnamed-17

(Sitting here with one of my main squeezes, Owen – whose been home sick all week.  My handy dandy carrots and hummus and an intense game of tic tac toe.  It’s all in balancing, this motherhood thing)

For now, make these, ASAP.  Post me a picture on social media and tag me.  Rub it in my face that you’re in the mood for sweets while I crunch away on what the land has given me.  Oh sweet baby, you sure are twisting things up this time around!

IMG_4147

I snuck a few bites straight out of the pan when I was taking pictures and I could not believe how moist (sorry if you hate that word) it was – the best pumpkin anything I had ever made – and now you can too!

Pumpkin Bars with Cream Cheese Frosting
Author: Abby Thome
Ingredients
  • 4 eggs
  • 2 cups sugar
  • 1 cup vegetable oil
  • 2 1/2 cups pumpkin puree
  • 2 cups unbleached all purpose flour
  • 2 tsp baking powder
  • 1 tsp baking soda
  • 3 tsp pumpkin pie spice
  • pinch of salt
  • FROSTING:
  • 1 block room temperature cream cheese
  • 1/3 cup room temp unsalted butter
  • 2 cups powdered sugar
  • 1 tsp vanilla
Instructions
  1. Pre heat the oven to 350* Line a 9×13 baking dish with parchment paper
  2. In a large bowl, mix together the eggs, sugar, oil and pumpkin puree. Once incorporated, add the flour, baking powder + soda, pumpkin pie spice and salt.
  3. Stir all of the ingredients together – until the dry is mixed well into the batter.
  4. Pour into your prepared dish and bake at 350* for 20-30 minutes, or until a toothpick comes out with few, if any crumbs attached.
  5. Let the cake cool completely in the pan
  6. For the frosting, blend all of the ingredients together until smooth and fluffy. Frost your bars in the pan once they are completely cooled.
  7. Slice and enjoy! I kept our pumpkin bars covered in the fridge and they lasted all week long!
3.3.3077

IMG_4149

Filed Under: Our Bites

Ryobi to the Rescue!

October 13, 2015 by Abby Thome

Ryobi to the Rescue!

This is a sponsored post with Ryobi Outdoor Power Tools.  A huge thank you to Ryobi for helping us tackle our jungle outside! 🙂

When an entire new group of outdoor power tools show up at your door step you count your lucky stars they did! It literally felt like Christmas morning for Dan and I, you guys.  I cannot begin to thank the team at Ryobi that helped us gather up the courage to tackle some of our most overgrown and neglected areas outside.

Not an area outside bothered me more than this side of our house.  We have a gorgeous brick chimney that was hiding behind a jungle of weeds and trees.  Homeowners always worry about the front of their house, and often neglect the sides.  Figuring they are not seen as well from the front of the house, well, let me tell you, they are seen, and when it looks like this, it’s sight for sore eyes!

IMG_3981

It’s a tough area to judge with your property line, obviously we know where our line lies, but if the land right next to it looks like hell, well, you want to clear it ALL out.  Best advice I can give, if you want to clean the entire area up, just ask.  Most neighbors will say yes because you are saving them tons and tons of time!

IMG_3982

We had SUPER sloppy plumbing just scrambled at the side of the house, so Dan went to town digging new lines and finally they are all underground and organized to drain properly!

IMG_3983

See ?! Ha…. The pipe that drains, well, there.

unnamed-16

Now we have plumbing that is not only hidden, but is functional and will save our grounds from getting too soggy near our foundation.

Dan went to town on this area with his new Ryobi tools, and in no time at all, we were left with a fresh blank slate to figure out the next step of landscaping!

Ryobi was OH So generous and sent us a ton of goodies to play around with …

String Trimmer /Edger Combo

Lawn Mower

Chainsaw

Edger

IMG_4175

I love being able to see our chimney now, brick always makes me a happy lady.

Once everything was cleared out, Dan and his buddy decided to build a retaining wall that stretched around the front and corners of our house.

This retaining wall was a piece we’ve been wanting to add for a while now, and it just goes to show, start small – tackle your projects piece by piece.  Clearing out the weeds and overgrown yuck is essential to starting landscaping that will stand the test of time.

IMG_4177

We still have to fill behind the retaining walls, but I adore the dimension it adds to the front of our house!

IMG_4178

IMG_4174

Now, around the bend we are left we cleared land.  We’ve gone back and forth on what we should place here – to hopefully add color and complete the project.  Whether it be fresh soil, and grass seed.  Or nice annuals that will stay green year round? What do you think?

I have to mention what fun I have had with these tools as well, you guys.  The lawn mower is so light and easy to use, I dare to call it FUN to use! Even my neighbor asked how it was so quiet, it is an impressive piece!

Without those Ryobi tools we would still be staring at the side of our house, covered in weeds and dying shrubs – feeling like it was too much to tackle with our bare hands.   A few hours and some amazing outdoor power tools and we were able to accomplish exactly what we set out for!

A big thank you again to Ryobi! An amazing company, with impressive tools that help us tackle our everyday projects!

Filed Under: Our Projects

The Thome Home Baby #3

October 7, 2015 by Abby Thome

The Thome Home Baby #3

Our best DIY project to date ….

We’re having a BABY!

If it wasn’t for the unreal “morning” all day sickness I have I would have to pinch myself to believe it true.  But, here we are, just a few days shy of 10 weeks and myself, Dan and the boys are so very excited to share the news with you all!

12068498_956211801121448_8755691921121506161_o

We planned on trying at the end of the summer, kind of kept the boys in the loop by saying we were ‘praying for a baby” and we are still counting our lucky stars that it happened right away for us this time.  It took such a leap of faith to start trying again, since the miscarriage, but I am so glad we went with our gut and did!

The shock lasted a few days when we tested REALLY early and had a positive test.  The following few weeks were nerve wrecking … I really was just waiting to miscarry.  But this ever-persistent all day ridiculous sickness was just enough to nudge my conscience into letting me know that everything was going well.

Last week we took the kids to our first appointment – we were not sure if it was a bad or good idea, but something told us to just roll with it.  We sat them down the night before, and told them we were taking them to the doctors for mom’s appointment.  They knew right away, “To see the baby!?” We corrected them, “To see IF there is a baby” We didn’t want to get their hopes up, just incase.

Our new OBGYN is a riot, sweet, chatty and hit it off so well with our family.  It only took barely a second to spot the precious new addition with a bright fast heartbeat! It was emotional, but in a super happy way – no tears, just sheer relief and happiness that everything was ok!

Brody had the best line during my ultrasound, he told my doctor “We prayed for a baby, and BOOM it just got in there!” We laughed our pants off, well, mine were already off 🙂

Up until that day, our parents did not know so we were SO ready to spill the beans!

IMG_4173

We told Dan’s Dad  (he goes by Papa) when we picked him up for a quick stop at our local apple farm.  We put the ultrasound in a box of doughnuts, which was so cute to see him so surprised.  We told Nana  – well, we were cut short by Brody grabbing the ultrasound and running towards here saying “Guess what! We have a baby!” It was just adorable.

The next day we “hid” the ultrasound in a frame on our end table, hoping my parents or my brother + his lovely gf would notice.  It went unnoticed, and I gave Owen the nod to share the news.  Literally, “Um, Gigi (my mom) We have a baby!” “My mom!”

Oh the excitement was high and we spent the following hour just chatting about names and guesses on the sex etc.

We could not be any happier for this new addition.  A dream has really come true for us!

Baby T # 3 is due May 7, 2016.  Same due date as Owen’s, but they induced me a week early.  So it will be exciting to see how close their birthdays will be!

Thanks for all the love, we are surely feeling it all

xoxo, abby

IMG_4172

And YES… I am showing already, BIG time.  I told my neighbors how usually I am a girl who prides herself on her flat stomach …  It starts out small, but like in this picture, by the end of the day its OUT there.  I was so surprised family did not point it out, unless they were being polite thinking I just added a few pounds to the scale! So hold your breath for me, I’ve had so many people seem shocked by it, but its the 3rd, I’m 5 feet tall, and well, I get huge with my babies.  Haven’t gained a pound yet, but it sure doesn’t look it!   So bring it on baby belly, we’re ready for you!

Filed Under: Our Life

Twiced Baked Potatoes with Bacon, Cheddar + Chives

October 5, 2015 by Abby Thome

Twiced Baked Potatoes with Bacon, Cheddar + Chives

Hello my people 🙂 Yesterday, Sunday, we kicked off the week a bit early with our amazing collaboration with Window Nation – you guys have got to check it out.  And if you are in the market for new windows, look no further we have an exclusive discount for The Thome Home readers, that by the way, does NOT expire!

Say what?! I know, I had to rub my eyes to when I read it too!

Over the weekend, I posted a recipe I was working on for when we had family over.  We made delicious ribs and these twiced baked potatoes that were to die for.  A few of you commented and wanted the recipe, so before my brain fog took ahold of me I decided to share it with you all right now!

unnamed-14

I did not plan to share this recipe on the blog – it was a simple side dish I was making on a whim.  But, when I took a bite, oh boy, it was something to be shared and made 10x over this fall season.

The “recipe” is simple.

What you’ll need ::

Potatoes – Bacon – Sour Cream – Butter – Chives – Garlic Powder – Salt + Pepper – Shredded Cheddar Cheese.

First step is making your bacon, and baking your potatoes.

Follow my recipe for making bacon in the oven …. by the way, now I just set the bacon straight onto parchment paper – forget the whole baking racks.  These tricks change over the years and the parchment paper works just fine and dandy.

At the same temperature (roughly 400*) Wash, dry, and rub your choice of potato with olive oil and bake for 1 hour.  We chose red skin potatoes, that’s simply what we like.

Once the bacon is done, set it aside on a paper towel to cool – same goes for the potatoes, let them cool a bit before handling.

The assembly …

Slice each potato in half.  Scooping out as much of the inside as possible – what you scoop out put into a separate medium size bowl.

Once all of your potatoes are scooped, set them onto another baking sheet.

In your medium-sized bowl your staring at the beginning stages of a mashed potato! Add butter, sour cream (a dollop at a time), and mix with a hand-held mixer until creamy and fluffy.  Add salt, pepper, garlic powder, stir some more.  Finally, FOLD in your bacon (CHOP IT), chopped chives and shredded cheddar cheese.

All of these ingredients were eye balled to taste (dont panic, it’s super simple.)

Fill your potato boats back up, and top with more shredded cheese.  You can either bake them right away (at 350* until the cheese is melted) or if they’re made in advance, cover the sheet with clear wrap and place them in the fridge until your guests arrive.

Same game plan for when you are ready to warm them through – 350*, uncovered, for 20-40 minutes.  Or until warmed through.

unnamed-15

These were just the right size, and the perfect addition to our dinner plates that evening.  I love a side dish that you can make ahead and have ready for when everyone comes over.

These were surely a hit! They’re making my mouth water just looking at them again …

Filed Under: Our Bites

Our Story with Window Nation + An Amazing gift for YOU!

October 4, 2015 by Abby Thome

Our Story with Window Nation + An Amazing gift for YOU!

( This is a sponsored post with Window Nation – The Thome Home was compensated for this review.  We are so grateful to be able to work with amazing companies that help our blog grow!)

As ALL homeowners know, the laundry list of things to fix in your house can feel like it is miles upon miles long.  The second we signed our paperwork to purchase this house, we felt like it should have come with a scroll.  A numbered list, of most important to least, with a budget outline and a sanity marker next to each project.  We thought we had it all figured out.  We purchased a completely neglected home, that not only had a ton of projects to make it livable on the inside, the outside list seemed just as long.

Windows were LAST on that list.  Not that they were not needed, we just put them on the back burner and busted through spring, summer and fall attempting to make this very house a home.

Funny how fast things change you guys, one wicked cold winter past us and we knew our priorities had to switch.  Say goodbye to the privacy fence or the finished basement – the windows needed to be replaced STAT.   Not only were our heating bills SO high, you could sit on the couch and feel the breeze coming through the windows. The draft was like someone poking us in the back – so this past spring we decided enough was enough and we needed to give our home the windows it deserved so that we could be nice and cozy this winter and save on our energy costs!

IMG_3518

We turned to Window Nation to replace our windows.  The best in the business – not only for their product but their customer service is superb.  The day the old windows were ripped out and replaced we felt a complete weight off of our shoulders. It transformed our house in ways we never anticipated!

IMG_0110-1024x768

Let’s start with Owen’s bedroom.  The windows in his room were the worst.  One was cracked, and the frame was falling apart.  A window that could not be opened, let alone safe enough to touch.

IMG_4166

With our new Window Nation windows, not only do they look flawless – they have added such ease to our day.  The simple things – like being able to open and close the windows with barely the push of a thumb.  In the past, we would grunt, push and I would end up yelling for Dan to help me get it opened and closed.

IMG_3974

One of our favorite features to these very windows are the safety latches.  They are on every window, but for the kids bedrooms it brings us such peace of mind.  These small latches “pop out” so you can set the window open a few inches, and at the same time prevent your little one from being able to lift it any further.  Brilliant.

IMG_0330-768x1024

We LOVED the idea of our kitchen window – but despised the idea of the cranks and the giant window pane that stuck out onto our porch when we wanted to open them.  It was like having an old car without power windows … just was not up to our speed!
IMG_4169Now we have gorgeous sliding windows that let the breeze flow completely through our front entry way and we love them so!

If you have been an avid reader for a while now, you already know that our family room is by far our most favorite space in the entire house.  It is large, the wood beams that stretch the ceiling, the picture window in the back and the built in’s … I could go on and on.

This is what it looked like when we “fell in love”

IMG_0094 IMG_0093

Dark and dirty! The picture window was a major focal point of the room, but it did not open, was covered in dark red paint and was screaming to be brought to its potential.  We also had french doors to the right of the window, opening up to our deck.  The french doors = HUGE issue.  There were gaps everywhere.  So not only the wind, but the rain would come into our family room.  I love the outdoors, but lets keep it outdoors shall we?

IMG_4170

IMG_4152

Our new sliding doors have been such an amazing addition to our family room.  They are not only sleek and functional, they add SO much light to this space which is exactly what we needed in this large room.

IMG_4159

We had some old wood work framing the old french doors, so we were a bit bummed to see that detailing go.  In the blink of an eye, the contractors were already building a replacement frame of wood that looks so sharp! We were so happy for this unexpected treat!

IMG_4161

We are ever so grateful for the amazing job that Window Nation did – the contractors were amazing and super professional and thorough.  Even down to the caulking – (you know we are DIY freaks, so we wanted everything to be perfect) and the crew’s work continued to wow us as we walked through our house.

Best of all, we feel so proud of the investment we have made for this house.  One that will last decades from now, and save us a ton of money in the meantime!

unnamed-13

^^ Before WINDOW NATION^^

IMG_4168

If any of you have been tossing around the idea of replacing your windows, now is the time!

Window Nation is providing an EXCLUSIVE offer for The Thome Home readers!!

30% off of your order if you mention “Abby Thome” at your consultation! Minimum order of 3 windows, maximum savings of $3,500.  That’s a whole lotta dough! 

We are jealous to say the least! Now is the time you guys! You will not regret it!

Check them out on Facebook + Twitter!

Filed Under: Our Projects

Gentlemans Box # 2 – Perfection for Fall.

September 30, 2015 by Abby Thome

Gentlemans Box # 2 – Perfection for Fall.

*This is a sponsored post on behalf of Gentlemans Box.  They provided this amazing box for us to share with you all! Thanks guys!* 

Remember when I introduced you guys to this amazing subscription box for you man this past spring? You can read all about it HERE. 

Just as Dan was aching for another box, the amazing crew at Gentlemans Box reached out to us to review another box for them.  Yet again, we sit completely amazed by the quality of products that come in this set each and every time!

IMG_4131

This box had me at plaid.  I know, I know, this entire subscription is all about my man.

IMG_4128

 But all ladies know all to well that when their man is looking dapper it sure leaves a lady feeling like a million bucks too.  This plaid pocket square is just the right touch for Dan to mix into his work threads to bring fall into the workplace.

IMG_4127

An amazing black bow tie that I am certain will be rocked at many weddings this coming year.

IMG_4126

Don’t get me started about how happy I was to see these Taft “no show” socks.  Dan is obsessed with perfect form-fitting socks for his dress shoes and now this saves me shopping for that perfect pair!

IMG_4136 IMG_4135

I am already going to sign him up for next month, you can do so too here, at Gentlemans Box  just peaking at what we’ve missed out on in previous boxes makes me want to get Dan back in the loop!

All of these pieces retail for over $76! So it is a no brainer to add this to your mailing list for your man for just $25 bucks!

A big thank you to Gentlemans Box, we love working with you guys!

Filed Under: Our Life

Oh, Hi!

September 29, 2015 by Abby Thome

Oh, Hi!

unnamed-10

I wish I could explain the absence I’ve had on this blog lately.  I’ve had tons of recipes I’ve cooked, zero of which I have photographed.  We’ve had home projects completed and nothing to show for it here.  Two years ago I would feel super flustered with myself – that I was not so on top of things as I usually am.  But, the truth is, we have amazing things happening over here – and I am taking each and every day as it comes, not rushing to be the first to pick up my camera and document each moment and recipe.

unnamed-5

I’ve been able to kick back the past few weeks and let go of the stress of maintaining the blog, which, if you are a blogger too, know that sometimes you need a moment.  A minute to hit the refresh button.

unnamed-8

These boys are getting SO big SO fast, and this past month we have enjoyed so many fun days together.  My days/evenings are not strapped to the computer and I am all hands on deck.

unnamed-6

Not to fear, this blog is not going anywhere.  At all, infact, if anything this little “break” has given me so much time to think about the direction I want to take this space.

unnamed-7

Next week I have to put on my big girl pants and get full fledge back into the mix, which I am super excited about.  Sometimes, a momma just needs her own little time out.

unnamed-13

So, my apologies for those who have stopped by here and were disappointed by not seeing anything new on here.  It gets to me too.

But with a little break, and lots of time to think, I’ve got plenty of amazing things to start back with next week.

So, thanks for hanging in there, dealing with my “I need a moment” moment. unnamed-9

Life is far to fast …. so slow down, pet some goats.

xoxo abby

Filed Under: Our Life

Sunday’s Best

September 21, 2015 by Abby Thome

Sunday’s Best

Happy Monday you guys!

Last week was such a rollercoaster, Brody was sick – super sick.  This is something we have grown accustomed too since his diagnosis.  You can read about it here, here, and here.  As a parent whose child has a particular issue, that will last his entire life long, it can be extremely overwhelming and heart-wrenching all at the same time.

unnamed-4

We have learned this thus far … he can go from perfectly healthy to sick in a day.  Starting at the age of 5 this boy has gone through so much, much more than the average jo and I know that has got to linger within him, even when it is not 100% aware of whats up all the time.  He amazes me, through all the junk he has the funniest, sweetest personality you can find out there.

The testing, the blood work, the hospital stays, the routine colonoscopy + endoscopy, the endless medication and doctors visits.  We tend to take it week by week, day by day, because the reality is we have no idea where this disease will go, but we got a phonecall today that his counts were fantastic, and he has improved since his last visit, which was simply amazing to hear.
unnamed-2

 I cannot believe I ever used to get my mama feathers ruffled over strep or an ear infection.  In this house, those results are a huge relief.

unnamed-3

It was a super long week – and this weekend he was feeling much more like himself, so we jolted our bodies outside and took advantage of this gorgeous fall like weather that is upon us.  I give a lot of credit to Owen, for always going with the flow and being a good brother.  It’s not easy listening to all the chaos and phone calls and appointments that go with this …
unnamed-1

I love these two little men, and I guess lately I just feel like I am in momma bear mode.  I get so choked up thinking about what the future may hold, the unknown, but ever more I feel so freaking proud of all that they have gone through and what amazing, hysterical full of light kiddos I’ve got.

I’m oh so lucky.

Speaking of lucky, just look at those beams of light shining down on Brody at the pumpkin patch.  I take that as a cue that it is all going to be okay.
unnamed

Here’s to hoping that all of our days have us feeling like this past Sunday, when we are all at our best.

Filed Under: Our Life

Quick Chalkworthy Fixes!

September 15, 2015 by Abby Thome

Quick Chalkworthy Fixes!

This is a sponsored post in collaboration with Chalkworthy.  Thank you for supporting our blog and helping up keep these projects going! 

Believe me when I say that I only work with, and talk about products that I love and use … and this Chalkworthy line is just amazing.  I have had quite a few people email me in the past weeks with different questions regarding this paint line and I just wanted to tell you all a bit more about it!

IMG_3994

Have an itch to refinish a piece of furniture you have? Start small – The best part of this paint line is that you can utilize it for SO many different pieces big and small.  These two mirrors above our piano were a last minute purchase because they were cheap, dirt cheap.  After they were hung, the dislike towards the color grew and grew, until I decided to take matters into my own hands.

#1 A little bit goes a long way! I was thrilled to see how little of the paint itself was needed to achieve complete coverage on a piece.  After painting my planters (3x) and these mirrors (3x) I still have 1/2 of the can left to use! I am a huge fan of following their step of watering down the paint a bit, so I pour what I think I will need into a separate pan, mix in a few tablespoons of water at a time, until it reaches the consistency I desire.

IMG_4103

#2 This paint goes on so creamy, so rich you find yourself moving so quickly through your projects.  Back in the day, prior to me using Chalkworthy I cannot tell you how many times I would have to go over and over a piece because with each swipe of the paint brush some would wipe away.  No sanding, no priming, simply stroke the paint on and be amazed at the coverage and quality!

IMG_4104

IMG_3583

Our entry way is one of my favorite spots of our house (minus the orange tile, we’ll get there someday) The numbers on the stairs, and the wood work just makes me grin.  This table + mirror just was not sitting well with my decorating soul.  Things needed to be switched up a bit, and so I turned to my everlasting can of Chalkworthy to pull me through.

IMG_4114

While I like the lighter, more feminine look of the other set up, it just did not float well through the different seasons.  So, a few coats of the Cast Iron Chalkworthy paint and I had a brand new table in one afternoon!

IMG_4113

#3 This paint sticks + dries so quickly! Listen, be your own judge.  I’m not tell you to paint something and go swiping your finger at it in 20 minutes, I’m not crazy.  But, in comparison to regular paint – this Chalkworthy paint not only applies 100x better, but the finish feels so solid.  Which, as a mother, I am all over!

IMG_4111

I  recommend Chalkworthy to anyone and everyone, I could chat your ear off about this paint line all day everyday…  These two projects just go to show that you can paint anything, big or small, old or new.  If you find a piece on clearance you love but dislike the color, do not fear, Chalkworthy is here!

Check out all of their colors they have to offer! And make sure to always send me your before and after pictures of what you completed!

IMG_4112

Filed Under: Our Projects

  • « Previous Page
  • 1
  • …
  • 30
  • 31
  • 32
  • 33
  • 34
  • …
  • 67
  • Next Page »

LETS BE SOCIAL

  • Email
  • Facebook
  • Instagram
  • Pinterest

Articles

Categories

Archives

Heinens

Visit The Thome Home 's profile on Pinterest.

Recent Posts

  • Pork Schnitzel
  • It’s time to book your vacation with Oasis Vacations!
  • Oasis Vacations at Ocean Isle Beach, North Carolina
  • JUS-ROL Crescents
  • Back to School Safely
  • Chicken Tender Charcuterie Board
  • Lillie’s Q Spicy Cheddar Sausage Pizza Bagel
  • Max’s Bedroom

Copyright © 2026 · Tasteful theme by Restored 316